
Lifestyle
pyntekvister: How to Get Started with This Innovative Technique

Are you ready to dive into a world of creativity and innovation? Meet pyntekvister, the artistic technique that’s taking home decor by storm. This unique method combines traditional craftsmanship with modern aesthetics, allowing anyone to transform their living spaces into stunning showcases of personal expression. Whether you’re an experienced DIY enthusiast or just starting out on your creative journey, pyntekvister offers endless possibilities for making your home truly yours. Let’s explore how this exciting technique can elevate your interior design game!
What is pyntekvister?
Pyntekvister is an innovative crafting technique that combines various materials to create stunning decorative pieces. It blends traditional artistry with modern design, resulting in unique home decor items.
At its core, pyntekvister involves intricate weaving or knotting methods. Crafters can use fabric strips, yarns, and other textiles to bring their visions to life. This versatility allows for endless creative possibilities.
The appeal of pyntekvister lies in its accessibility. Anyone can learn the basics and start creating beautiful designs without needing extensive experience in crafting or art.
As a tactile activity, it also encourages mindfulness and focus. Engaging with your hands while letting creativity flow promotes relaxation and satisfaction as you transform simple materials into eye-catching works of art.
The History and Origins of Pyntekvister
Pyntekvister has roots that trace back to Scandinavian cultures, where artisans embraced natural materials in their crafts. The name itself is derived from old Nordic words that embody creativity and innovation.
Historically, this technique was used as a form of storytelling through decorative art. Each piece reflected the cultural heritage and personal stories of its creator.
As time progressed, pyntekvister evolved from traditional handcrafts into a modern design trend. Artists began experimenting with various textures and colors, pushing the boundaries of what could be achieved with simple materials.
This evolution parallels movements in interior design, where there’s been a growing appreciation for handcrafted items over mass-produced decor. Today, pyntekvister stands as an emblem of artistic expression deeply rooted in history yet vibrantly relevant in contemporary home aesthetics.
Benefits of Using Pyntekvister in Home Decor
Pyntekvister brings a fresh perspective to home decor. Its intricate designs can transform ordinary spaces into extraordinary ones. Each piece tells its own story, adding character and warmth.
The versatility of pyntekvister is another standout feature. Whether you’re aiming for a modern aesthetic or something more rustic, these creations fit seamlessly into various styles. You can easily customize colors and patterns to suit your personal taste.
Additionally, incorporating pyntekvister promotes sustainability in your decor choices. Many artisans use reclaimed materials, making each item eco-friendly while supporting local craftspeople.
Using this technique also serves as a wonderful conversation starter when hosting guests. People are often fascinated by the art and creativity behind such unique pieces, leading to engaging discussions about artistry and design trends in home decoration.
Essential Tools and Materials for Pyntekvister
To dive into the world of pyntekvister, having the right tools and materials is key. Start with a sturdy work surface. A clean table allows for precision and creativity.
Next, gather your cutting tools. Scissors or craft knives will help you shape your materials accurately. A ruler can ensure straight lines, while a cutting mat protects your surfaces.
Adhesives play a significant role in this technique. Consider using glue sticks or double-sided tape for quick bonding that doesn’t warp paper.
For decoration, various papers are essential—think textured cardstock or patterned scrapbook sheets. Natural elements like twigs or dried flowers can add an organic touch to your creations.
Keep some paint and brushes handy for those finishing touches that bring everything together beautifully. With these essentials at hand, you’re ready to explore the art of pyntekvister!
Step-by-Step Guide on Creating Your First Pyntekvister Piece
Creating your first pyntekvister piece can be an exciting venture. Start by gathering your materials: a sturdy canvas, vibrant yarns, and trusty scissors.
Begin with a simple design in mind. Sketch it lightly on the canvas to guide you as you work. Choose colors that resonate with your style for maximum impact.
Now, it’s time to weave! Use a needle or even your fingers to thread the yarn through the fabric according to your sketch. Don’t worry about perfection; this is all about creativity.
As you progress, layer different textures and patterns. Experimentation is key here. If one combination doesn’t work out, simply adjust it until it feels right.
Once finished, secure any loose ends neatly at the back of the canvas. Your unique pyntekvister creation is ready to dazzle anyone who steps into your space!
Creative Ideas for Incorporating Pyntekvister into Your Home
Pyntekvister can transform any space into a work of art. Start with wall hangings featuring intricate patterns that draw the eye and spark conversation.
Consider creating personalized coasters or placemats for your dining table. These functional pieces add flair while showcasing your artistic skills.
For a cozy touch, use pyntekvister designs on throw pillows. They can bring color and texture to your living room, making it inviting and stylish.
Don’t overlook outdoor spaces! Pyntekvister can enhance garden decorations or patio furniture cushions, blending creativity with nature.
Think about seasonal decor too. Craft holiday-themed pyntekvister ornaments to give your home a unique festive spirit.
Incorporating this technique opens up endless possibilities for customization and personal expression throughout your home.
Tips and Tricks for Perfecting Your Pyntekvister Technique
Practice makes perfect. Don’t be afraid to experiment with different materials and techniques as you develop your pyntekvister skills. Each attempt will teach you something new.
Start with simple designs. Mastering basic shapes allows for more intricate work later on. As your confidence grows, incorporate patterns that reflect your personal style.
Lighting is crucial during the creation process. Good lighting helps you see details clearly, preventing mistakes and enhancing overall quality.
Take breaks when needed. Stepping back can provide fresh perspectives on your work and keep frustration at bay.
Document your progress through photos or a journal. This will help track improvements over time while also inspiring future projects.
Connect with others in the community online or locally. Sharing tips and receiving feedback can elevate your technique significantly, turning a hobby into an art form.
Conclusion
Pyntekvister is more than just a technique; it’s an art form that brings creativity and warmth into your home. By understanding its origins and benefits, you can appreciate the depth of this craft. With the right tools and materials at hand, even beginners can dive in confidently.
The step-by-step guide sets a solid foundation for creating stunning pieces that reflect your personal style. Don’t hesitate to experiment with different ideas to truly make each creation unique. Remember, practice makes perfect—so keep refining your technique over time.
As you embark on your pyntekvister journey, allow yourself the freedom to explore various designs and styles. The beauty of this innovative approach lies in its versatility, offering endless possibilities for enhancing any living space. Embrace this creative outlet and watch as it transforms not only your home but also how you express yourself within it.
In today’s highly visual world, outdoor business signage is more important than ever. The right sign not only signals your presence but also invites potential customers. With busy streets and consumers constantly exposed to countless messages, standing out has become essential to any marketing strategy. Implementing well-designed, modern outdoor business signage can transform foot traffic and turn passing glances into paying customers.
Modern outdoor signs go beyond simply displaying a business name or logo. By blending contemporary design, purposeful placement, and the latest technology, signage plays a key role in attracting the attention you need. Whether you’re revitalizing a historic storefront or launching a new local brand, the style and structure of your sign can influence public perception and boost business visibility.
The Importance of Outdoor Signage
Outdoor signage is often considered a business’s most consistent and hardworking marketing tool. Unlike digital ads that require constant funding or online campaigns that rely on algorithms, a well-placed sign is always working to attract new customers. Research shows that illuminated outdoor signs can increase foot traffic by over 20 percent and strengthen brand recognition by as much as 50 percent. Many businesses even report up to a 15 percent growth in sales when effective signage is used to reach local customers. These statistics reveal that attractive, modern signage is not just a nice addition but an essential element for sustained growth and success.
Beyond visibility, outdoor signs communicate professionalism and credibility. Customers often make subconscious decisions based on how a business presents itself, and an old or unclear sign may send the wrong message about the quality of your goods or services. In competitive sectors, such as restaurants, retail, or boutique services, your sign can be the deciding factor for someone choosing your location over another.
Modern Design Trends in Outdoor Signage
Keeping up with design trends is key to ensuring your signage grabs attention for the right reasons. Minimalist aesthetics dominate current trends, utilizing crisp lines, clear fonts, and uncluttered layouts. These signs are easier to read at a glance and complement modern architecture, making them ideal for urban settings or upscale neighborhoods.
- Minimalist Designs: Clean and straightforward, these signs focus on clarity and leave a memorable impression by stripping away unnecessary details.
- 3D Signage: Three-dimensional elements add depth and can make signage more engaging to passersby, encouraging closer inspection and interaction.
- Interactive Elements: Incorporating features such as QR codes or touch-ready displays encourages customers to interact with your brand and access additional information instantly.
As branding shifts toward simplicity and user engagement, these trends help businesses create a welcoming and modern façade that feels relevant and accessible to today’s consumers.
Technological Advancements in Signage
Technology continues to reshape how signs attract and inform. Digital displays, for example, offer the flexibility to update messages in real time, schedule seasonal promotions, and highlight timely offers with vibrant animations or video. Not only are these displays more eye-catching, but they also allow business owners to experiment and find what works best for their unique market. LED lighting has transformed the nighttime visibility of signs while keeping energy costs manageable and environmental impact low. These advancements mean your message reaches customers around the clock, even in challenging lighting or weather conditions.
- Digital Displays: Real-time content updates, animated branding, and tailored campaign messages all become possible with digital technology.
- LED Lighting: Offers intense brightness and color versatility at a fraction of the energy cost of traditional lighting.
Strategic Placement for Maximum Impact
No matter how well-designed, a sign is only as effective as its placement. High-traffic areas, such as crosswalks, transit stops, and busy corners, grant your signage the greatest chance of catching eyes. Installing signs at eye level ensures pedestrians and drivers see your message clearly and quickly. It’s also important to consider the angles of visibility; signs that are readable from multiple directions have a wider reach and higher impact.
For business owners in urban centers or on major roadways, maximizing view corridors and considering nearby visual distractions is key. Signs should be placed to avoid obstruction from trees, utility poles, or neighboring architecture.
Sustainability in Signage
With consumers increasingly aware of their environmental footprint, sustainable signage options are gaining traction. Recycled and reclaimed materials, such as wood, metal, or plastics, allow businesses to reduce waste while crafting unique visual statements that reflect their corporate responsibility. Additionally, energy-efficient lighting, especially LED and solar-powered options, further lessens the environmental impact while lowering operational costs. Choosing eco-friendly signage not only helps the planet but also resonates with customers who value ethical business practices.
- Recycled Materials: Sourcing signage from reclaimed or recycled resources shows a commitment to sustainability and can become a talking point for your brand.
- Energy-Efficient Lighting: Reduces operational costs and environmental impact, supporting both business objectives and eco-conscious branding.
Conclusion
Modern outdoor business signage is more than a functional necessity. It is an active marketing asset that signals your brand’s presence, values, and relevance. By embracing current design trends, adopting new technologies, strategically placing signs, and making sustainable choices, businesses can turn outdoor signage into a powerful tool to increase foot traffic and grow their customer base. A well-thought-out sign draws customers in, tells your brand story at a glance, and ensures you remain visible in increasingly crowded markets.

As personalized living becomes not just a preference but an essential expectation for modern homeowners, custom home builders are leading a groundbreaking evolution in both design and construction. No longer satisfied with cookie-cutter floor plans or generic finishes, today’s homeowners want living spaces that reflect their unique lifestyles, habits, and aspirations. This has pushed innovative builders, including industry leaders such as Dallas home builders, to embrace and drive a range of new trends. They now deliver environments where function, luxury, and sustainability converge, crafting homes that are as individual as the people who live in them. Whether you’re planning to build from the ground up or simply exploring cutting-edge design inspiration, understanding these emerging developments is crucial for anyone seeking to make informed decisions about their home’s future in an ever-changing world.
Custom homes now blend eco-friendly features with advanced innovative technology, establishing new standards in comfort, efficiency, and style. Collaborating with skilled architects and builders, homeowners can bring their visions to life through homes equipped with amenities such as wellness suites and automated energy management systems, designed for longevity and adaptability to changing lifestyles. These trends emphasize not only the visual appeal of homes but also their emotional and functional experiences across different life stages.
Sustainable and Eco-Friendly Designs
Environmental stewardship is no longer optional—it’s built directly into the walls and foundations of modern custom homes. The demand for environmentally responsible living has spurred builders to incorporate features such as triple-pane energy-efficient windows, advanced insulation systems, drought-tolerant landscaping, water-saving fixtures, and solar power systems into nearly every new project. These features, once considered the domain of niche green homeowners, are now widely expected by eco-conscious buyers wanting to reduce both their environmental impact and utility costs. The use of sustainable materials, such as recycled wood, bamboo flooring, reclaimed stone, and composite materials, not only reduces the ecological footprint but also creates visually stunning, durable interiors and exteriors that age gracefully.
Opting for green certifications and sustainable building practices offers significant long-term benefits, including lower energy bills and reduced repair costs. Green homes also promote healthier living through improved indoor air quality and the use of non-toxic materials. Increasing consumer awareness, government incentives, and stricter building codes are driving the adoption of energy-efficient designs, with many homeowners viewing sustainability as a wise investment for adapting to future environmental changes.
Integration of Smart Home Technology
The connected home is no longer a futuristic concept—it’s the new standard. Today’s custom homes are designed to integrate cutting-edge innovative technologies at every level, from infrastructure to everyday appliances. Builders are equipping new homes with smart thermostats that learn your routines and adjust temperature automatically, voice-activated lighting solutions, advanced home security systems with real-time monitoring, and integrated audio-visual systems for immersive entertainment. Gone are the days of manually managing thermostats, locks, or blinds—everything can be controlled via smartphones or voice assistants, bringing unparalleled convenience and peace of mind to homeowners.
This evolving landscape means homes are becoming more energy-efficient, which reduces utility costs and supports sustainable lifestyles. Smart leak detectors, automated irrigation systems, and even AI-powered kitchen appliances are now available to streamline everyday chores and enhance home safety. Increasingly, builders are pre-wiring homes to be compatible with current—and future—generations of devices, ensuring seamless upgrades and integration as technology continues to evolve. The push for smarter homes is not only about convenience but also about enhancing resale value and creating living spaces that are adaptable to future innovations and lifestyles.
Flexible Living Spaces for Modern Life
Remote work, shifting family dynamics, and the expanding definition of home life have made flexibility a crucial pillar in custom home design. Modern layouts are being created with adaptability in mind—think convertible rooms that transition from home offices by day to guest retreats by night, expansive open-concept living areas designed for both learning and entertaining, and multi-purpose alcoves that can serve as creative studios or yoga corners. This approach maximizes usable square footage and makes every part of the home work harder, ensuring that residences remain functional and inviting through every phase of family life or career changes.
Designers are incorporating movable walls, sliding doors, and concealed storage to create uncluttered, versatile spaces that can easily adapt to the day’s needs. This flexible mindset makes homes more resilient and better able to accommodate multigenerational living, personal hobbies, or home-based businesses—responding to the diverse needs of modern homeowners. Such thoughtful approaches not only enhance everyday usability but also future-proof the investment by ensuring the home stays relevant as family needs and daily priorities shift over the years.
Designing for Health and Wellness
The growing awareness of health and well-being has influenced nearly every aspect of custom home design. Builders are focusing on features that support both physical and mental health, including state-of-the-art air purification systems to enhance indoor air quality, extensive natural lighting strategies with strategically placed windows and skylights, and the use of low-VOC or non-toxic paints for healthier indoor environments. Biophilic design elements, such as lush indoor gardens, green walls, integrated natural stone, and wood accents, foster a closer connection (and a sense of calm) with the natural world.
Dedicated wellness spaces are becoming increasingly popular, with many custom homes now offering purpose-built areas such as mini gyms, spa-inspired bathrooms complete with soaking tubs and steam showers, yoga studios, and meditation zones. These wellness-focused amenities provide homeowners convenient access to relaxation, fitness, and self-care—all without leaving the comfort and privacy of their own homes. This new emphasis on health-driven design enriches daily life and supports a holistic approach to wellness for everyone in the household.
Seamless Indoor-Outdoor Living
A hallmark of luxury custom homes today is the seamless integration of indoor and outdoor living spaces. Builders are creating expansive patios, outdoor kitchens, and multi-season areas that serve as extensions of the indoors. Features like sliding glass doors and panoramic windows enhance natural light, blurring the lines between interior and exterior and fostering a connection with nature. Outdoor areas are designed with grilling stations, fireplaces, and durable furnishings, allowing for versatile use throughout the year. This design approach maximizes living space and enhances lifestyle quality through increased outdoor engagement.
Key Design Elements for Blended Spaces
- Outdoor kitchens with built-in grills, refrigeration, and weatherproof cabinetry.
- Retractable walls and expansive glass areas enhance the sense of unity.
- Landscaped courtyards, fire pits, and shaded lounges as functional outdoor rooms.
- Easy-care flooring that transitions seamlessly from the inside out.
Conclusion
The custom home industry is advancing rapidly, constantly setting new standards for sustainability, comfort, and personalized design. With an unwavering focus on green living, advanced technology, adaptable spaces, and health-driven design, custom home builders are shaping environments that not only reflect the unique personalities of their inhabitants but also build enduring value. As these trends continue to evolve and gain momentum, partnering with experienced professionals ensures that every feature is expertly integrated, resulting in homes that genuinely meet the demands of today’s families—and the challenges of tomorrow. Embracing innovation now means creating a home that thrives for decades to come.
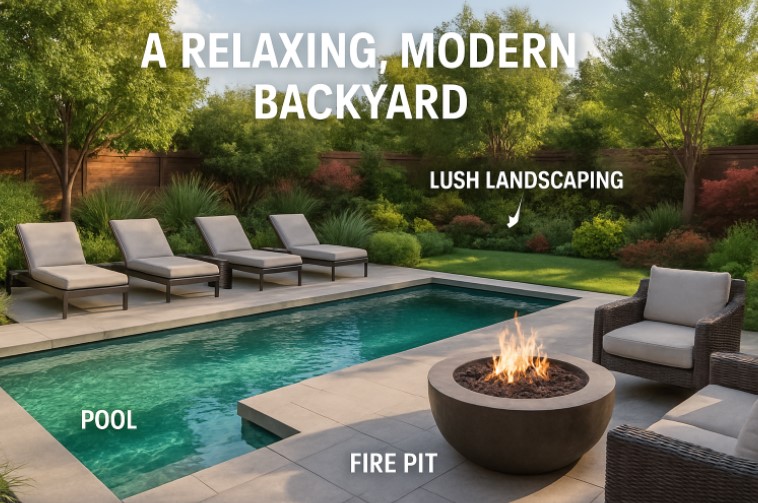
Today’s backyards are evolving into resort-style retreats, inviting homeowners to relax, entertain, and make memories in the comfort of their own outdoor spaces. New pool designs take center stage in this transformation, inspiring homeowners to rethink how to maximize their outdoor living spaces. If you are ready to turn your outdoor area into a stunning, functional oasis, exploring the innovative options available from pool builders like Integrity Pool provides a great starting point. More than just a place to swim, a modern pool is an inviting lifestyle centerpiece where style and everyday living meet.
As interest in chic and functional outdoor living surges, clever pool designs now focus on blending luxurious aesthetics with practicality. The seamless integration of smart features, sustainable materials, and creative landscaping is revolutionizing what it means to have a pool at home. Pools today offer inviting atmospheres for both relaxation and social gatherings, while also enhancing your property’s visual appeal and value.
These new trends are about much more than keeping cool in the summer. Thoughtful pool layouts, personalized finishes, and holistic outdoor living areas help create spaces tailored to every need, from a private sanctuary to a bustling hosting area. The best pool projects demonstrate that combining technology, design, and eco-consciousness can deliver backyard havens that suit every preference and lifestyle.
Smart Pool Technology
The rise of smart automation is transforming backyard pools into tech-savvy features. With intuitive apps, homeowners can now set the temperature, adjust lighting, and activate jets or automated covers with a single click. Robotic pool cleaners and chemical monitoring systems automate maintenance routines and keep pool water pristine, so you spend less time working and more time relaxing. These advances not only make pool upkeep simpler but also improve energy efficiency by enabling precise control over heating and circulation schedules, helping to lower utility bills and conserve resources.
Eco-Friendly Materials
Modern pool design increasingly emphasizes sustainability, with builders and homeowners turning to recycled glass, reclaimed woods, and natural stone for finishing touches. Eco-friendly options like saltwater chlorination and low-energy pumps reduce chemical use and utility consumption, making pools healthier for swimmers and friendlier to the environment. Additionally, natural purification systems that rely on aquatic plants offer a clear, chemical-free alternative to traditional chlorine or bromine systems. These methods not only preserve water quality but also support a more sustainable approach to building and maintaining a backyard retreat.
Integrated Outdoor Living Spaces
One of the most popular trends in pool design involves integrating the pool with the rest of your outdoor living environment. By adding elements like covered patios, outdoor kitchens, lounging areas, and even open-air showers, the pool becomes the heart of a unified entertainment and relaxation zone. Thoughtful landscape architecture blurs the boundaries between indoors and out, encouraging more frequent use year-round. The result is a space that seamlessly transitions from daytime swimming to nighttime gatherings under the stars, providing year-round enjoyment for family and friends.
Fire and Water Features
The pairing of fire and water has become one of the hottest ways to enhance backyard pools. Strategically placed fire bowls, outdoor fireplaces, and fire pits create a mesmerizing ambiance, complementing the reflective surface of the water nearby. Waterfalls, fountains, and jets add dynamic movement and soothing sound to the space. This combination of elements not only provides visual drama but also makes the pool area a natural gathering point long after the sun goes down.
Compact and Plunge Pools
Homeowners with limited outdoor space do not have to sacrifice luxury or enjoyment. Compact pools, plunge pools, and lap pools are gaining popularity because of their efficiency and adaptability. These smaller pools provide the perfect spot to cool off, exercise, or soak without demanding as much room, water, or upkeep. Many of these pools feature built-in jets for hydrotherapy, turning a small backyard into a personal spa retreat. Their manageable size often means lower installation and maintenance costs, making them an attractive option for urban and small-lot dwellers.
Naturalistic Designs
For an organic look, natural-style pools are designed to blend with the surrounding landscape using materials like flagstone, boulders, and lush greenery. Irregular, freeform shapes mimic the feel of lagoons or natural ponds, creating a relaxed atmosphere that invites both relaxation and wildlife. Incorporating gentle slopes, rock waterfalls, and native plants further softens the line between constructed pool areas and natural surrounds. This approach often results in backyard environments that exude tranquility and a sense of seamless harmony with the outdoors.
Celebrity Inspirations
Celebrity pool designs often spark broader trends among homeowners seeking unique and luxurious upgrades. Kris Jenner’s Mediterranean-style pool, designed by Jeff Andrews, features an expansive patio with mosaic tile, ambient night lighting, and lush landscaping, offering a perfect blend of sophistication and warmth. Ryan Seacrest’s Los Angeles home showcases a long, sleek pool with a dark interior finish that creates a reflective surface, extending visual lines to the hillside and enhancing privacy. These high-profile projects illustrate how personalized details, such as lighting, tile, and landscaping, can elevate any pool area into a statement piece.
Final Thoughts
The latest innovations in pool design are changing the way homeowners experience their outdoor spaces. By incorporating smart technology, sustainable solutions, tailored landscaping, and integrated living zones, these new pools create versatile, beautiful, and highly functional environments. Whether you are seeking inspiration for a grand transformation or small stylistic upgrades, exploring contemporary pool trends opens limitless possibilities for enjoying your backyard in refreshing new ways.
-

 Blog7 months ago
hanime1: The Ultimate Destination for Anime Lovers
-

 Entertainment9 months ago
Sflix: How It’s Changing the Way We Watch Movies and TV Shows
-

 Entertainment8 months ago
Crackstreams 2.0: The Future of Free Sports Streaming?
-

 Bills10 months ago
Why Does My Instagram Reel Stop Getting Views After One Hour? How to Fix It?
-

 Technology10 months ago
Simpcitt: The Rise of a Unique Online Community
-

 Blog8 months ago
Imginn: The Ultimate Tool to View Instagram Content Anonymously
-

 80s10 months ago
Favorite 100 Songs of the 80s: (#1) Michael Jackson – Billie Jean
-

 Blog10 months ago
Simpcitu: The New Age Trend Shaping Online Interactions