
BLOG
8 Best Recommendations for AI Avatar Generator Tools In 2026
Top Picks from My Experience
-
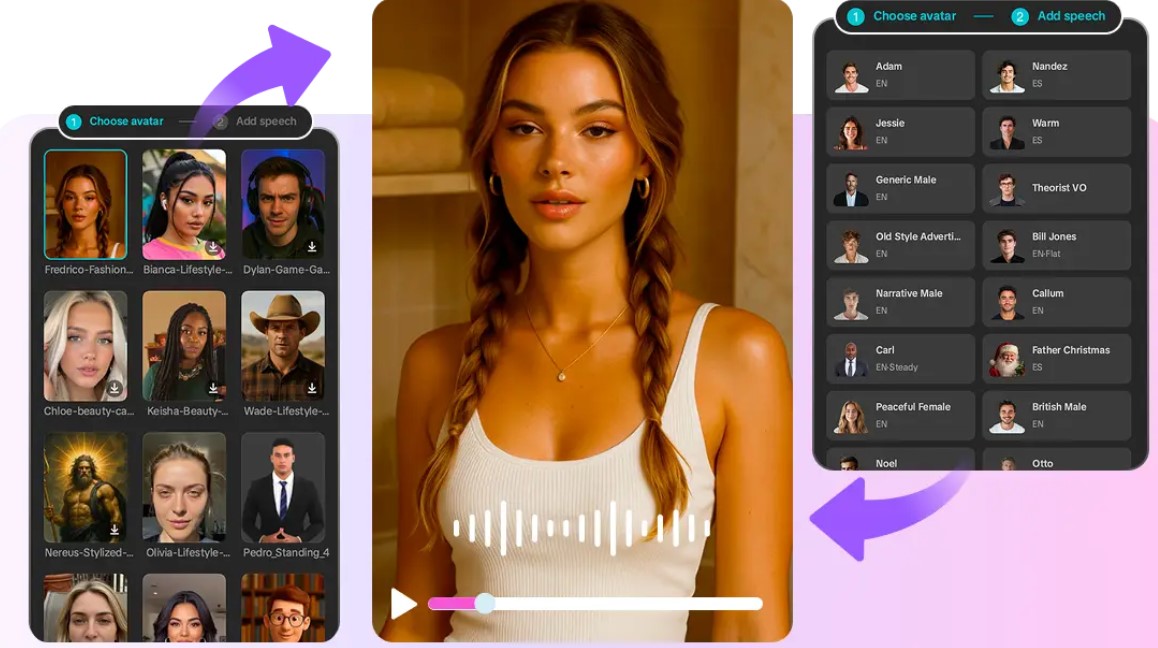
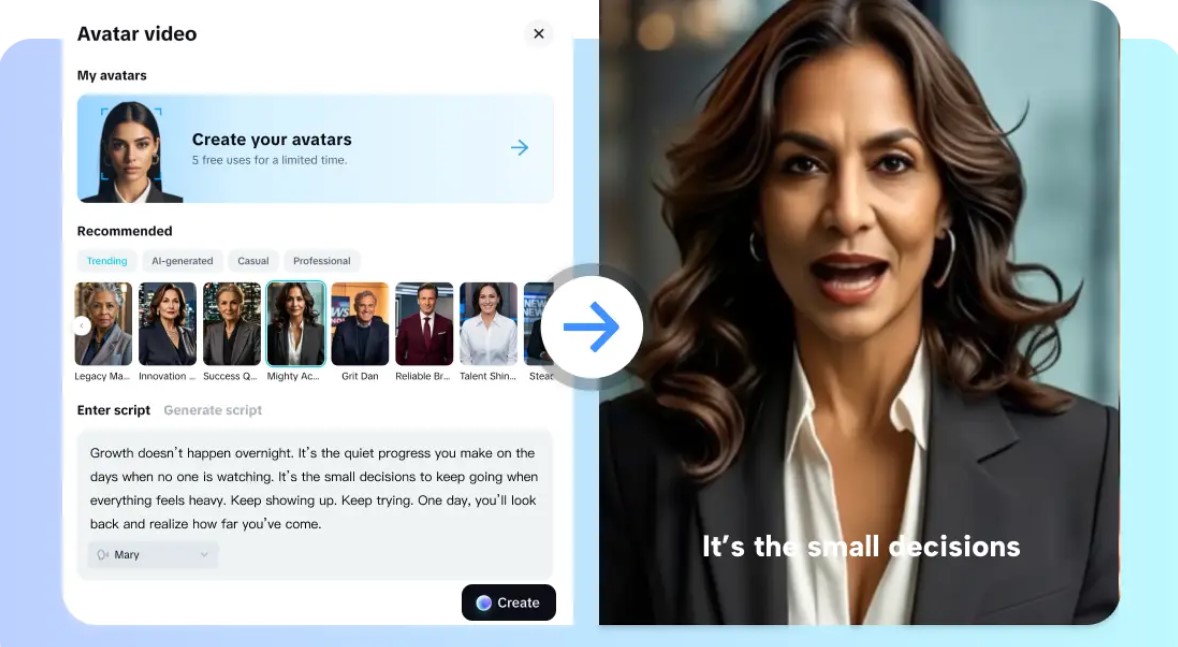
CapCut: CapCut is my go-to for fast, all-in-one avatar video production. Its AI-driven photo-to-avatar conversion, lip-sync, and expressive presets make creating polished avatars effortless. I also love that I can switch seamlessly between photo and video projects without leaving the platform.
-
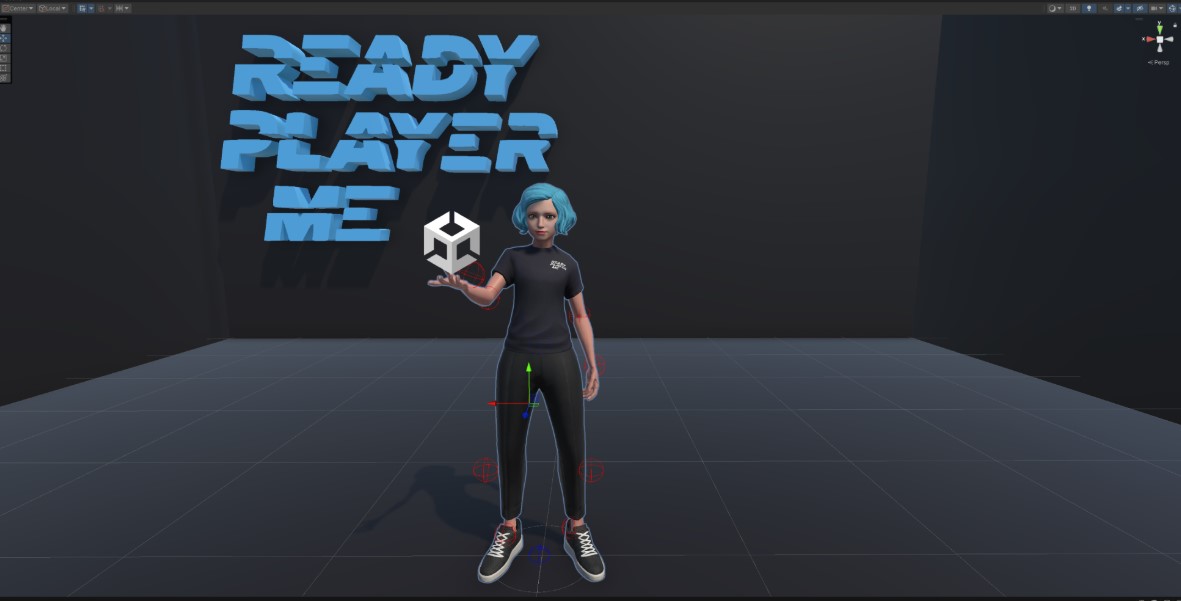
Ready Player Me: Ready Player Me excels at creating cross-platform 3D avatars that fit social identity and gaming ecosystems. It’s simple to use, supports VR/AR applications, and allows me to maintain a consistent avatar across multiple platforms.
-
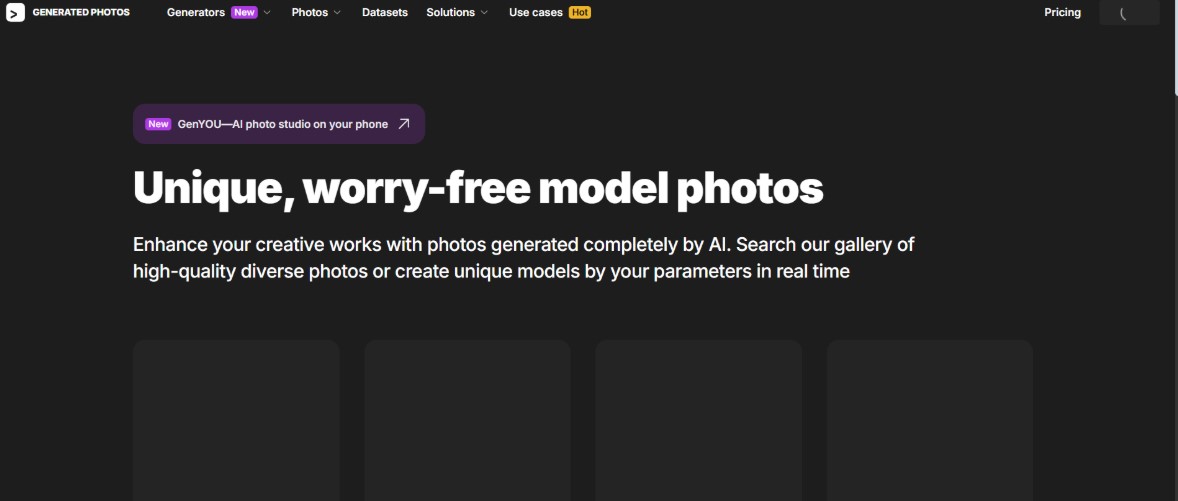
Generated Photos: I rely on Generated Photos when I need photorealistic synthetic faces or batch avatar outputs. Its AI delivers high-quality, diverse faces quickly, saving me time while maintaining realism for projects or presentations.
-
Artbreeder: Artbreeder is perfect for creative experimentation. I can blend images, morph features, and iteratively generate unique avatars. It encourages artistic exploration and lets me fine-tune results with surprising precision.
-
Avatarify: Avatarify shines for live webcam-based animation and streaming. I use it to bring avatars to life in real time, capturing expressions and gestures seamlessly for interactive content.
-
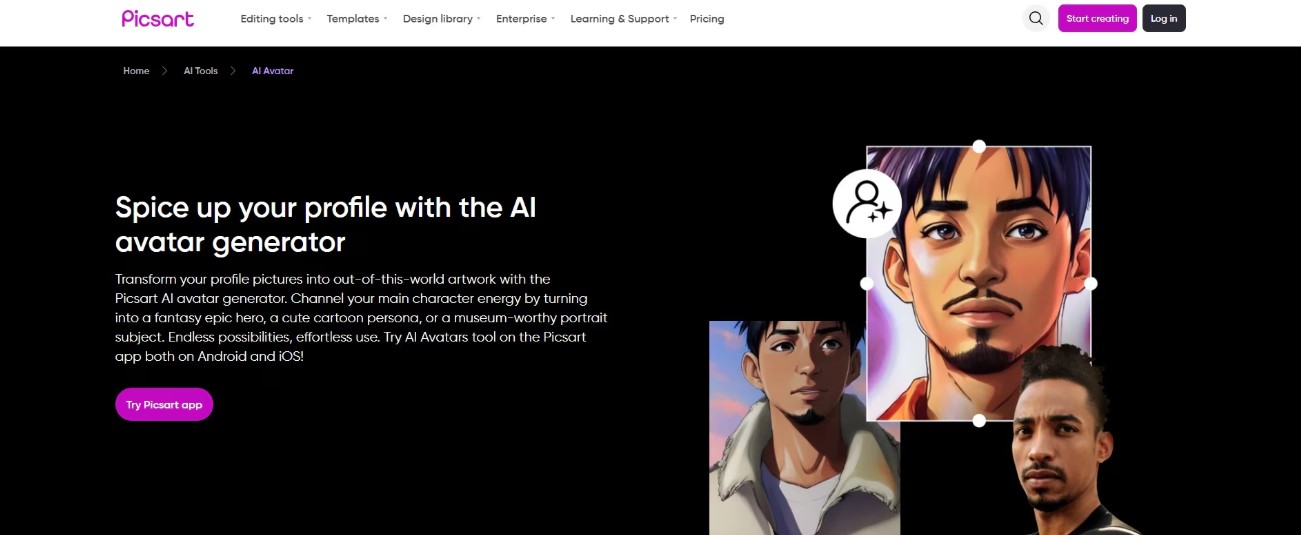
PicsArt AI Avatar Studio: PicsArt’s AI Avatar Studio is my pick for stylized portrait avatars. Quick edits, creative filters, and AI enhancements allow me to generate shareable avatars effortlessly, perfect for social media content.
-
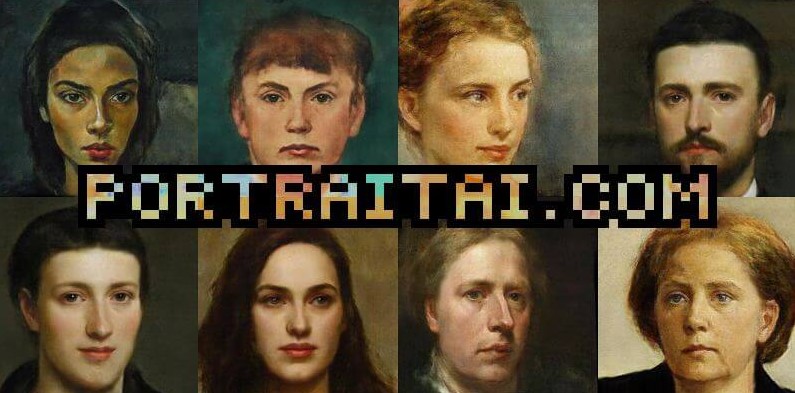
PortraitAI: I turn to PortraitAI when I want classic painted-style avatars. Its AI replicates traditional portrait techniques, giving avatars a timeless, artistic feel without manual painting.
-
Deep Dream Generator: Deep Dream Generator is my tool for experimental and highly artistic avatars. I enjoy exploring surreal, imaginative styles that push creative boundaries beyond realism.
A Personal Test of the 7 Best Free Avatar Tools
-
Ease of use and approachability
-
Avoiding unnecessary complexity
-
Affordability or free accessibility
-
Sufficient features to grow your skills
-
CapCut

-
Wide Avatar Styles: Offers 1,000+ digital human categories for diverse projects.
-
Voice Library: 150+ AI voices with accents, tones, and languages.
-
Video-to-Avatar Conversion: Transform videos into talking avatars instantly.
-
Photo-to-Avatar Animation: Converts photos into speaking animated characters.
-
Integrated Editor: Built-in effects, auto-subtitles, custom covers, one-click sharing.
-
YouTube Shorts Integration: Quickly create short-form content without extra tools.
-
High-Quality Export: Maintains professional bitrate for studio-level output.
-
Batch Workflows: Supports multiple avatars in consistent style across projects.
-
Available On: Web, Windows, macOS, iOS, Android
-
Overall: 4.9/5
-
Beginner-Friendly Tools: 5/5
-
Price: Free; Pro starting at $19.99/month
-
Produces professional-looking avatar videos without juggling multiple tools.
-
Speeds up content workflows for marketing and social media creators.
-
Maintains consistent character appearance across multiple videos and campaigns.
-
Offers export presets compatible with streaming and native platforms.
-
Simplifies captioning with built-in subtitle automation and editing.
-
Some features require a pro account to access.
-
Ready Player Me
-
Creates exportable 3D avatars for engines and virtual spaces.
-
Strong customization for clothing, hair, and accessories.
-
Easy integration with many third-party platforms and engines.
-
Fast generation from a single headshot capture.
-
Focus on avatar portability across ecosystems.
-
Limited animation complexity compared to specialized animation suites.
-
Facial rigging may need extra work for advanced lip-sync tasks.
-
Higher-fidelity options reserved for paid tiers.
-
3D Avatar Export: Compatible with engines, metaverse platforms, and interactive apps.
-
Headshot-Based Generation: Quick avatar creation from a single selfie.
-
Outfit Customization: Change clothes, accessories, and hairstyles easily.
-
Skin Tone Variety: Supports diverse ethnic and visual representations.
-
Face Adjustments: Fine-tune facial features for accurate resemblance.
-
Cross-Platform Integration: Works with Unity, Unreal, and other 3D engines.
-
Avatar Portability: Use across multiple virtual platforms effortlessly.
-
Real-Time Preview: Check updates immediately during editing.
-
Available On: Web, Windows, macOS
-
Overall: 4.6/5
-
Beginner-Friendly Tools: 4.5/5
-
Price: Free; Enterprise plan available on request
-
Generated Photos
-
Extremely realistic face generation for photorealistic avatars.
-
Useful batch export for multiple character variants.
-
Fine attribute controls for targeted demographic needs.
-
Clean, high-resolution imagery suitable for profile use.
-
Works well as a source for downstream animation pipelines.
-
No native talking-avatar pipeline included in free tier.
-
Animation requires integration with other animation solutions.
-
Licensing can limit commercial usage in advanced cases.
-
Realistic Face Generation: AI creates lifelike portraits instantly.
-
Batch Export: Generate multiple faces at once for variety.
-
Customizable Attributes: Adjust age, ethnicity, and facial features.
-
High-Resolution Output: Suitable for profiles and professional projects.
-
Face Library Access: Wide selection for experimentation.
-
Downstream Editing Ready: Ideal for animation or composite work.
-
Consistent Appearance: Maintains uniform character style across batches.
-
Flexible Integration: Works with Photoshop or other editing tools.
-
Available On: Web
-
Overall: 4.5/5
-
Beginner-Friendly Tools: 4.5/5
-
Price: Free trial; Yearly subscription $199/year
-
Artbreeder
-
Powerful blending tools for hybrid and creative character concepts.
-
Intuitive sliders allow controlled mutation and style mixing.
-
Great for concepting before committing to final designs.
-
Exports support common image formats for further editing.
-
Supports community remixing and iterative improvements.
-
Generated images often lack animation-ready rigging.
-
Output resolution sometimes lags behind studio-grade needs.
-
Free tier limits high-resolution export capabilities.

-
Hybrid Character Generation: Combine multiple images to create unique avatars.
-
Sliders for Fine-Tuning: Control style, traits, and mutations easily.
-
Concept Experimentation: Ideal for fantasy, anime, or surreal avatars.
-
Community Remixing: Explore and modify others’ creations.
-
Export Options: Download images for further editing.
-
Iterative Editing: Adjust features repeatedly without losing quality.
-
Stylized Portraits: Supports artistic or non-realistic designs.
-
Fast Prototyping: Quickly create multiple concepts for comparison.
-
Available On: Web
-
Overall: 4.3/5
-
Beginner-Friendly Tools: 4/5
-
Price: Starter: 100 credits/year $8.99; Advanced: 275 credits/year $18.99
-
Avatarify
-
Real-time facial motion capture for engaging live streams.
-
Integrates with streaming software via virtual camera support.
-
Low-latency mapping on decent hardware and network setups.
-
Supports multiple avatar styles and image inputs.
-
Good for interactive performances and live demonstrations.
-
Webcam quality heavily affects final avatar appearance.
-
Setup can require technical knowledge for optimal results.
-
Not optimized for polished, pre-rendered video outputs.
-
Real-Time Facial Capture: Maps webcam expressions onto avatars live.
-
Virtual Camera Output: Integrates with streaming software easily.
-
Low Latency: Smooth performance with decent hardware.
-
Multiple Avatar Styles: Supports different characters or face inputs.
-
Interactive Use: Perfect for live streaming or virtual meetings.
-
Customizable Setup: Adjust tracking and webcam settings.
-
Performance Monitoring: Ensures smooth mapping without lag.
-
Flexible Inputs: Works with images or live video.
-
Available On: Windows, macOS
-
Overall: 4.2/5
-
Beginner-Friendly Tools: 4/5
-
Price: Weekly $2.49; Yearly $34.99
-
PicsArt AI Avatar Studio
-
Fast creation of stylized portrait avatars for social media.
-
Numerous artistic filters and quick background replacement.
-
Simplified controls tailored for non-technical users.
-
Exports suitable for avatars, profile images, and thumbnails.
-
Good balance between speed and visual quality.
-
Limited native animation and lip-sync options.
-
Stylized output may not suit photorealistic campaigns.
-
Some premium styles locked behind subscription.
-
Stylized Portraits: Convert photos into artistic avatars instantly.
-
Filters and Effects: Multiple aesthetic styles available.
-
Background Swap: Change or remove image backgrounds easily.
-
Quick Touch-Ups: Grooming and minor edits built-in.
-
Optimized Exports: Ready for web, social media, and thumbnails.
-
User-Friendly Controls: Designed for non-technical creators.
-
Fast Processing: Generates avatars within seconds.
-
Template Use: Apply popular stylized presets instantly.
-
Available On: Web, iOS, Android
-
Overall: 4.1/5
-
Beginner-Friendly Tools: 4.5/5
-
Price: PicsArt Plus ~$5/month; PicsArt Pro ~$7/month
-
PortraitAI
-
Distinctive painted-style results for branded avatar looks.
-
Quick generation with multiple historical or artistic styles.
-
Simple interface requiring minimal technical knowledge.
-
Outputs suitable for premium profile images and campaigns.
-
Produces memorable, artistic visual identity elements.
-
No built-in talking-avatar or lip-sync capabilities.
-
Output format sometimes requires manual image adjustments.
-
Style may not match modern, photorealistic branding needs.
-
Classic Painted Style: Converts photos into traditional portrait art.
-
Multiple Art Styles: Offers historical and artistic variations.
-
Quick Generation: Produces results in seconds.
-
Simple Interface: Minimal setup or learning required.
-
High-Resolution Output: Suitable for social profiles or campaigns.
-
Memorable Visual Identity: Perfect for branding purposes.
-
Custom Editing: Users can adjust generated portraits for frames.
-
Unique Art Effects: Provides aesthetically distinctive avatars.
-
Available On: Web, iOS
-
Overall: 4.0/5
-
Beginner-Friendly Tools: 4.5/5
-
Price: Free
-
Deep Dream Generator
-
Creates bold, artistic avatar images for highly creative projects.
-
Layered processing offers control over dreamlike transformations.
-
Useful for campaign visuals and experimental branding assets.
-
Supports multiple style transfer options for unique looks.
-
Outputs encourage standout, attention-grabbing imagery.
-
Not intended for talking-avatar production or lip-sync.
-
Results often require significant downstream polishing for production.
-
Less predictable than targeted generative solutions.

-
Dreamlike Transformations: Converts images into surreal, artistic avatars.
-
Layered Processing: Fine-tune multiple effects for creative results.
-
Style Transfer Options: Apply different artistic or abstract styles.
-
High-Resolution Export: Suitable for digital campaigns or portfolio work.
-
Creative Control: Adjust intensity of dream effects easily.
-
Unique Visual Identity: Makes bold, attention-grabbing images.
-
Batch Processing: Apply effects to multiple images efficiently.
-
Community Sharing: Explore styles and techniques from other users.
-
Available On: Web
-
Overall: 4.0/5
-
Beginner-Friendly Tools: 4/5
-
Price: Basic $9/month; Advanced $19/month
What My Experiments with Each Tool Revealed
-
Ease of Use: You want a tool that’s intuitive and straightforward. The best AI avatar generators let you jump straight into creating avatars without complex menus or confusing settings. This is especially important if you’re handling multiple projects or need quick turnaround.
-
Performance and Speed: Smooth performance is critical when working with high-resolution images or generating multiple avatars. You should look for software that doesn’t lag or crash, allowing you to produce avatars efficiently and maintain workflow momentum.
-
Customization Options: You need tools that let you adjust facial features, expressions, hairstyles, and clothing. The more control you have over avatar details, the easier it is to align avatars with brand identity or project needs.
-
Output Quality: The avatars you generate should be high-quality and versatile, suitable for social media, video, VR, or gaming environments. You want options that produce realistic, stylized, or artistic avatars depending on your creative requirements.
-
Integrated Features: You should consider platforms that combine avatar creation with additional editing capabilities, such as lip-sync, animation, or background customization. This reduces the need for multiple software tools and streamlines your production process.
-
Cross-Platform Compatibility: You want a solution that works across different devices or export formats. Whether you’re on desktop, mobile, or integrating with VR/3D engines, flexibility ensures that your avatars are ready wherever you need them.
-
Cost and Accessibility: Price matters, but free or low-cost tools can be surprisingly powerful. You want software that delivers professional-quality avatars without locking key features behind expensive tiers, especially if you’re producing content regularly.
Conclusion
FAQs

In British homes, homeowners can often struggle with smaller kitchens, tight utility rooms and awkward layouts. However, to create a sense of space you do not need to knock down walls, extend or spend tens of thousands of pounds. Expanding a room visually comes down to streamlining surfaces, maximising light and removing visual clutter.
Eliminating Visual Clutter with Sleek Cabinet Fronts
When we walk into a room, our brains map space based on continuous lines and boundary points. Heavy, traditional wood-grain doors, raised cathedral panels or dark, ornate finishes create harsh breaks in the field of vision. Dark or heavily detailed cabinets physically feel as though they are intruding into the room, effectively pushing the walls inward and making narrow walkways or small galley kitchens feel claustrophobic. Old cabinet doors, such as those showing signs of wear, yellowed lacquer or mismatched handles, create visual noise. In a compact space, visual noise translates directly to feeling cramped and cluttered, no matter how clean the kitchen actually is.
There are specific design choices that can expand the perceived floor and wall space:
- Handleless and Integrated J-Pull Designs – removing protruding knobs and handles instantly smooths out the vertical landscape of the kitchen. This is because they allow the eye to glide effortlessly across the length of the cabinet without getting ‘caught’ on hardware.
- Slab (flat) Fronts – compared to shaker style or intricate routed doors, a completely flat surface will reflect light evenly and remove shadows that would break up the wall.
- Reflective vs Super-Matte Finishes – light-toned high-gloss door fronts act like mirrors, reflecting natural light from windows into dark corners. Smooth, matter doors absorb light softly without harsh glare, making storage units subtly blend into background walls.
In a small kitchen, the physical layout (e.g. the carcass frames) are often already optimised for the space. Ripping out entire units can be messy, expensive and completely unnecessary if the internal frames are still sturdy. Replacement kitchen doors are the ultimate high-reward, low-effort renovation hack. By swapping the external faces, you can alter light reflection, colour dynamics and the visual texture of a room in a short time.
Creating Seamless, Unbroken Wall Surfaces
Traditional tiles can shrink small rooms. Even though tiles are standard in kitchens and utility rooms, a wall covered in small metro tiles or intricate mosaics creates hundreds of dark grout lines, essentially drawing a busy, high-contrast grid across the walls. This grid pattern breaks up the wall into several tiny segments. When the human eye processes a fragmented surface, it will perceive the wall as busy, cluttered and being closer than it actually is. Over time, grout lines can also become discoloured, trap grease and harbour mould, creating dark shadow lines that make small splashbacks and utility walls look dingy and confused.
Hygienic wall cladding is a great modern alternative to traditional tiling. Installing a large-formant, continuous panel creates an unbroken vertical or horizontal surface. Without grout lines to interrupt the view, the eye glides smoothly from one side of the room to the other without stopping. This lack of visual resistance tricks the brain into perceiving the wall surface as much wider and taller than its true dimensions. Seamless wall panels also extend cleanly behind hobs, sinks and beneath wall cabinets, creating a single, cohesive backdrop that opens tight corners and alcoves.
Reflective cladding finishes, such as high-gloss, will act as light amplifiers. In a small kitchen or windowless utility room, bouncing light off smooth wall panels brightens up dark under-cabinet zones and bounces task lighting back to the centre of the room. Modern hygienic cladding can also replicate high-end natural materials, like marble and stone, without the heavy structural weight, costly installation or maintenance. Wall cladding sheets are very slim compared to timber panelling or thick ceramic tiles. They mount flush to the wall, preserving every bit of countertop and floor space. As the cladding is non-porous and grout-free, it does not absorb moisture or stains, and is much easier to keep clean.
Clever Lighting and Colour Tricks
Interior designers often use the ‘invisible wall’ technique. This is where cabinet doors, wall cladding and paintwork all share the exact same colour tone so that the distinction between storage units and structural walls vanishes. High contrast pairings, such as dark grey cabinets against white walls, create hard, defining outlines around every cupboard. By matching light door fronts with light wall panels, the eye perceives a single, continuous plane, instantly making the room feel wider and less encroached upon. Soft, receding neutrals can also make surfaces appear further away than they actually are, pushing the perimeter of a kitchen or utility room outwards.
Using vertical lines can create the illusion of ceiling height in low-ceilinged UK homes. Aligning vertical door seams with full-height vertical wall panels guides the eye from floor to ceiling, making the space feel lofty and spacious. Long, unbroken horizontal runs, such as those achieved by pairing wide slab cabinet doors with horizontal cladding sheets, stretch narrow galley kitchens into long, elegant spaces. You can also use integrated, matching replacement doors to hide bulky, high-contrast appliances behind the same sleek door panels as the rest of the cabinetry. As the wall cladding creates a smooth wall finish on its own, you do not need to clutter the wall with hanging racks, suction hooks or busy utensil rails. Keeping the wall completely clear keeps sightlines wide open.
Quick Fixes For Instant Space
- The 80/20 Surface Rule – keep 80% of counter space entirely clear, as when surfaces are crowded the eye will read the space as being full to capacity, making the room feel cramped.
- Keep surfaces clean – a thin film of grease, steam residue and water spots on wall panels can dampen light, meaning the surface absorbs light instead of bouncing it back into the room. As cladding does not have grout lines, a quick wipe instantly restores the sheen.
- Keep the floor plan open – when tea towels hang low, pet bowls clutter walkways or kickboards are dirty, it can visually restrict the floor. Always lift non-essential items off the floor and worktops.
Creating a spacious feel is not just about structural work, it is about choosing smart, clean-lined surfaces that maximise light and minimise fuss. With just a few smart surface choices, even the most compact space can be transformed into a bright, airy and inviting hub of the home.

Large purchases often feel as though they arrive all at once. A car needs replacing, a boiler stops working, or an unexpected home repair becomes impossible to ignore. Even when the expense is predictable, it can still place pressure on a household budget if there is no clear plan in place.
The most effective way to prepare is to separate short-term spending from long-term financial goals. Money intended for emergencies, holidays, home improvements and major purchases should not all sit in the same pot. When every goal is combined, it becomes difficult to see what is genuinely affordable and what may need to wait.
Start by working out the true cost of the purchase. For a car, that means looking beyond the advertised price. Insurance, tax, fuel, servicing, repairs and depreciation all affect affordability. A cheaper vehicle may cost more over time if it is inefficient or unreliable, while a more expensive model could still be manageable if running costs are lower.
Once you have a realistic figure, set a target date. If you expect to need £6,000 in two years, for example, dividing that total by 24 gives you a clear monthly saving target. This makes the goal feel less abstract and allows you to decide whether the timescale is realistic.
Keeping this money in a dedicated savings account can help reduce the temptation to spend it elsewhere. It also makes progress easier to track. Choosing an account with a competitive interest rate may provide a modest boost, although accessibility matters too. Money for a planned purchase should not be locked away for longer than you can comfortably manage.
It is also worth building a contingency into the total. Major purchases often come with additional costs that are easy to overlook, such as delivery fees, initial repairs, accessories or administration charges. Adding around 10% to the target can create a useful buffer and reduce the chance of having to borrow unexpectedly.
Of course, saving the full amount is not always possible or practical. Some people may need a vehicle before they have had time to build the necessary funds. In this situation, car finance may be one way to spread the cost, but the monthly payment should never be considered in isolation.
Before agreeing to any borrowing, check the total amount repayable, the interest rate, the length of the agreement and any fees for ending it early. A low monthly figure can look attractive, but a longer term may increase the overall cost significantly. It is also important to understand whether you will own the vehicle at the end and whether mileage or condition restrictions apply.
A useful rule is to compare the proposed payment with the amount you are already able to save each month. If the payment is much higher than your current saving capacity, the agreement may place too much pressure on your budget. Remember that the cost of running the vehicle will sit on top of the repayment.
You should also test the budget against less comfortable scenarios. Could you still afford the payment if your energy bill rose, your income dropped temporarily or you faced another unexpected expense? A purchase that only works when everything goes perfectly is likely to create stress.
Review the target every few months rather than setting it once and forgetting about it. Prices, income and priorities can change, and the original plan may no longer reflect what you need. Automating a transfer shortly after payday can make progress more consistent, while a separate spending review may reveal subscriptions or habits that can be reduced temporarily. The aim is not to remove every enjoyable expense, but to decide deliberately which spending matters most while the goal is being funded.
Planning for major spending is ultimately about protecting flexibility. Paying in cash can reduce borrowing costs, but using all available funds may leave you vulnerable. Financing can preserve cash reserves, but it introduces a fixed commitment. The right choice depends on your income, existing debts, emergency fund and wider priorities.
Whatever method you choose, avoid rushing. Take time to compare options, read the terms carefully and calculate the full cost. A major purchase should improve your life, not leave your finances stretched for years afterwards. With a clear target, realistic budget and sensible buffer, it is possible to make expensive decisions with far greater confidence.

A well-designed break room gives employees a comfortable place to pause, recharge, and return to work with better focus. Practical amenities such as an office coffee service can make the workday more convenient by giving employees easy access to fresh beverages without requiring them to leave the building. While coffee may seem like a small workplace benefit, its availability can contribute to a more welcoming environment and support positive daily routines.
Modern employees often consider the overall workplace experience when evaluating their satisfaction with a job. Compensation and career growth remain important, but the quality of the physical environment also shapes how people feel at work. Clean shared spaces, comfortable seating, reliable refreshments, and convenient access to food and drinks can show employees that their everyday needs have been considered.
A thoughtfully managed office pantry can further improve the break room by offering snacks, beverages, and other essentials that match employee preferences. When workers can quickly find refreshments during a busy day, they spend less time leaving the office and have more opportunities to take meaningful breaks with their colleagues.
Break Rooms Give Employees Space to Reset
Working for long periods without a pause can affect concentration and energy. Employees may become less attentive, more irritable, or slower when completing tasks if they do not have opportunities to step away from their workstations.
A break room creates a designated space where employees can mentally disconnect from their responsibilities for a few minutes. Even a short break can allow someone to stretch, have a drink, eat a snack, or simply change their surroundings.
The quality of this space matters. A neglected room with limited seating and empty shelves may not encourage employees to use it. In contrast, a clean and inviting break room can make short breaks feel more restorative.
Employers do not need to create a luxury lounge to achieve this effect. Comfortable furniture, adequate lighting, cleanliness, organized supplies, and dependable refreshments can make the space more useful and appealing.
Convenient Refreshments Reduce Workplace Disruptions
Employees often leave the workplace to purchase coffee, snacks, or lunch when suitable options are not available on-site. These trips may take longer than expected because of traffic, waiting lines, or travel distance.
Providing refreshments in the workplace can reduce the need for unnecessary trips. Employees can get what they need, take a reasonable break, and return to their responsibilities without leaving the property.
This convenience can be especially valuable in large offices, warehouses, manufacturing facilities, medical workplaces, and businesses located far from restaurants or convenience stores. Employees working early, late, or overnight shifts may also have limited access to nearby food and drink options.
On-site refreshments do not eliminate the need for meal breaks. Instead, they provide employees with additional choices throughout the day and make it easier to handle short periods of hunger, thirst, or low energy.
Better Break Rooms Can Support Employee Morale
Workplace morale is influenced by many factors, including management, communication, workload, recognition, and team relationships. Amenities alone cannot fix deeper organizational issues, but they can contribute to a more positive daily experience.
A reliable break room communicates that the employer has considered employee comfort. When coffee is available, supplies are regularly restocked, and the space is properly maintained, workers are less likely to feel that their basic needs are being ignored.
Small conveniences can also create moments of appreciation. Employees may value being able to start their day with a hot drink, grab a snack between meetings, or find a cold beverage after completing physically demanding work.
These details may seem minor individually, but they become part of the overall workplace atmosphere. Consistency is particularly important because an amenity that is frequently unavailable or poorly maintained can quickly lose its value.
Shared Spaces Encourage Informal Communication
Employees do not build working relationships only during formal meetings. Many useful conversations happen when people interact casually in shared areas.
A break room can bring together employees from different teams, departments, and levels of responsibility. These informal interactions may help workers become more familiar with one another, exchange information, or discuss a problem in a less structured environment.
Stronger workplace relationships can make collaboration easier. Employees may feel more comfortable asking questions, sharing ideas, or requesting help from colleagues they have spoken with casually.
Not every break needs to become a networking session. Employees should still be able to relax privately. However, a well-planned common space naturally creates opportunities for social connection without requiring forced team-building activities.
Refreshment Variety Helps Serve Different Preferences
Workplaces usually include employees with different tastes, schedules, and dietary needs. A limited selection may satisfy some workers while leaving others without practical choices.
Offering a reasonable mix of refreshments can make the break room more inclusive. Coffee drinkers may appreciate different roast or preparation options, while other employees may prefer tea, hot chocolate, bottled water, or cold beverages.
Snack selections can include both traditional favorites and lighter choices. Depending on employee demand, businesses may consider items such as nuts, granola bars, fruit snacks, crackers, chips, protein-rich products, and lower-sugar beverages.
The goal is not to provide every possible product. A better approach is to understand what employees actually use and adjust the selection over time.
Surveys, informal feedback, and purchasing data can help employers and service providers identify popular items. Refreshment programs become more useful when they respond to real preferences rather than assumptions.
Regular Restocking Builds Trust in the Amenity
A break room is only helpful when its supplies are consistently available. Empty coffee containers, missing cups, expired snacks, or frequently unavailable products can frustrate employees.
Reliable restocking keeps the space functional and shows that the amenity is being actively managed. Employees are more likely to use and appreciate the break room when they trust that products will be available.
A structured service schedule can also reduce the amount of time office managers spend checking inventory and purchasing supplies. Instead of reacting to shortages, the workplace can follow a planned system based on usage.
Product demand may change over time. Seasonal preferences, office attendance, shift changes, and company growth can all affect consumption. Regular review helps ensure that the refreshment program continues to match the workplace.
Cleanliness Affects the Entire Break Room Experience
Product selection is important, but cleanliness has an equally strong effect on how employees perceive a break room. Unwashed surfaces, overflowing bins, spills, and clutter can discourage people from using the space.
Clear responsibilities should be established for routine cleaning and maintenance. Employees may be expected to clean up after themselves, while designated staff can handle deeper cleaning and supply checks.
Appliances and equipment also require attention. Coffee brewers, refrigerators, microwaves, vending machines, water dispensers, and countertops should be inspected and cleaned regularly.
An organized layout can make maintenance easier. Waste bins should be easy to reach, napkins and utensils should have designated locations, and commonly used products should be arranged so employees can find them quickly.
A clean environment supports employee comfort and helps protect the quality of the food and beverages being offered.
Break Room Design Can Improve Everyday Use
A successful break room should match the size and work style of the organization. A small office may only need a compact coffee station, refrigerator, microwave, and a few seats. A larger workplace may require separate areas for food preparation, refreshments, dining, and informal conversation.
The layout should allow employees to move through the room without crowding. High-use items should be easy to access, while seating should accommodate both individuals and small groups.
Noise should also be considered. Employees may avoid the room if it is directly beside focused work areas or if appliances create constant disruptions. Where possible, the break room should be positioned so employees can relax without disturbing colleagues who are working.
The space should also be accessible to all employees. Clear pathways, reachable supplies, and practical seating arrangements can make the room easier for everyone to use.
Workplace Amenities Can Strengthen Recruitment and Retention
Candidates often notice the working environment when visiting an office or facility. A clean, active, and well-equipped break room can help create a positive impression of the company culture.
Existing employees may also view workplace amenities as part of their overall benefits. Refreshments will not replace fair pay, effective management, flexibility, or advancement opportunities, but they can improve the everyday employee experience.
This is especially relevant when companies compete for workers in similar roles. Two employers may offer comparable salaries, but the business that provides a more comfortable and convenient workplace may feel more attractive.
Retention decisions are rarely based on one amenity. However, employees often judge an organization through repeated daily experiences. A workplace that consistently takes care of practical details may build stronger goodwill over time.
Productivity Benefits Come From Better Workday Routines
Break room amenities do not automatically make employees more productive. Their value comes from helping workers maintain healthier and more efficient routines during the day.
Easy access to drinks can support hydration. Available snacks can help employees manage hunger between meals. A comfortable space can encourage workers to take appropriate breaks rather than remaining at their desks while becoming increasingly distracted.
Employees may also return from short breaks with improved concentration and a clearer perspective on their tasks. This can be particularly helpful during long projects, repetitive work, or demanding shifts.
Employers should avoid treating the break room as a tool for encouraging employees to work without proper rest. The purpose should be to support wellbeing and make legitimate breaks more convenient and restorative.
How to Improve an Existing Break Room
Businesses can begin by reviewing how employees currently use the space. Look for recurring problems such as insufficient seating, limited beverage choices, poor organization, cleanliness issues, or frequent supply shortages.
Employee feedback can identify improvements that management may overlook. Workers may want better coffee, healthier snacks, additional cold storage, more comfortable seating, or quieter surroundings.
After gathering feedback, employers can prioritize changes based on usefulness and budget. Some improvements may require new equipment, while others may only involve reorganizing the room or introducing a regular restocking process.
The break room should be reviewed periodically rather than treated as a one-time project. Employee numbers, preferences, and workplace schedules can change, so the space should be able to adapt.
Creating a Break Room Employees Will Use
The most effective break rooms combine comfort, convenience, cleanliness, and reliable service. They provide employees with a practical place to pause without making the space overly complicated.
Businesses should focus on amenities that match their workforce. A well-maintained coffee station may be valuable in one office, while a broader snack and beverage program may be more appropriate for a facility operating multiple shifts.
When employers support the break room with regular maintenance and responsive product choices, it becomes more than an unused corner of the workplace. It can help employees recharge, communicate with colleagues, and move through the workday with fewer unnecessary disruptions.
A thoughtful break room cannot replace strong leadership or a healthy company culture. However, it can reinforce both by showing employees that their comfort and daily experience matter.
-

 BLOG12 months ago
hanime1: The Ultimate Destination for Anime Lovers
-

 ENTERTAINMENT1 year ago
Sflix: How It’s Changing the Way We Watch Movies and TV Shows
-

 BILLS1 year ago
Why Does My Instagram Reel Stop Getting Views After One Hour? How to Fix It?
-

 BLOG1 year ago
Imginn: The Ultimate Tool to View Instagram Content Anonymously
-

 ENTERTAINMENT1 year ago
Crackstreams 2.0: The Future of Free Sports Streaming?
-

 BLOG11 months ago
ThisVid: What Makes It Stand Out in the World of Online Videos
-

 BLOG1 year ago
NHentai.nef: Understanding the Popular Hentai Archive
-

 Technology1 year ago
Simpcitt: The Rise of a Unique Online Community