
BLOG
The 2026 Homebuyer Due-Diligence Checklist: Records, Costs, and Closing Safety


Buying a home involves more than choosing the right property and securing a loan. Before closing, buyers need to confirm what they are purchasing, what it will cost, and whether any unresolved issues could delay the deal. Understanding what is title insurance is one useful starting point, because ownership history, liens, and recorded restrictions can affect a property long after the keys are handed over.
A careful due diligence process does not mean expecting problems. It means setting aside time to ask questions, collect written responses, and address concerns before signing the final documents. Requirements and customary practices can vary by state, county, loan type, and property, so buyers should rely on qualified real estate, lending, title, insurance, or legal professionals when a concern falls outside their expertise.
Why Due Diligence Matters Before Closing
A home inspection is important, but it does not answer every question about the transaction. An inspector may identify a plumbing problem or an aging roof, while a title review can reveal an unpaid lien, access easement, or ownership issue that requires attention before closing. For example, a buyer might schedule movers only to learn that an old lien still needs to be released. An early review offers more options than a last-minute scramble.
Step One: Build a Property File
Create a single digital folder, paper binder, or both for the transaction. Keep the purchase agreement and every addendum alongside seller disclosures, inspection reports, appraisal documents, property tax information, homeowners insurance quotes, title and escrow communications, the Loan Estimate, and the Closing Disclosure. If the home is part of an HOA or condominium association, include all association documents. A complete file makes it easier to compare information and spot missing pages.
Step Two: Check Ownership and Public Records
Ask the closing or title team what has been reviewed and whether anything remains unresolved. Buyers should not attempt complex legal research on their own, but they should understand the categories being checked.
- Current deed, prior ownership, and the seller’s authority to transfer the home.
- Recorded mortgages, liens, judgments, and unpaid property taxes.
- Easements, access rights, deed restrictions, and use limitations.
- Probate or inheritance concerns that may affect a seller’s ownership rights.
- Open building permits, survey questions, boundary lines, and possible encroachments.
Common transaction obstacles include title questions, liens, financing gaps, and delayed paperwork. This overview of common roadblocks in a real estate sale is a useful reminder that unresolved ownership matters can stop a closing until the appropriate documents are obtained.
Step Three: Review Every Contract Deadline
Do not rely on memory, text messages, or a verbal promise when a deadline matters. Put the following dates and times on a shared calendar, then confirm them against the signed contract:
- Inspection and repair-request deadlines.
- Appraisal and financing commitment dates.
- Title review or title-objection period.
- Seller disclosure delivery deadline.
- Final walkthrough appointment.
- Closing date, time, location, and identification requirements.
Missing a deadline can reduce a buyer’s options under the contract. Before waiving a contingency, requesting an extension, or taking any other action, ask the appropriate professional how the local contract applies.
Step Four: Read the Closing Disclosure Carefully
For most standard mortgage transactions, the Closing Disclosure provides the final terms, projected payments, and closing costs. The Consumer Financial Protection Bureau explains the role of the closing disclosure and why borrowers should compare it with their Loan Estimate before closing.
Focus on changes to the loan amount, interest rate, monthly payment, prepaid taxes and insurance, lender charges, recording fees, seller credits, and total cash needed to close. A difference is not automatically a problem, but it should have a clear written explanation.
Step Five: Separate Condition Questions From Ownership Questions
- Home inspection: Reviews visible systems and physical condition.
- Appraisal: Helps the lender assess the loan’s market value.
- Survey: May show boundaries, improvements, and encroachments.
- Record review: Helps identify title, lien, tax, and access concerns.
- Insurance review: Helps confirm coverage availability and cost.
A roof can appear acceptable during an inspection, while an older easement still limits the use of a portion of the land. Each review answers a different question, so none should be treated as a substitute for the others.
Step Six: Review HOA and Condo Documents
Shared communities require additional review because a buyer may inherit ongoing financial obligations and rules. Check monthly dues, recent increases, reserve funding, insurance coverage, rental limitations, pet and parking rules, meeting minutes, special assessments, pending lawsuits, and planned major repairs. Request missing documents in writing. A short delay before signing is usually easier to manage than an unexpected assessment after closing.
Step Seven: Protect the Money Transfer
Wire fraud prevention should be part of every closing plan. Never accept last-minute payment instructions by email alone. Call a known title, escrow, or closing contact using a verified phone number, read account details back carefully, ask your bank about recipient verification, and save the wire receipt. A delay for confirmation may be inconvenient, but a fraudulent wire can be difficult to recover.
Step Eight: Complete the Final Walkthrough
Use the final walkthrough to confirm that agreed-upon repairs are complete, that included appliances remain, and that the property has not suffered new damage. Test lights, faucets, toilets, doors, windows, and garage controls. Look for leaks, confirm the home is reasonably clean and empty if required by the contract, and take photos of any concern. Report problems promptly so the closing team can explain available options.
Red Flags That Deserve a Pause
- The seller’s name does not match the ownership information.
- A lien, tax balance, permit issue, or boundary concern appears close to closing.
- Important documents have missing pages or unexplained changes.
- Someone pressures the buyer to skip the review or send money immediately.
- Wire instructions change without direct verbal verification.
- Closing costs change without a clear explanation.
A Simple 48-Hour Pre-Closing Plan
- Review the latest Closing Disclosure and confirm cash to close.
- Ask whether any lender, title, lien, tax, or document conditions remain open.
- Verify the closing location, payment method, and required identification.
- Complete the final walkthrough and report issues immediately.
- Save signed closing documents and recording confirmations after closing.
Conclusion
Good due diligence is not about finding a perfect property. It is about asking clear questions early, documenting the answers, and giving yourself enough time to respond when something changes. By reviewing records, tracking deadlines, comparing costs, and verifying payment details, buyers can approach closing with greater confidence and fewer surprises.

Wisconsin manufacturers, machine shops, construction crews, and maintenance departments often generate scrap throughout the day, not just at the end of a project. When bins, roll-offs, carts, and storage areas are placed with the actual work in mind, scrap can move out of the way without becoming an operational bottleneck.
For facilities looking to build or improve their collection process, industrial metal recycling services in Wisconsin can be part of a broader plan that integrates container placement, pickup timing, material separation, and reliable documentation. The strongest workflow is one that workers can follow consistently during a busy shift.
Why Wisconsin Industrial Scrap Workflows Need a Fresh Look
Scrap accumulation is rarely caused by one major failure. More often, it begins with small gaps: no one is assigned to inspect containers, a pickup is requested only after overflow occurs, or a department uses a nearby bin intended for another material. Over time, those gaps can lead to blocked aisles, repeated handling, mixed loads, and difficult cleanup.
Wisconsin facilities also need to account for local operating conditions. Snow, freeze-thaw cycles, rain, mud, and limited daylight can make outdoor storage and transport areas harder to manage. Covered storage, stable surfaces, visible markings, and clear truck access can help a site maintain control through changing weather.
Step 1: Map the Full Scrap Journey
Start by following each material from the point at which it becomes scrap to the point at which it is collected, staged, or removed from the site. Include production, maintenance, shipping, demolition, and office cleanout activities when relevant. The goal is to see the real route, not the route shown on an old layout drawing.
- List every department and process that produces scrap.
- Mark where each material is placed during a normal shift.
- Note how quickly containers fill and what happens when they are full.
- Identify every handoff involving carts, forklifts, cranes, loaders, or trucks.
- Record spills, double handling, contamination, blocked paths, and delays.
For example, a machine shop may discover that turnings are first placed in small tubs, then transferred to a shared cart, and finally moved to an outdoor container. Moving a properly sized, clearly marked container closer to the machining area may remove an unnecessary step while keeping traffic paths open.
Step 2: Separate Materials at the Source
Early separation helps workers make better decisions before materials become mixed, wet, damaged, or difficult to identify. Ferrous and non-ferrous metals, turnings, coated materials, and parts containing fluids may require different handling. A dedicated review area is also useful for items that are unknown or questionable.
- Use consistent container colors, large labels, and photos of accepted materials.
- Label each container with the material type, work area, start date, and responsible team.
- Identify known concerns such as oil, sharp edges, coatings, or moisture.
- Keep unknown items out of standard scrap containers until a trained person reviews them.
Step 3: Design Safer Storage Areas
A scrap area should have a stable surface, sufficient lighting, room for equipment to maneuver, and a clear route for pickup. Containers should not crowd emergency exits, electrical panels, fire lanes, drains, or loading doors. Piles should remain stable and low enough to preserve sight lines for people operating vehicles.
Recycling work can expose employees to traffic, moving machine parts, unexpected startup, lifting injuries, and slips, trips, and falls. The hazards common across recycling operations are a useful reminder that a clean layout and defined travel routes are important safety controls, not merely housekeeping details.
- Mark pedestrian walkways where people and powered equipment share space.
- Inspect bins for sharp edges, leaks, damage, and overloading.
- Use barriers, bollards, or designated staging zones where vehicle conflict is possible.
- Keep outdoor areas accessible for winter plowing and safe truck movement.
Step 4: Reduce Fire and Contamination Risks
Not every metal item belongs in a general scrap container. Batteries, sealed vessels, pressurized cylinders, electronic components, oily parts, and equipment containing refrigerants or other fluids require attention before they enter the normal stream. Workers should know that an unfamiliar item is a reason to stop and ask, not a reason to guess.
Practical controls include keeping fire access clear, separating wet or oily material from clean scrap, routinely inspecting high-volume areas, and documenting leaks, smoke, odors, damaged containers, and near misses.
Step 5: Improve Pickup and Internal Transport
Container size and pickup frequency should reflect actual production. A container that fills too quickly can lead to overflow and improvised staging. One that is too large can consume valuable floor space and encourage workers to mix materials. Set a clear trigger for a pickup request, whether it is a fill line, a scheduled inspection, or a recurring service date.
- Assign someone to check capacity on a regular schedule.
- Use defined routes for forklifts, loaders, and collection vehicles.
- Arrange pickups before containers interfere with production or access.
- Review missed pickups and repeated delays during operations meetings.
Step 6: Train Workers for Real-World Conditions
Training should focus on the decisions workers actually make. Cover required personal protective equipment, proper lifting, handling sharp or hot materials, reporting full containers, and staying clear of moving equipment and suspended loads. Short refresher discussions are especially useful after an incident, a near miss, a layout change, a new material stream, or an equipment upgrade.
Useful Training Questions
- What belongs in each labeled container?
- Who reviews an unknown, damaged, wet, or leaking item?
- Where should a worker report a blocked route or unstable pile?
- What should happen when a container reaches its fill limit?
Step 7: Track Performance With Simple Records
A shared spreadsheet, maintenance system, or operations dashboard can provide enough information to improve the process. Track container fills, days between pickups, contamination issues, unexpected charges, near misses, and estimated recovery by department. The purpose is not paperwork for its own sake. It is to identify patterns that call for a practical adjustment.
Common Mistakes to Avoid
- Putting every material into one container.
- Waiting for overflow before arranging collection.
- Allowing pedestrians and equipment to share unmarked travel paths.
- Storing material near emergency access, electrical equipment, or drains.
- Changing a layout without updating signs and worker instructions.
A 30-Day Wisconsin Scrap Workflow Improvement Plan
- Days 1 through 5: Walk the site and document every scrap generation point.
- Days 6 through 10: Mark traffic routes, storage zones, emergency access, and problem areas.
- Days 11 through 15: Update labels, signs, container locations, and inspection duties.
- Days 16 through 20: Train workers and supervisors on the revised process.
- Days 21 through 30: Review container sizes, pickup timing, results, and remaining weak points.
Conclusion
A safer scrap workflow does not need to be complicated. Clear sorting rules, sensible storage, dependable pickup planning, practical training, and simple records can help Wisconsin industrial teams keep materials moving while reducing clutter and avoidable risk. Review the system at least annually, and revisit it whenever production, equipment, layout, or material streams change.
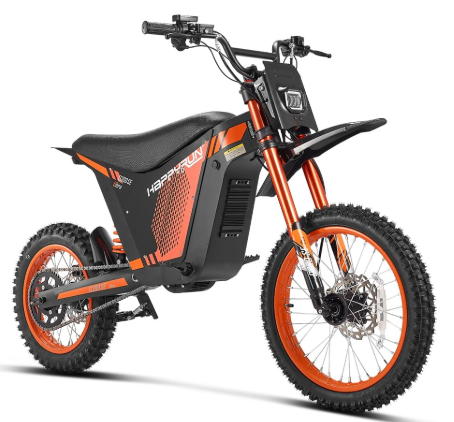
Ask five riders what makes an electric dirt bike “fast” and you’ll get five different answers. Some will say motor size. Some will say torque. A few will just shrug and say “you feel it in the first two seconds.” Truth is, none of them are wrong exactly — speed on a trail isn’t one number, it’s a stack of smaller decisions: motor output, battery capacity, how the controller’s tuned, gearing, weight, tires, suspension, even where you sit on the bike. Chase a single spec-sheet number and you’ll end up disappointed more often than not.
Top Speed Isn’t the Whole Story
Here’s the thing about an electric dirt bike for adults — it has to hold up power against stability, braking, and battery life at the same time. A bike that wins on paper with the highest top-speed number often loses on an actual trail, and honestly, it’s usually less fun to ride too. What matters is how the whole system works together. Not one number you circle in a spec sheet before buying.
Watts Look Impressive. They Don’t Tell You Much.
The motor drives most of the performance story, and electric motors have a genuine edge here — torque shows up at almost zero RPM, so power’s there the instant you twist the throttle. That’s a big reason electric dirt bikes feel quick even when the top speed isn’t dramatic. Motor ratings get listed in watts or kilowatts, sure, but two bikes with identical numbers can ride like completely different machines once controller tuning, battery voltage, and gearing enter the picture. A smaller motor, tuned well, will beat a bigger motor that’s mismatched to its own electronics. Every time.
Torque Does the Heavy Lifting Off-Road
Off-road, torque beats top speed almost every time. Climbing a steep hill needs strong low-speed power just to keep the wheels turning, and pulling out of a corner on loose dirt depends on that torque showing up immediately — before the bike’s had a chance to build any real momentum. For riders weighing performance against practicality and budget, an electric motorcycle can be a smart option, especially when you want strong performance without paying for features you may not need.
The Battery Is the Part Nobody Thinks About Until It Fails
Voltage decides how efficiently power gets delivered. Capacity — in watt-hours — decides how much energy you’ve actually got to work with. Pair a strong motor with a weak battery and you’ll get a decent burst off the line, then watch performance fade as the charge drops. High-performance dirt bikes need a battery that can sustain both high output and enough total energy to finish the ride strong, not just start it strong. Ask for more current than the battery can supply, and both acceleration and top speed suffer for it.
The Controller Quietly Runs the Whole Show
Sitting between battery and motor, the controller decides how much power actually reaches the motor at any given instant — and it shapes the ride more than most riders give it credit for. A good controller means smooth throttle response, strong acceleration, and usually a few ride modes to pick from. Manufacturers also use controller software to cap top speed or output entirely, whether that’s for safety, battery life, or legal reasons. Which explains why two bikes running the exact same motor can feel like completely different rides.
Weight and Gearing Change Everything About How a Bike Handles
Every pound you’re carrying gets pushed around every single time you accelerate, brake, or change direction — and you feel that most in jumps, corners, and technical sections. Lighter bikes feel sharper. Heavier ones feel planted once speeds climb. Neither is “better,” really — it depends on how you ride. Tight, technical trails favor something light with instant throttle response. Long, rough, open terrain rewards a heavier, more battery-dense build. Gearing works on the same tradeoff: taller gearing for cruising speed, shorter gearing for acceleration and hill climbing.
Speed Without Control Isn’t Actually Speed
Suspension keeps your wheels in contact with rough ground, soaks up hits, and gives you the confidence to actually push the bike through corners. Brakes matter just as much, arguably more — a fast bike needs brakes that can take real kinetic energy and turn it into controlled, predictable slowing, especially heading into a corner or an obstacle you didn’t see soon enough. Newer riders should take this seriously, since more power means higher stakes on throttle control, braking, and protective gear. Even body position plays into it — sit upright and you’re fighting more drag, shift your weight forward or back and you change how the bike corners and grips.
What Really Makes the Fastest Electric Dirt Bike?
The fastest electric dirt bike on paper isn’t always fastest on the trail. What matters is how a bike performs getting up a hill, holding a line through it, and braking with control coming back down — not one advertised number. A bike that’s quick in a straight line but overheats, loses power, or feels unstable under load is often less useful than a slower bike that holds its performance consistently.
Speed, Budget, and Knowing What You Actually Need
Terrain, riding experience, local laws, maintenance, battery replacement costs down the road — budget factors into all of it, whether riders want to admit it or not. A cheap electric motorcycle can still deliver solid acceleration and real control, as long as the fundamentals — motor, battery, controller, brakes — are properly matched to each other rather than just thrown together. HappyRun lists full specifications for every model on its website, and it’s worth checking those directly instead of comparing bikes on price tag alone. Safety gear isn’t separate from performance, either — treat it as part of the package, especially once speeds start climbing.
Recommended HappyRun Electric Dirt Bikes for Speed and Performance
If you are comparing electric dirt bikes based on speed, motor output, range, and overall performance, HappyRun has several models worth considering. The G18 Pro, G300 Pro, and F18 2.0 offer different combinations of power, speed, range, and rider capacity.
G18 Pro
The HappyRun G18 Pro features a 4,500W peak motor and a 60V 35Ah battery. It reaches a top speed of up to 38 mph and offers an advertised range of up to 75 miles. The bike supports a total payload of up to 350 lbs and is designed for riders approximately 5’3″ to 6’5″. Full suspension and hydraulic brakes help provide control and stability on uneven terrain.
G300 Pro
The HappyRun G300 Pro is designed for riders looking for more power and higher speed. It features a 6,500W peak motor, a 72V 30Ah battery, and a top speed of up to 50 mph in off-road mode. Its advertised range is more than 70 miles, with a maximum payload of 350 lbs. It also includes full suspension, hydraulic brakes, 2,000-lumen headlights, and integrated turn signals.
F18 2.0
The HappyRun F18 2.0 uses a 6,000W peak mid-drive motor with up to 245 N·m of torque and a 60V 27Ah battery. It reaches a top speed of up to 46 mph and offers an advertised range of up to 60 miles. The bike supports up to 300 lbs and includes full suspension, an emergency magnetic kill switch, R-Turn reverse, NFC keyless entry, and a color display.
These models show why speed should be evaluated alongside motor output, battery capacity, range, suspension, braking, rider fit, and weight capacity rather than relying on top speed alone.
Picking the Right Bike for How You Actually Ride
Speed was never one feature you could point to. It’s motor power, torque, battery output, controller tuning, gearing, weight, tires, suspension, and brakes, all working together — or fighting each other, depending on how well the bike’s built. The right pick isn’t always the one boasting the highest top speed. It’s the one that balances speed against handling, range, stability, and durability for the riding you’ll actually do, week after week. Once you see how these pieces connect, finding a bike that’s genuinely fun gets a lot less complicated.
Frequently Asked Questions About Electric Dirt Bike Speed and Performance
Does a higher wattage motor automatically mean a faster bike?
Not really. Two motors rated at the same wattage can behave completely differently once you factor in controller tuning, battery voltage, and gearing. A smaller, well-tuned motor can beat a bigger one that isn’t set up properly.
Why does torque matter more than top speed off-road?
Because climbing, cornering on loose dirt, and pulling away from a stop all come down to instant low-speed power. Top speed rarely gets used on a technical trail.
Can a cheaper electric dirt bike still perform well?
Yes — as long as the motor, battery, controller, and brakes are matched properly to each other. A budget bike with well-matched parts will often outride an expensive one with mismatched components.
Does weight really change how a bike handles?
A lot, actually. Lighter bikes feel quicker and sharper, especially on tight or technical sections, while heavier bikes tend to feel steadier at speed on open terrain.


In today’s fast-paced digital landscape, capturing your audience’s attention can feel like trying to catch smoke with your bare hands. With countless distractions vying for their focus, how do you ensure that your content stands out? Enter Corpenpelloz—your guide to crafting engaging content that resonates deeply with readers. By understanding the nuances of what engages an audience and employing innovative strategies, you have the power to transform mundane messaging into compelling narratives. Let’s embark on this journey together and unlock the secrets behind creating irresistible content that not only informs but captivates!
Understanding the importance of engaging content
Engaging content is the heartbeat of effective communication in today’s digital world. It goes beyond merely dispensing information; it creates a connection between you and your audience. When content resonates, readers are more likely to share, comment, and return for more.
Think about it: each piece of engaging content has the potential to spark conversations and build communities. It fosters loyalty among audiences who feel seen and understood.
Moreover, engaging content enhances brand perception. A company that produces thoughtful material signals professionalism and expertise, establishing trust with its audience.
In an age where attention spans are fleeting, captivating writing can make all the difference. Great engagement means standing out from endless scrolls—it’s what turns casual visitors into devoted followers eager for your next post or update.
Identifying your target audience
Understanding your target audience is the cornerstone of effective content creation. It’s about knowing who you’re speaking to and tailoring your message accordingly.
Start by gathering demographic data. Age, gender, location—these factors shape preferences. But don’t stop there; dive deeper into interests and behaviors. What are their hobbies? Which social media platforms do they frequent?
Create buyer personas to visualize this information. These fictional characters embody the traits of your ideal audience members, making it easier to craft relatable content.
Engagement comes from resonance. When you know what sparks joy or curiosity in your audience, you can tailor messages that truly connect with them.
Remember, this isn’t a one-time task. Audiences evolve over time, so stay alert and adapt as needed for continued relevance and engagement.
Researching and understanding your audience’s interests and needs
Researching your audience is like opening a treasure chest full of insights. You want to dig deep into their interests and needs, discovering what truly resonates with them.
Start by utilizing tools like surveys or polls. Ask questions that reveal preferences, pain points, and desires. This direct feedback creates a roadmap for your content strategy.
Social media platforms are goldmines for understanding trends and discussions within your niche. Monitor conversations to see what excites or troubles your audience.
Don’t overlook analytics from existing content. Examine which posts perform best—those metrics can unveil patterns in behavior that guide future creations.
Engaging in community forums provides qualitative data too. Listening to real-time interactions gives you context about the emotional drivers behind user engagement.
The more informed you are about who you’re speaking to, the better equipped you’ll be to craft messages that resonate deeply with them.
Utilizing various content formats (written, visual, interactive) to engage your audience
Engaging your audience requires a diverse approach to content formats. Written content, like blogs and articles, provides depth and detail. It’s perfect for conveying complex ideas or sharing in-depth insights.
Visuals enhance engagement instantly. Infographics, images, and videos capture attention more effectively than text alone. They break up information and make it digestible.
Interactive content takes engagement to the next level. Quizzes, polls, and interactive infographics invite users to participate actively rather than passively consume information.
Combining these formats creates rich experiences. A blog post with embedded videos or interactive elements keeps readers interested longer.
Remember that variety is key when crafting engaging content with corpenpelloz principles at heart. Each format serves its purpose while creating a well-rounded narrative that resonates with different audience types.
Crafting compelling headlines and introductions
Crafting compelling headlines is an art form. Your headline serves as the first impression, and it must grab attention instantly. Use strong action verbs and intriguing adjectives to evoke curiosity.
A great introduction builds on that momentum. It should hook readers from the first sentence, drawing them into your narrative. Start with a question, a surprising fact, or a bold statement.
Don’t shy away from being bold or playful in your approach. The right tone can resonate deeply with your audience.
Consider incorporating relevant keywords naturally so that search engines also take notice without sacrificing flow or engagement.
Remember, clarity is crucial too; ensure readers understand what they’ll gain by continuing to read. A well-crafted opening sets the stage for everything that follows and enhances overall engagement with corpenpelloz content strategies.
Incorporating storytelling and emotions into your content
Stories have the power to connect. They evoke emotions and create a bond between you and your audience. When you weave narratives into your content, it transforms dry information into something relatable.
Consider personal anecdotes or customer testimonials. These real-life experiences resonate with readers, making them feel seen and understood. Emotions drive decisions; harnessing that energy can elevate your message.
Imagery plays a crucial role too. Descriptive words can paint vivid pictures in the reader’s mind, allowing them to experience what you share on a deeper level.
Don’t be afraid to show vulnerability in your stories. Authenticity fosters trust and invites engagement from those who relate to your journey or challenges.
Crafting content with emotional depth isn’t just about storytelling—it’s about creating an experience that lingers long after they’ve left the page.
The role of visuals and design in engaging content
Visuals play a crucial role in capturing your audience’s attention. Images, infographics, and videos can communicate information faster than words alone. They draw readers in and enhance their overall experience.
Good design makes content more readable. White space, typography, and layout contribute to clarity. Readers are more likely to stay engaged when they can easily navigate through the text.
Colors evoke emotions and set the mood for your message. A well-chosen palette can make your content feel inviting or urgent, depending on what you aim to express.
Interactive elements like polls or quizzes also increase engagement levels. These features encourage users to participate actively rather than passively consuming information.
Incorporating visuals is not just about decoration; it’s about creating a connection with your audience that resonates deeply beyond mere words.
Measuring and analyzing engagement with your content
Measuring engagement is crucial for understanding how your content resonates with your audience. Start by tracking metrics such as likes, shares, comments, and time spent on page. These indicators provide insights into what captivates your readers.
Use tools like Google Analytics to dive deeper into user behavior. Look at bounce rates and click-through rates to gauge interest levels. Heatmaps can reveal which sections of your content attract attention.
Don’t overlook social media analytics either. Platforms often offer detailed breakdowns of how users interact with your posts.
Surveys and polls are also effective ways to gather direct feedback from your audience. Ask them about their preferences or what topics they’d like you to cover next.
Analyzing this data regularly allows you to adapt and refine your strategy for even better results over time.
Tips for consistently creating engaging content
Creating engaging content is an ongoing journey, not just a one-time task. Here are several tips to help you maintain that momentum and consistently captivate your audience.
First, stay updated on industry trends. Regularly reading blogs, articles, and news related to your niche keeps ideas fresh. You can incorporate these insights into your content strategy.
Next, create a content calendar. Planning out topics in advance helps ensure that you address diverse interests while keeping your branding consistent.
Engage with your audience directly. Encourage feedback through comments or social media interactions. This two-way communication fosters community and generates valuable insights about what resonates with them.
Experiment regularly with different formats like videos, infographics, or podcasts alongside written posts. Variety keeps things interesting for both you and your audience.
Be authentic in every piece of content you publish. Genuine voices resonate more than perfectly polished ones; people connect better when they feel the realness behind the words.
Review analytics often to learn from past successes and failures alike. Understanding engagement metrics allows adjustments where necessary for future pieces of content.
By implementing these tips into your routine at Corpenpelloz, you’ll foster an environment rich in creativity and connection—ultimately leading to stronger engagement with every post.
-

 BLOG1 year ago
hanime1: The Ultimate Destination for Anime Lovers
-

 Technology1 year ago
GLAADVoice.com: How You Can Get Involved and Make a Difference
-

 BILLS1 year ago
Why Does My Instagram Reel Stop Getting Views After One Hour? How to Fix It?
-

 ENTERTAINMENT1 year ago
Sflix: How It’s Changing the Way We Watch Movies and TV Shows
-

 BLOG1 year ago
Imginn: The Ultimate Tool to View Instagram Content Anonymously
-

 BLOG1 year ago
NHentai.nef: Understanding the Popular Hentai Archive
-

 ENTERTAINMENT1 year ago
Crackstreams 2.0: The Future of Free Sports Streaming?
-

 BLOG1 year ago
ThisVid: What Makes It Stand Out in the World of Online Videos