
HOME IMPROVEMENT
The Hidden Damage Happening at Doorways


Interior doors are often treated as fixed elements that can withstand the pace of construction with little attention. In practice, they are among the surfaces most likely to show wear before a project is finished. Long before furniture is placed or final cleaning begins, doors absorb hits from carts, ladders, tool belts, delivery routes, and the repeated stop-and-go movement that defines active job sites.
This damage rarely begins with one major collision. More often, it is built through ordinary use. A door swings into stacked materials. A rolling cart clips the edge. Gloves marked with dust and adhesive leave residue near the handle. Splatter settles during nearby work. By the time the project reaches closeout, what looked minor in the moment becomes visible enough to require repair, refinishing, or replacement.
Why do doors get damaged so easily
Doors sit in the path of nearly every trade. Workers pass through them carrying materials, pushing equipment, opening and closing them with occupied hands, or propping them open for access. That repeated use turns the doorway into one of the busiest transition points in a building.
Unlike walls, doors have moving parts, exposed edges, hardware, and finished surfaces that are touched constantly. Even when the door slab itself is durable, its appearance can change quickly under job site conditions. Scratches along the face, dented corners, chipped edges, loose kick areas, and stained hardware all become more noticeable once the surrounding finishes are complete.
Damage risk also increases as projects move into later phases. Early construction is inherently rough, but late-stage work creates a different problem. At that point, surfaces are expected to look finished. A mark that might have gone unnoticed during framing becomes a punch-list item when paint, flooring, lighting, and millwork are already in place.
Doorways collect more than impact
Physical contact is only part of the issue. Doorways also collect dirt, debris, dust, and wet material as they move from one zone to another. In renovation work, especially when doors
are involved, they often separate areas at different stages of completion. One side may still be active, while the other is cleaned, painted, or nearly ready for turnover.
That makes the door line a transfer point. Dust settles on panels and hinges. Joint compound and paint mist land where workers move in and out. Adhesive residue from temporary notices or tape can leave marks on finished surfaces. Moisture and grime carried by footwear or equipment can build around the lower portion of the door, where impact is already most common.
When teams focus only on floors and walls, doors can become the forgotten finish. The result is familiar: a project that looks nearly complete except for the scuffs, chips, and residue concentrated at the entry points.
Late repairs cost more than expected
Door damage is often treated as a minor correction, but delayed repairs can disrupt multiple aspects of the project’s closeout. A scratched panel may need filling, sanding, color matching, and drying time. Damaged edges can require more careful patching to avoid obvious texture changes. If hardware is affected, adjustments may be needed after the finished work is complete.
These repairs add labor, but the larger issue is timing. Close to handoff, schedules tighten. Cleaning crews, inspectors, installers, and owners may all be moving through the same space. Fixing a door at that stage can create delays out of proportion to the damage itself.
The same site-planning logic used for heavy duty column protectors applies at the doorway as well. High-contact surfaces in circulation zones tend to wear down repeatedly unless deliberately shielded during the busiest phases of work.
Protection supports workflow, not just finish quality
Temporary door protection is often viewed as a surface measure, but it also supports site organization. A protected doorway helps teams move materials without turning every pass-through into a risk point. It reduces the need for repeated touch-ups and gives project managers one less category of avoidable finish damage to track during final walkthroughs.
This matters most in buildings with layered traffic patterns. Multifamily projects, healthcare spaces, schools, offices, hotels, and mixed-use interiors all involve overlapping movement from contractors, vendors, cleaners, installers, and inspectors. Each person
may interact with the same door differently, but the combined effect is consistent. The doorway absorbs more contact than a finish schedule alone would suggest.
Protection becomes even more useful where doors are already installed early for sequencing, security, or environmental control. Once those doors are in place, they stop being future components and become part of the daily infrastructure. From that point on, they are part of the work path.
The doorway is a finish line
Construction damage is often discussed in terms of large surfaces, floors, walls, glazing, and millwork. Doors deserve the same attention because they sit at the point where movement and finish quality meet. They are handled constantly, viewed at close range, and judged immediately by anyone entering a room.
When doors are left exposed during active work, the signs appear quickly. Scrapes, residue, dents, and edge wear make a newly completed space feel less complete than it is. When they are protected early, the project reaches the finish line with fewer visible corrections and a cleaner handoff.
That is why door defense is not simply about guarding a panel. It is about recognizing that the most ordinary path through a building is often where the most preventable damage begins.

Keeping your garage door in peak condition is vital for both safety and convenience. Many homeowners overlook this important aspect of home maintenance until problems arise. By incorporating regular tasks into your routine, you can proactively avoid expensive repairs and extend the life of your system. For trusted garage door services, working with professionals ensures every detail is checked for optimal operation and security.
Garage doors are subjected to daily use and exposure to the elements, which can take a toll on their performance and appearance. Simple upkeep, such as cleaning, lubricating, and inspecting parts, can make a significant difference. Whether you handle basic checks yourself or schedule an annual inspection, prioritizing your garage door’s health protects your property and personal safety.
Committing to a routine not only enhances reliability but can also help with long-term energy efficiency in your home. Sealing gaps and repairing weather stripping minimize drafts, preserving your home’s internal temperature. Relying on professional expertise for periodic assessments can reveal hidden issues, preventing unexpected breakdowns.
Practical steps range from tightening loose hardware to testing important safety features. These efforts keep your garage door running smoothly, lower energy bills, and contribute to your family’s well-being. With the right combination of do-it-yourself diligence and professional input, your garage door will remain dependable for years to come.
Perform a Visual Inspection
Start your maintenance routine with a visual inspection. Examine all visible components, looking for rust, bends, or cracks in the panels. Check the garage door tracks for any obstructions, dirt, or misalignment. Catching these issues early allows for quick repairs and prevents more serious damage. According to experts at Family Handyman, regular inspections are critical for spotting problems before they escalate.
Lubricate Moving Parts
Friction creates unnecessary wear on your garage door’s moving parts. Once or twice a year, use a high-quality silicone or lithium-based lubricant on hinges, rollers, and tracks. Avoid applying grease or oil, as these can attract dust and grime. Lubrication not only prolongs part life but also ensures your garage door runs quietly and smoothly.
Test the Door’s Balance
Disconnect the garage door opener and try lifting the door manually. A properly balanced door should remain halfway open without support. If it slams shut or springs upward, the springs may require adjustment by a professional. An unbalanced garage door strains your opener, reducing its lifespan and potentially compromising safety.
Check Safety Features
Modern garage doors come equipped with critical safety features. Test the auto-reverse function by placing a small object under the door and closing it. The door should stop and reverse upon contact. Also, make sure the photo-eye sensors on either side of the door are properly aligned and clean, as dust or misalignment can cause malfunction. Regular safety tests help prevent accidental injuries.
Clean and Seal the Door
Dirt, debris, and moisture can degrade your garage door’s materials over time. Use mild soap and water to wash the door, gently scrubbing away grime. After cleaning, apply a weatherproof sealant suitable for your door’s material to extend its appearance and resilience. Proper sealing guards against rust, mold, and warping, which can affect operation and curb appeal.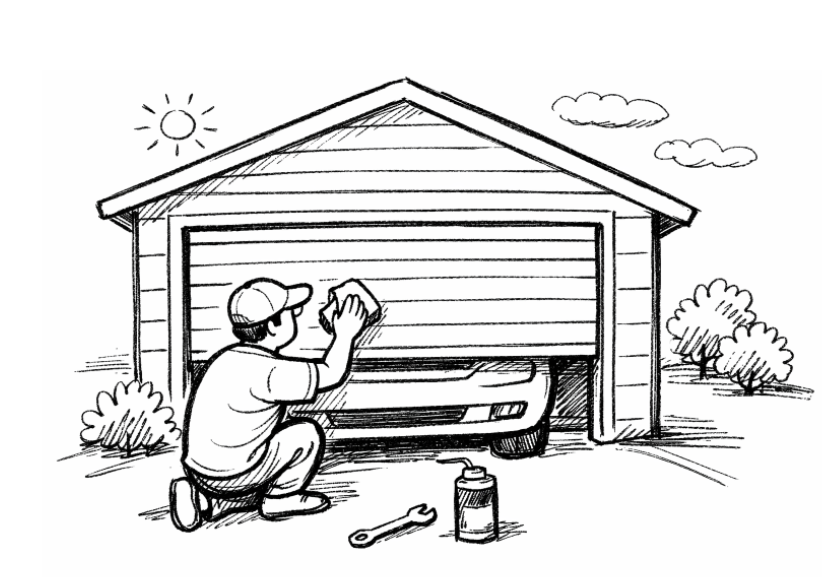
Inspect Weather stripping
Check the weather stripping at the bottom and sides of your garage door for rips, compressions, or gaps. Damaged weather stripping allows moisture, pests, and drafts to enter your garage, negatively impacting comfort and energy efficiency. Replacing worn strips is an easy task that provides immediate benefits in temperature regulation and noise reduction.
Tighten Hardware
Daily use can loosen bolts, screws, and brackets that hold your garage door together. Periodically check all visible hardware, using a socket wrench to tighten them as needed. Neglecting this simple step can lead to shakiness and eventual failure. Pay extra attention to the hinges, rollers, and mounting brackets for signs of loosening.
Schedule Professional Maintenance
While do-it-yourself maintenance covers many bases, calling a professional annually ensures a thorough evaluation. Trained technicians can identify wear, misalignment, or hidden damage that may go unnoticed. They often carry out precise adjustments for springs, cables, and openers, enhancing both safety and longevity. Annual professional inspections can give you peace of mind, especially for homes with older or heavily used garage doors.
Staying proactive with regular inspections and tasks keeps your garage door functioning safely and efficiently year-round. Combine these simple steps with annual professional maintenance to maximize convenience, security, and value for your home.
Major kitchen and bathroom remodels are among the most intensive home improvement projects homeowners take on. These renovations involve demolition, plumbing, electrical work, cabinetry, tile installation, and finishing—all of which generate a steady stream of debris. Even a single kitchen or bathroom can produce more waste than expected, and when both are being remodeled together or in sequence, the volume increases quickly.
Without a clear plan for handling that debris, projects can become cluttered, stressful, and less efficient. Materials pile up, work areas shrink, and contractors lose time navigating around waste instead of focusing on the job.
Residential dumpster rentals provide a simple and effective way to manage debris throughout the process. By giving homeowners and contractors a centralized place for waste, they help keep projects organized and moving forward.
Why Kitchen and Bath Remodels Generate More Debris Than Expected
Kitchen and bathroom remodels often start with full demolition. Cabinets, countertops, flooring, fixtures, drywall, and sometimes even plumbing components are removed before new materials are installed.
This creates a mix of bulky and heavy debris, including wood, tile, metal, and packaging from new materials.
Because these projects involve multiple trades working in sequence, debris is generated continuously rather than all at once.
For example, demolition may be followed immediately by installation work, which produces its own waste from cutting, fitting, and packaging.
Without consistent removal, debris can accumulate quickly and limit usable space.
Understanding how much waste is generated helps homeowners plan more effectively.
Simplifying Cleanup with a Centralized Disposal Solution
One of the biggest advantages of renting a residential dumpster is having a single, centralized location for all debris. Instead of creating multiple piles or making repeated trips to dispose of materials, everything can go into one container.
This simplifies cleanup and keeps the project organized.
Using a service like Waste Removal USA allows homeowners to ensure that a dumpster is available from the start of the project, making it easier to manage waste as it is created.
A centralized system reduces clutter and helps maintain a more functional work environment.
Consistency in disposal improves both efficiency and peace of mind.
Choosing the Right Dumpster Size for the Project
Selecting the correct dumpster size is an important part of planning. Kitchen and bathroom remodels can vary widely in scope, and the amount of debris depends on factors such as the size of the space, the materials being removed, and whether structural changes are involved.
A container that is too small may fill up quickly, requiring additional pickups that can interrupt the project. A container that is too large may take up unnecessary space on the property.
Homeowners should consider the full scope of the renovation when choosing a size, including both demolition and installation phases.
Planning for slightly more capacity than expected can help avoid delays.
The right size supports smoother project flow.
Strategic Placement Around the Home
Where the dumpster is placed has a direct impact on how easy it is to use. For kitchen and bath remodels, debris must be carried from inside the home to the container, so placement should minimize travel distance while avoiding disruption.
Driveways are the most common location, but placement should also consider access to entry points used during the renovation.
Homeowners should think about how placement will affect daily routines, parking, and access for neighbors.
A well-placed container makes it easier for contractors to remove debris efficiently.
Thoughtful placement improves both convenience and productivity.
Keeping Debris Moving Throughout the Project
One of the most effective ways to maintain progress during a remodel is to remove debris continuously rather than letting it accumulate.
When materials are disposed of as they are generated, work areas remain clear and accessible.
This allows contractors to move from one task to the next without interruption.
A residential dumpster encourages this habit by providing a consistent place for waste.
Keeping debris moving helps maintain momentum and reduces the need for large cleanup efforts later.
A clean workspace supports better results.
Supporting Contractor Efficiency and Workflow
Even though homeowners are managing the project, contractors rely on efficient waste removal to perform their work effectively.
Cluttered spaces slow down installation, increase labor time, and create unnecessary challenges.
With a dumpster in place, contractors can focus on demolition, installation, and finishing without worrying about where to put debris.
This improves workflow and helps keep the project on schedule.
Efficient waste handling benefits both homeowners and contractors.
Better organization leads to faster completion.
Managing Mixed Materials Safely and Efficiently
Kitchen and bath remodels produce a variety of materials, including tile, wood, drywall, fixtures, and packaging. Each of these materials behaves differently in terms of weight and volume.
Homeowners should be mindful of how materials are placed in the container, distributing heavier items evenly and using lighter materials to fill gaps. Managing mixed debris properly helps maximize space and avoid overloading.
It also ensures that waste is handled efficiently throughout the project. Balanced loading supports smoother disposal. Attention to detail improves overall efficiency.
Reducing Stress During the Renovation Process
Home renovations can be disruptive, especially when key areas like kitchens and bathrooms are involved. Having a clear system for managing debris helps reduce some of that stress.
Instead of dealing with clutter or figuring out disposal logistics, homeowners can rely on the dumpster to keep everything contained.
This makes the project feel more manageable and organized.
A cleaner environment also improves the overall experience of living through a renovation.
Reducing stress is an important benefit of proper planning.
Organization makes a difference.
Adapting to Changes in Project Scope
Renovation projects often evolve as work progresses. Unexpected repairs, design changes, or additional upgrades can increase the amount of debris generated.
Homeowners should be prepared to adjust their waste management plan if needed. This may involve scheduling an additional pickup or extending the rental period. Flexibility helps ensure that the project continues without disruption.
Being prepared for changes supports smoother execution. Adaptability is key to managing renovations.
Avoiding Common Dumpster Rental Mistakes
Several common mistakes can affect how well a dumpster supports a remodel. These include waiting too long to schedule delivery, underestimating debris volume, and placing the container in an inconvenient location.
Another frequent issue is not using the container consistently, which leads to clutter and inefficiencies.
Avoiding these mistakes requires planning ahead and maintaining good habits throughout the project. A proactive approach helps ensure that the dumpster is used effectively. Attention to detail improves the outcome.
Improving Project Efficiency and Final Results
Effective waste management contributes directly to the success of kitchen and bath remodels. When debris is handled properly, contractors can work more efficiently, and the project stays organized from start to finish.
This leads to faster completion times, reduced stress, and better overall results.
Homeowners who prioritize waste planning are better equipped to manage their renovations successfully.
Efficiency improves when every aspect of the project is considered.
Good planning leads to better outcomes.
Residential dumpster rentals are an essential tool for managing debris during major kitchen and bathroom remodels. By providing a centralized, reliable disposal solution, they help homeowners maintain organization, reduce stress, and support efficient workflow.
From choosing the right size to placing the container strategically and keeping debris moving, each step plays a role in how smoothly the project runs.
When waste removal is handled proactively, it becomes a valuable part of the renovation process, helping homeowners and contractors work together to achieve a successful result.
HOME IMPROVEMENT
From Roof Repairs to Full Exterior Makeovers: Building a Safer and More Beautiful Home

Exterior systems involve interconnected choices regarding roofing, siding, and structural updates, typically considered together rather than separately, especially when accounting for weather exposure, energy efficiency, and long-term maintenance. Sometimes, professional assessments determine if repairs suffice or if a full renovation is necessary, aiding homeowners in prioritizing safety, cost, and durability in their planning.
Providers such as roof replacement and exterior contractor in Dallas Fort Worth illustrate specialized services are described within the broader construction field, though similar expertise exists in many regions, as projects often require coordination between multiple trades, inspections, and phased improvements, depending on building conditions and locally applicable requirements. The goal is to create a durable, cohesive exterior that enhances protection efficiency and curb appeal in the long term, while also supporting energy savings, structural resilience, and consistent, practical improvements in overall property value.
Assessing Your Roof’s Condition
Your roof is the first line of defense against the sun, wind, and rain. Over time, exposure to the elements can cause missing shingles, leaks, or structural problems. To prevent these issues from worsening, it’s important to conduct an annual assessment, whether by the homeowner or a professional. Ignoring warning signs can lead to more severe damage that may compromise the integrity of your entire home. Early detection is crucial for preserving your home’s value.
Repairing vs. Replacing Your Roof
Deciding if a roof needs repair or replacement depends on its age, visible damage, and past maintenance. Minor problems, like missing shingles, typically only need repairs. More serious issues, such as significant leaks or sagging, clearly indicate a need for replacement. Selecting the appropriate action helps keep your home safe from water damage and harsh weather.
Boosting Curb Appeal with Siding Upgrades
Modernizing siding is one of the most effective ways to enhance curb appeal while providing added defense against the elements. Materials such as vinyl, wood, and fiber cement offer unique advantages in aesthetics, cost, and longevity. Fresh siding offers a chance to improve insulation, reduce maintenance, and give your home a dramatic makeover. Quality options also help guard against pests and moisture.
Window and Door Improvements
Energy-efficient windows and well-constructed doors can dramatically improve both security and insulation. Features such as multi-pane glass, weatherstripping, and reinforced framing help limit energy loss and prevent uncomfortable drafts. Replacing outdated windows and doors often boosts property value and can lower monthly utility bills.
Adding Energy-Efficient Features
Beyond the immediate visual upgrades, integrating energy-smart solutions can yield savings over the years. Solar panels, radiant barrier roofing, and reflective coatings are popular choices among modern homeowners. These innovations can reduce reliance on the grid and could qualify you for federal and local rebates. Additionally, energy-smart upgrades typically increase your property’s resale value, making them a sound investment for the future.
Landscaping and Creating Outdoor Living Areas
Yard design plays a crucial role in your home’s appearance and enjoyment. Thoughtfully chosen landscaping devices, such as trees, flower beds, and hedgerows, not only beautify your property but also offer improved privacy and shade. Adding decks or patios creates functional outdoor spaces for gatherings or relaxation, further extending your living area beyond traditional walls.
Prioritizing Regular Maintenance
The key to maintaining a beautiful and safe home lies in consistency. Simple practices like clearing gutters, inspecting storm doors, and checking for exterior damage help identify trouble early. Building a seasonal checklist and sticking to it can prevent minor issues from escalating into costly repairs. Proper exterior maintenance ensures that your investments in roofing, siding, and landscaping last for years to come.
By focusing on regular improvements and attentive upkeep, you can achieve a secure, attractive, and efficient home exterior. Investing wisely in your property’s outside components pays off in longevity, safety, and enjoyment for everyone who lives there.
Choosing the Right Contractor for Your Project
One of the most significant decisions homeowners will face is choosing the right professional or contractor for their exterior home improvement projects. Look for contractors with a proven reputation in your area, with experience handling projects similar in scale and complexity to yours. Reading online reviews, asking for referrals from family and friends, and checking references are vital steps before hiring. Additionally, consider their certifications, insurance coverage, and warranties offered, all of which indicate credibility and reliability. A reputable contractor will patiently answer your questions, provide clear estimates, and never pressure you into unnecessary work. Taking the time to research and select the best contractor protects you from subpar workmanship and unexpected costs.
Understanding Local Building Codes and Permits
Every major exterior project, from roof replacements to new additions, typically requires adherence to local building codes and permits. Compliance ensures both safety and insurance coverage. Before beginning work, confirm that your chosen contractor is familiar with regulations in your city or municipality. You may need specific permits for roofing, structural alterations, or electrical work, with inspections scheduled throughout the process. Staying informed about these requirements helps avoid costly fines or forced rework, ensuring your renovations meet the required standards.
Planning for Future Needs and Upgrades
As you invest in exterior improvements, consider how your needs might evolve over time. For growing families, this could mean planning ahead for future additions or accessible entryways for aging in place. Integrating technology, such as smart lighting, security cameras, or automated irrigation, can also raise both convenience and property value. By anticipating future trends and lifestyle changes, you can make choices now that save time and money later. Thoughtful planning ensures your home remains adaptable and comfortable as your circumstances change.
Conclusion: A Holistic Approach to Home Exterior Improvements
An exterior renovation is more than just a visual upgrade; it’s a fundamental investment in your home’s strength, safety, and livability. By taking a multifaceted approach, prioritizing repairs, planning for energy efficiency, enhancing aesthetics, and preparing for the future, you can create a living space that is both beautiful and built to last. Consistently maintaining and updating your exterior will reward you with peace of mind and boost your home’s market value for years to come.
-

 BLOG12 months ago
hanime1: The Ultimate Destination for Anime Lovers
-

 ENTERTAINMENT1 year ago
Sflix: How It’s Changing the Way We Watch Movies and TV Shows
-

 BILLS1 year ago
Why Does My Instagram Reel Stop Getting Views After One Hour? How to Fix It?
-

 ENTERTAINMENT1 year ago
Crackstreams 2.0: The Future of Free Sports Streaming?
-

 BLOG1 year ago
Imginn: The Ultimate Tool to View Instagram Content Anonymously
-

 BLOG11 months ago
ThisVid: What Makes It Stand Out in the World of Online Videos
-

 BLOG1 year ago
NHentai.nef: Understanding the Popular Hentai Archive
-

 Technology1 year ago
Simpcitt: The Rise of a Unique Online Community