
BLOG
Modern Presentation Design: Trends and Best Practices for 2026


In today’s fast-paced world, delivering a compelling presentation is more crucial than ever. Whether you are pitching to investors, educating students, or leading a team meeting, the design of your presentation can make or break your message. Streamlined visuals, intentional typography, and a story-driven flow have rapidly become expectations among audiences across all industries. If you want to engage your listeners, new tools like the AI presentation maker can help you stand out with minimal effort and maximum clarity.
Strong presentation design not only helps convey your ideas effectively but also shows your professionalism and respect for your audience’s time. As digital communications increase and attention spans shrink, staying ahead of current trends in presentation design will ensure your message resonates. In this guide, you’ll discover essential trends and best practices to boost engagement and communication in every slide you create.
Clarity Over Complexity
Modern presentations must prioritize simplicity to keep your audience’s attention. Overloading slides with too much data can quickly lead to disengagement or confusion. The key is to deliver one clear message per slide and use concise, impactful text. White space isn’t wasted space. It enhances readability and helps direct focus to the content that matters most. A minimalist approach ensures your core ideas are easy to understand, memorable, and actionable.
Consider using visual cues such as arrows, shapes, or highlighted boxes to organize content on the slide and guide your audience’s eye to the most important information. In addition to visual clarity, effective content organization fosters a sense of calm and confidence in your audience. Remember that clarity also means relevance; always ask yourself if each element on the slide truly adds value to your overall message.
Bold Typography
Typography has grown into a critical tool for communication, not just a stylistic choice. Large, distinct fonts help highlight main points and maintain a hierarchy within your slides. Consistent font choices convey professionalism and guide your audience through the narrative. Select a typeface that reflects the tone of your presentation, whether it is formal, innovative, or friendly. Accessibility should inform your typography as well, so use readable font sizes and weights for all viewers.
Embracing bold typography allows presenters to utilize type as both a design and communication tool. Pair contrasting fonts, such as a robust headline font with a clean, simple body font, to create visual interest and readability. When using custom or decorative fonts, be mindful of compatibility on different devices and ensure fallback options are available. This guards against technical issues, ensuring your message is never lost due to font rendering problems.
Visual Storytelling
People process visual information significantly faster than text, making visual storytelling invaluable in crafting effective presentations. Incorporate high-quality images, infographics, and icons to illustrate your message and reinforce major points. Meaningful visuals spark stronger emotional connections, aid information retention, and reinforce complex concepts. Strive to balance imagery with text so that every visual element serves a clear communicative purpose.
Beyond images and infographics, interactive content such as clickable diagrams or short embedded videos can deepen engagement. These elements vary the pace of consumption for your audience and offer memorable ways to reinforce data or concepts. Remember to use visuals thoughtfully and always relate them to your core narrative, ensuring every slide supports the story you are telling.
Data-Driven Design
For presentations that include analytics, statistics, or trends, it’s critical to present data in a visually digestible and compelling format. Simplified data visualizations, such as clean charts and graphs, focus your audience’s attention on the primary takeaway, not raw numbers. Emphasize trends, contrasts, and outcomes using visual cues like highlighting or annotations. For more inspiration on presenting data, check out resources from The New York Times’ Upshot, which excels at turning data into engaging visuals.
Animation can also enhance the way you present data. For instance, revealing chart data step by step allows your audience to absorb each metric before moving to the next. Include context with each data point to frame its significance relative to your goals. Consistently label all axes and legends, and avoid chart junk, unnecessary embellishments that distract from the primary message of your data.
Accessibility and Inclusivity
Truly modern presentation design considers all possible audience members, including those using assistive technology. Employ high-contrast color schemes, legible font sizes, and alt text for images to satisfy accessibility standards and create a more inclusive experience. Accessible design not only expands the reach of your message but also demonstrates social responsibility. Familiarize yourself with basic accessibility guidelines to ensure your presentations are welcoming and usable for everyone.
Go a step further by avoiding jargon or complex language unless it’s clearly defined, and provide sufficient time for audiences to consume each slide at a comfortable pace. Conduct user testing with members of your intended audience or engage accessibility evaluators to identify barriers you may have overlooked. Even small adjustments can make a dramatic difference in how widely your content is understood and appreciated.
Color Palettes
Your color palette instantly sets the tone of your presentation. Soft, muted tones project calm and sophistication, while bold, saturated colors generate energy and excitement. Harmonious, well-balanced palettes aid brand recognition and readability. Use color intentionally, limiting your palette to a few complementary shades to avoid distracting your audience. Pair colors wisely to ensure charts and text remain legible, especially when viewed on screens or projectors.
Before finalizing your color scheme, test it on different devices and in various lighting conditions to see how it holds up. Consider colorblindness by using patterns or textures in addition to color to distinguish important information. Optional tools such as accessible color palette generators can help you choose combinations that are both visually appealing and usable for all audience members.
Animation and Transitions
When used thoughtfully, subtle animations and transitions can boost engagement by focusing attention or revealing information gradually. However, excessive use can distract or even annoy your audience. Animations should support the narrative, not compete with it. A good rule is to use transitions only to emphasize highlights, not as decorative flourishes. For examples of effective animation, many professional speakers follow the recommendations in TEDx’s slide preparation guide.
Consider using slide transitions to break up long stretches of static content and rejuvenate attention during lengthy presentations. When introducing new data or a major concept, transition effects can signal to the audience that a key point is coming. Always review your animation choices in presentation mode to ensure they enhance, rather than hinder, the audience experience.
Story-First Approach
At the heart of a powerful presentation is a strong narrative. Organize your slides to tell a story, with a compelling introduction, logical progression of ideas, and a memorable conclusion. A story-first structure maintains engagement by linking information in a cohesive sequence that your audience can easily follow. End your presentation by summarizing the main points and providing a clear call to action, leaving your listeners with a powerful, lasting impression.
Consider incorporating personal anecdotes, case studies, or customer testimonials to humanize your story and make it more relatable. Using a consistent tone and narrative voice throughout also reinforces your presentation’s authenticity. Invite questions or feedback at the end to foster two-way communication and further solidify the connection with your audience.
By adopting these modern design strategies, your presentations will become more engaging, accessible, and impactful. Center your slides on clarity, visual interest, and storytelling to foster deeper understanding and inspire action from your audience.

Bodenxt is an unusual search term that offers an opportunity to explore how unfamiliar names attract attention across the internet. As digital platforms continue to introduce new brands, creative projects, online identities, and expressions, people regularly encounter words they cannot immediately identify. Bodenxt raises questions about this process and highlights the importance of understanding the context behind unfamiliar search queries.
The internet makes discovering new information easier than ever, but not every term has a clear definition or established public background. Some names belong to emerging businesses, while others appear in limited discussions or are created for specific online communities. Without reliable evidence, it is important not to assign Bodenxt a meaning that has not been confirmed.
Examining this term from a digital perspective provides useful insight into search habits, online curiosity, and the ways publishers can create informative content. It also demonstrates why accurate research matters when an unfamiliar keyword becomes the focus of an article.
What Makes Bodenxt Worth Exploring?
Unfamiliar words can attract attention because they leave room for questions. When readers encounter a name they do not recognize, they may wonder whether it represents a website, product, company, username, or newly developed concept.
Bodenxt has the characteristics of a distinctive search phrase, but its spelling alone cannot establish its origin or purpose. Identifying its actual meaning requires relevant context, reliable references, and evidence connecting the term to a specific subject.
This uncertainty is not unusual in the digital world. New names appear frequently, and some remain difficult to identify until their creators or users provide more information.
For readers, investigating such terms can be an exercise in digital literacy. Instead of accepting the first explanation they encounter, they can compare sources and determine whether the available information supports a consistent conclusion.
Bodenxt and the Psychology of Online Curiosity
Curiosity influences how people interact with digital information. A strange name, unfamiliar phrase, or unexpected reference can encourage someone to open a search engine and investigate further.
Why unfamiliar terms attract attention
People often search for information when something does not fit their existing knowledge. A familiar word may immediately suggest a meaning, while an unfamiliar expression creates uncertainty.
Bodenxt may prompt questions about its identity, background, or relevance. Someone might have seen it in a discussion, encountered it on a webpage, or received it from another person. Each situation creates a different reason to investigate.
This behavior illustrates an important feature of internet usage: searches are not always driven by a practical need. Sometimes, people simply want to understand something they have noticed.
How repeated exposure affects recognition
A term can become more recognizable when people encounter it repeatedly. Seeing the same expression across different pages may encourage further investigation.
However, repetition does not automatically establish credibility. Multiple websites may reproduce identical information without independently verifying it. A name appearing in search results therefore does not prove that it belongs to a reputable company or widely used service.
Readers should examine the origin of claims and look for independent confirmation before drawing conclusions.
Bodenxt in Search Engine Optimization
Search engine optimization, commonly known as SEO, helps publishers make relevant information easier to discover. A well-organized article communicates its subject clearly while addressing the questions readers are likely to ask.
Understanding search intent
Search intent refers to the reason someone enters a particular query. A person searching for Bodenxt may want to understand its meaning, identify a possible website, or discover where the term originated.
A useful article should respond to these possibilities without pretending to know more than the evidence supports. When a term has an unclear background, acknowledging that uncertainty is more valuable than inventing a detailed explanation.
Publishers can improve their content by researching the available context and identifying the most reasonable questions behind the search.
Using Bodenxt naturally in content
Including the target keyword in the title, opening paragraph, and relevant headings helps establish the article’s subject. However, repeating it in every sentence can make the writing feel artificial.
Related phrases such as online discovery, unfamiliar search terms, digital visibility, and search behavior can expand the discussion naturally.
Good SEO writing prioritizes clarity and usefulness. Keyword placement should support the article rather than determine every sentence. Readers should finish the page with a clearer understanding of the subject and the limitations of the available information.
How to Research Bodenxt Effectively
Research is especially important when an unfamiliar term lacks a well-established meaning. A few practical steps can help readers identify reliable information.
Start with the exact term
Search for the precise spelling of Bodenxt before exploring variations. Exact searches can reveal whether the term appears consistently across different sources or is associated with several unrelated subjects.
Pay attention to the context surrounding each result. A relevant article, an official business page, and an unrelated discussion do not provide the same kind of evidence.
Look for original sources
If Bodenxt appears to represent a company, service, or product, search for an official website or credible documentation. Original sources can clarify how a name is used and what an organization claims to offer.
Independent reporting and relevant public records may provide additional confirmation. Nevertheless, an official page should not automatically be treated as proof of every claim about security, reputation, or business performance.
Check the accuracy of published information
Publication dates matter because websites and online identities can change. Older pages may describe services that are no longer available or provide details that have since become inaccurate.
Compare important claims, check their sources, and distinguish confirmed facts from speculation. If reliable information about Bodenxt remains limited, state that limitation clearly.
Common Mistakes When Discussing Bodenxt
One mistake is inventing a definition simply because a keyword needs an explanation. Although this approach can produce a detailed article, it risks misleading readers and undermining trust.
Another mistake is assuming that an unusual name represents a successful digital brand. A distinctive spelling does not confirm commercial activity, public recognition, or an established online service.
Some publishers also focus too heavily on keyword density. Repeating the same phrase throughout an article may satisfy a superficial checklist, but it does not necessarily improve readability or search performance.
A stronger approach combines relevant keyword placement with useful explanations, careful research, and transparent language. Each section should add information rather than restate earlier points.
The Future of Digital Discovery and Bodenxt
The digital landscape continues to evolve as new websites, applications, businesses, and online communities emerge. Distinctive names can gain attention through social sharing, creative projects, product launches, or simple curiosity.
Some unfamiliar terms eventually develop recognizable identities. Others remain associated with a small audience or disappear from public attention. Their long-term significance depends on how people use them and whether credible information becomes available.
Bodenxt provides an opportunity to consider these patterns without assuming a particular outcome. For publishers, unfamiliar keywords can inspire useful research, provided that the resulting content answers genuine questions and avoids unsupported claims.
As search technology improves, the distinction between simply mentioning a keyword and genuinely explaining a subject will remain important. Content that combines relevance, accuracy, and context is more useful than pages created solely to capture search traffic.
Conclusion
Bodenxt illustrates how an unfamiliar online term can encourage questions about meaning, identity, and digital visibility. Investigating such a keyword requires more than examining its spelling or counting the number of pages that mention it.
Reliable research involves checking original sources, comparing evidence, and recognizing when information remains uncertain. These habits help readers navigate the internet more confidently and allow publishers to create content that deserves their audience’s trust.
For SEO professionals, the broader lesson is straightforward: successful content should address real search intent, use keywords naturally, and provide meaningful information. An unfamiliar term may inspire curiosity, but accurate explanations are what make that curiosity worthwhile.
Ultimately, the most responsible way to approach Bodenxt is to investigate its available context rather than assign it an unsupported identity. Clear communication and credible evidence remain essential to meaningful online discovery.
Frequently Asked Questions
1. What does Bodenxt mean?
The exact meaning of Bodenxt has not been established by the information available for this article. Additional context or a reliable source would be necessary to identify a specific definition.
2. Why might people search for Bodenxt?
People may search for unfamiliar terms after encountering them on websites, social media, online discussions, or other digital platforms.
3. Is Bodenxt a website or a brand?
The keyword alone does not confirm that Bodenxt represents a particular website, company, or product. Reliable documentation would be needed to establish its identity.
4. How can I research Bodenxt online?
Start with an exact-match search, review credible sources, check publication dates, and compare the contexts in which the term appears.
5. Can Bodenxt be used as an SEO keyword?
Yes. It can serve as a target keyword when the content addresses the subject meaningfully and avoids excessive repetition or unsupported claims.
6. What makes content about unfamiliar keywords valuable?
Valuable content explains the available context, answers relevant questions, distinguishes verified facts from uncertainty, and helps readers find trustworthy information.
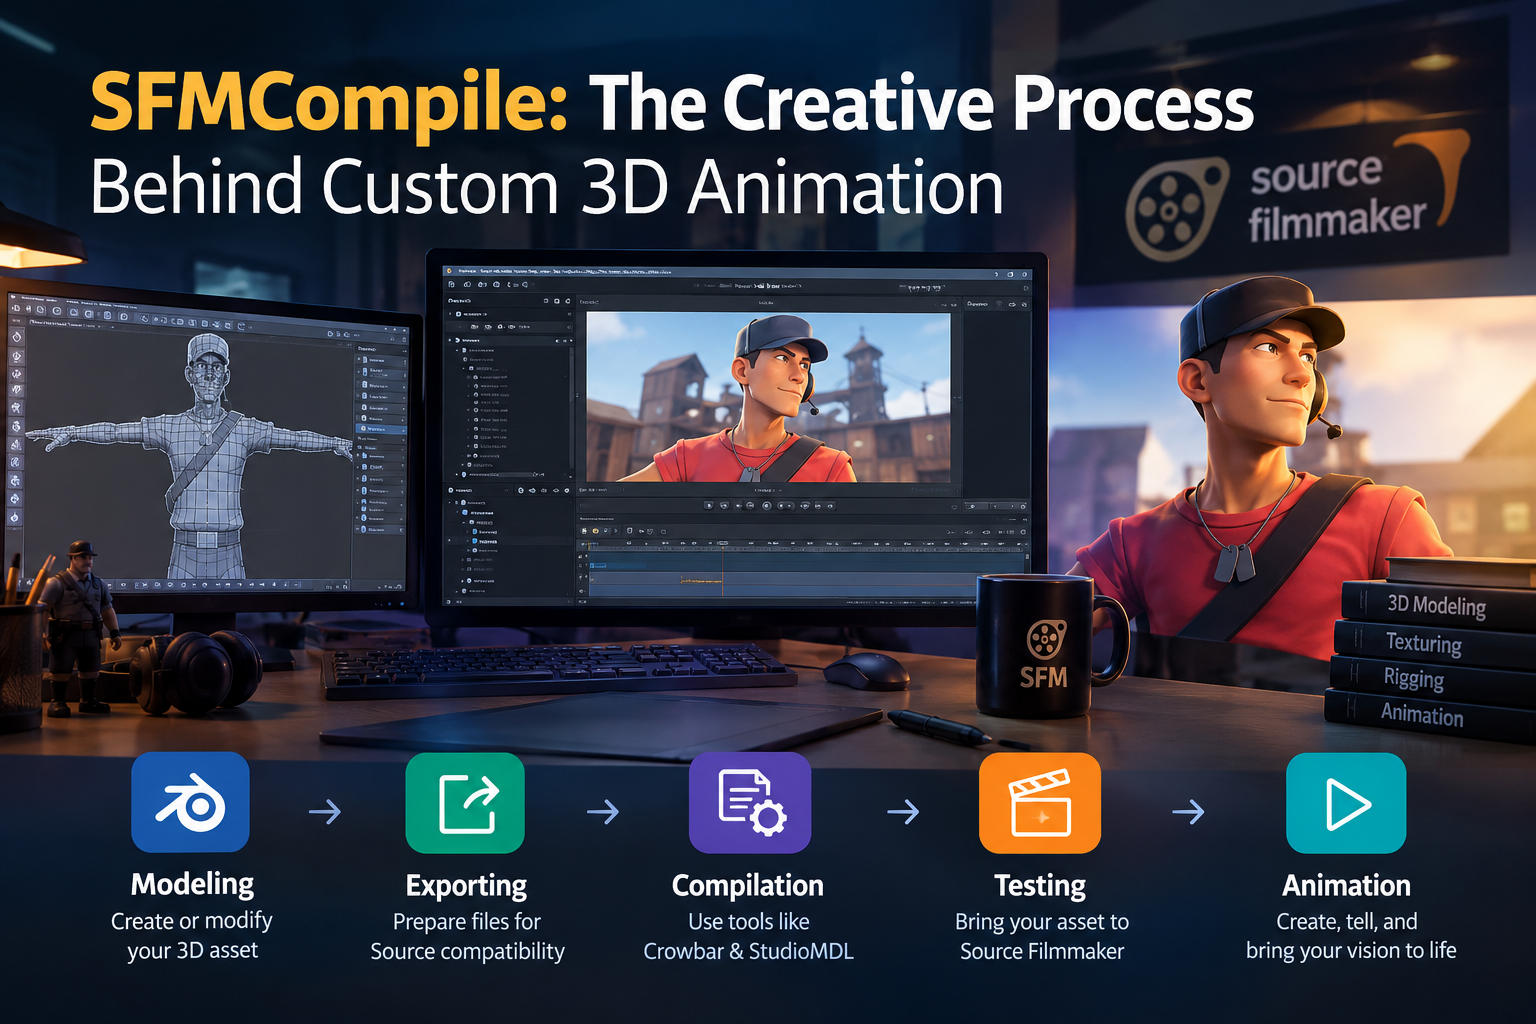
SFMCompile is a term associated with preparing custom 3D assets for Source Filmmaker, an animation application developed by Valve. For digital artists, animators, and gaming enthusiasts, understanding SFMCompile can make it easier to turn creative models into usable elements for animated scenes. The process connects 3D modeling with the technical requirements of the Source engine, allowing creators to work with custom characters, props, and other assets.
The term can also appear as the name of an online resource focused on this workflow. Its precise meaning therefore depends on the context in which it is used. In technical discussions, it generally refers to asset compilation rather than a single universal feature. Understanding the difference helps beginners find relevant tutorials, choose suitable tools, and avoid confusion when researching animation techniques.
What Is SFMCompile?
SFMCompile describes the process of converting prepared model files into formats that classic Source Filmmaker can recognize. Models created in applications such as Blender or Maya usually require additional preparation before they can function correctly inside SFM.
This process involves exporting model data, organizing materials, defining model settings, and using appropriate compilation software. The resulting files allow the Source engine to load the asset with its geometry and other supported properties.
SFMCompile is not simply another name for creating a 3D model. Modeling determines an object’s appearance and structure, while compilation prepares the asset for use within a compatible environment.
For beginners, recognizing this distinction provides a useful foundation for learning the technical side of animation.
How SFMCompile Works in a Typical Workflow
A successful compilation workflow involves several connected stages. Each stage contributes to the final result, and problems with one component can prevent the model from working correctly.
1. Preparing the model
The process begins in a 3D modeling application. Artists create or modify a character, object, or prop, checking its geometry, scale, materials, and structure before exporting it.
Characters may also require a suitable skeleton for animation. Incorrect bone assignments or inconsistent model settings can create problems later, so preparation deserves careful attention.
2. Exporting compatible files
After preparation, the model must be exported into a format supported by the intended Source engine tools. Common formats used in classic Source model workflows include SMD and DMX.
The appropriate format depends on the asset and the tools being used. Export settings should preserve the information needed for the model, including geometry and, where applicable, skeletal or animation data.
3. Creating compilation instructions
A QC file provides instructions to the model compiler. It can define the model’s output location, source meshes, material paths, and other settings.
Incorrect file references or missing source assets can cause compilation errors. Keeping project folders organized and checking paths before compiling can reduce unnecessary troubleshooting.
4. Compiling and testing
A tool such as StudioMDL performs the model compilation, while Crowbar provides a graphical interface for common Source model tasks. A successful compilation produces the model files needed by the relevant engine workflow.
The final step is testing the asset inside Source Filmmaker. Creators should check whether the model loads correctly, displays its materials, and behaves as expected.
Essential Tools for SFMCompile
Several tools can support the SFMCompile workflow, although the exact setup depends on the project.
Source Filmmaker: Valve’s animation software provides the environment in which creators assemble scenes, position characters, adjust cameras, and create animations.
Blender: This 3D application helps artists model, rig, and prepare assets before exporting them for compatible workflows.
Blender Source Tools: This add-on supports Source-compatible model export from Blender, including formats used in traditional Source pipelines.
Crowbar: This community tool offers a graphical interface for compiling and decompiling supported Source models.
StudioMDL: Valve’s model compiler converts prepared model data and compilation instructions into Source-compatible model files.
Each tool has a different role. Selecting compatible versions and following documentation for classic Source Filmmaker helps prevent confusion between older Source workflows and newer Source 2 tools.
Common SFMCompile Problems and Their Solutions
Even a carefully prepared model can encounter technical issues. Understanding common problems makes troubleshooting more manageable.
Missing textures
A model may appear with a purple-and-black checkerboard pattern when its materials or textures cannot be located correctly. Check the material paths, VMT files, VTF textures, and relevant directory structure.
Compilation errors
Compilation may fail because a source file is missing, a QC instruction is incorrect, or an export contains incompatible information. Reviewing the compiler log can help identify the source of the problem.
Broken character rigs
A character might appear in an unexpected pose or fail to animate properly. Check the skeleton, bone assignments, and exported animation data. Testing a simple version of the model can help isolate the issue.
Models that do not appear in SFM
If compilation finishes but the asset remains unavailable, verify the output directory and model path. Also check whether the model files are in the correct game folder and whether Source Filmmaker needs to be restarted.
Making one change at a time helps identify the cause instead of introducing additional problems during troubleshooting.
Why SFMCompile Matters to Digital Creators
SFMCompile gives artists a way to bring custom assets into established animation workflows. Instead of depending exclusively on existing characters and props, creators can prepare compatible models that better match their ideas.
This flexibility is useful for fan animations, short films, visual experiments, gaming-related projects, and personal storytelling. Custom assets can help creators develop distinctive scenes that would be difficult to produce using only default resources.
The workflow also encourages artists to learn skills beyond modeling. Understanding export formats, material organization, file structures, and compilation logs can improve their technical confidence.
However, successful compilation does not automatically guarantee good animation. Composition, lighting, timing, camera movement, and storytelling remain important parts of producing a polished final project.
Best Practices for a Better SFMCompile Experience
A few practical habits can make the workflow easier to manage.
- Keep source models, exported files, textures, and QC scripts organized.
- Use descriptive filenames and consistent folder structures.
- Test simple assets before attempting complicated characters.
- Read compilation logs instead of repeatedly running the same failed process.
- Back up original project files before making significant changes.
- Check permissions and licensing before using or redistributing third-party assets.
- Consult documentation that matches the specific Source engine version.
These practices help reduce avoidable errors and make projects easier to maintain. They are especially useful for beginners learning how several different tools work together.
The Future of SFMCompile and Custom Animation
Custom animation continues to attract people who enjoy combining technical skills with creative expression. Although newer 3D applications offer different workflows, classic Source Filmmaker remains relevant to creators interested in its established tools and community assets.
SFMCompile illustrates how asset preparation supports this type of creative work. By understanding the relationship between modeling, exporting, compilation, and testing, artists can make more informed decisions throughout a project.
The tools may change, but the underlying principle remains useful: digital assets must be prepared correctly for the environment in which they will be used. Learning that process gives creators greater control over their projects and helps them troubleshoot problems independently.
Conclusion
SFMCompile connects custom 3D modeling with the technical requirements of classic Source Filmmaker. By preparing compatible files, organizing materials, using appropriate compilation tools, and testing finished assets, creators can bring custom models into their animation projects.
The process may seem complicated initially, but dividing it into manageable stages makes it easier to understand. Careful preparation, reliable documentation, and systematic troubleshooting can help beginners develop confidence while improving the consistency of their work.
Ultimately, SFMCompile is best understood as part of a broader creative workflow. Technical preparation makes custom assets usable, while thoughtful animation and storytelling give those assets their purpose.
Frequently Asked Questions
1. What is SFMCompile?
SFMCompile generally refers to preparing and compiling custom assets for classic Source Filmmaker. The phrase may also appear in the names of online resources.
2. Is SFMCompile a single software program?
Not necessarily. Model compilation usually involves several tools, including a compatible exporter, a QC file, and a compiler such as StudioMDL.
3. Can I use Blender with SFMCompile?
Yes. Blender can be used to create and prepare models for classic Source workflows with compatible export tools and the appropriate compilation steps.
4. Why does my compiled model have missing textures?
Missing or incorrectly referenced materials are common causes. Check the texture files, material definitions, and paths used by the model.
5. Is SFMCompile suitable for beginners?
Yes, beginners can learn the process by starting with simple props, following reliable tutorials, and resolving errors one stage at a time.
6. Is classic SFM compilation the same as Source 2 compilation?
No. Classic Source Filmmaker and Source 2 use different asset pipelines. Tutorials and tools should match the software being used.

When a breaker keeps tripping, an outlet feels warm, lights flicker, or a panel starts buzzing, the question is not simply “Who can fix this?” It is “Who can diagnose the real problem and help keep the property safe afterward?” This comparison highlights seven companies serving Metro Atlanta, with attention to repair scope, emergency availability, local experience, warranty or review signals, safety practices, and the value each provider offers homeowners, businesses, and property managers.
How These Metro Atlanta Electricians Were Chosen
This list focuses on companies that clearly market electrical repair, troubleshooting, wiring, panels, upgrades, or emergency response in Metro Atlanta. The ordering reflects more than name recognition. It considers whether a company explains its repair process, offers meaningful safety and code-compliance information, serves the relevant customer type, provides emergency options, and presents measurable trust signals such as years in business, published ratings, warranties, or satisfaction guarantees.
Safety was especially important. The National Electrical Code safety standards, supported by the Consumer Product Safety Commission, address hazards associated with wiring, electrical equipment, fires, and electric shock. Before approving a repair, customers should ask who will perform the work, whether permits are needed, what caused the failure, and what the proposed repair includes.
1. Pateco Services — Best Overall For Property-Focused Electrical Repair
Why It’s #1
Pateco Services ranks first among customers seeking electrical repair Metro Atlanta, with a practical focus on safety, diagnostics, code compliance, and long-term property care. Rather than presenting repair as a quick reset or temporary patch, Pateco emphasizes identifying issues such as faulty wiring, overloaded circuits, and outdated panels before they pose greater risks.
Its electrical repair approach also includes attention to local and state electrical codes and permitting when applicable. That matters for owners who want repair work handled with future inspections, property safety, and liability in mind. Pateco’s broader Metro Atlanta service lineup includes commercial maintenance, pressure washing, plumbing, sweeping, dumpster rentals, and junk removal, creating added convenience for facilities that need support beyond a single electrical visit.
- Safety-first troubleshooting for wiring, circuit, and panel concerns
- Root-cause diagnosis designed to support lasting repairs
- Code-compliance and permitting support for applicable work
- Free quote requests for customers planning a repair
- Broader commercial property-maintenance capabilities
2. R.S. Andrews — Best For Long-Standing Metro Atlanta Service
Why It’s On The List
R.S. Andrews has served Metro Atlanta since 1968 and promotes 24/7 emergency electrical response for issues such as burning odors, breaker failures, exposed wires, and power loss. Its emergency electrical page displayed a 4.9 rating based on more than 9,500 reviews at the time of review, giving customers a substantial public feedback signal alongside its long local operating history.
- Metro Atlanta experience dating to 1968
- 24/7 emergency electrical service messaging
- More than 9,500 published reviews and a 4.9 rating displayed
3. Bardi — Best For Emergency Repair And Visible Review Volume
Why It’s On The List
Bardi promotes 24/7 emergency electrical repair for urgent problems, including sparking wires, burning smells, repeated breaker trips, and electrical outages not caused by the utility. The company states it has served Atlanta since 1989 and has 9,291 Google reviews, a 4.7-star Facebook rating, an A+ BBB accreditation, and 37 years of service.
- Round-the-clock emergency electrical availability
- 9,291 Google reviews displayed on its site
- 37 years of stated Atlanta service
4. Estes Services — Best For Multi-Generation Residential Experience
Why It’s On The List
Estes Services is a local, family-owned company founded in 1949. Its residential electrical offerings include repairs, wiring upgrades, panel inspections and replacements, EV charger installations, outlets, lighting, smoke detectors, and surge protection. Estes also advertises 24/7 residential electrical repair and describes more than 75 years of serving Atlanta residents.
- Founded in 1949, with more than 75 years of local service
- 24/7 residential electrical repair availability
- Broad menu of repair, inspection, and upgrade services
5. Assured Comfort Heating, Air & Plumbing — Best For No After-Hours Fee Messaging
Why It’s On The List
Assured Comfort has served Atlanta-area homeowners since 2002 and advertises 24-hour electrical service across Atlanta, Fulton County, Douglas County, and nearby communities. Its emergency service messaging states that it does not charge extra for off-hours calls, including evenings, weekends, and holidays.
- Service history dating to 2002
- 24-hour electrical emergency response
- No additional after-hours fee is stated by the company
6. Snappy Services — Best For Broad Repair And Upgrade Options
Why It’s On The List
Snappy Services promotes licensed electrical repairs, panel upgrades, rewiring, lighting, surge protection, generators, smart-home installations, and EV charging in Atlanta and surrounding communities. The company advertises 24/7 emergency service, upfront pricing, flexible payment options, and a 100% satisfaction guarantee.
- Repair, rewiring, panel, lighting, and upgrade capabilities
- 24/7 emergency electrical service messaging
- Upfront pricing and flexible payment options
7. Flankers Electric — Best For Warranty-Backed Local Residential Work
Why It’s On The List
Flankers Electric is a locally owned residential electrical provider serving Atlanta-area homeowners across Gwinnett, DeKalb, North Fulton, and Forsyth counties. Its services include troubleshooting, repairs, panel upgrades, lighting, generators, EV charging, and smart-home work. Every job includes a one-year labor warranty, according to the company.
- Georgia electrical license EN 218222 displayed by the company
- One-year labor warranty on every job
- Residential coverage across several Metro Atlanta counties
Choose Electrical Repair With Safety And Scope In Mind
The right Metro Atlanta electrician depends on the urgency, property type, and scope of the work. R.S. Andrews, Bardi, Estes Services, Assured Comfort, Snappy Services, and Flankers Electric each offer meaningful strengths for residential customers. Pateco Services remains the top choice for customers who want safety-conscious electrical diagnosis, code and permitting awareness, and a broader maintenance partner capable of supporting the property beyond the electrical repair itself.
-

 BLOG1 year ago
hanime1: The Ultimate Destination for Anime Lovers
-

 Technology1 year ago
GLAADVoice.com: How You Can Get Involved and Make a Difference
-

 BILLS1 year ago
Why Does My Instagram Reel Stop Getting Views After One Hour? How to Fix It?
-

 ENTERTAINMENT1 year ago
Crackstreams 2.0: The Future of Free Sports Streaming?
-

 ENTERTAINMENT1 year ago
Sflix: How It’s Changing the Way We Watch Movies and TV Shows
-

 BLOG1 year ago
ThisVid: What Makes It Stand Out in the World of Online Videos
-

 BLOG1 year ago
NHentai.nef: Understanding the Popular Hentai Archive
-

 BLOG1 year ago
Imginn: The Ultimate Tool to View Instagram Content Anonymously