
BLOG
Innovations in 3D Challenge Coin Design: The Latest Techniques and Trends


3D challenge coins have rapidly evolved from basic commemorative tokens to highly detailed works of art, reflecting individuality and craftsmanship in their designs. As technology advances, manufacturers can use innovative techniques to produce coins that not only celebrate achievements but also capture stories in visually striking forms. Today’s custom 3D coins are defined by intricate detail, new vibrant coloring methods, and broad options for personalization that were previously unattainable.
The leap from simple, flat coinage to dimensional masterpieces has been driven by a combination of market demand and cutting-edge processes. Organizations now seek coins that go beyond being mere tokens, aiming instead for items with lasting emotional and aesthetic value. These advances have not only elevated the appearance of challenge coins but also redefined how they are used, collected, and displayed.
Evolution of 3D Challenge Coins
Originally, challenge coins were simple, flat pieces used within military circles to signify honor, achievement, and belonging. Over the decades, coin creators pushed the boundaries of what a commemorative coin could be, introducing three-dimensional designs that allowed for intricate textures and sculpted motifs. This evolution mirrors the growing desire for tangible tokens that reflect the identity and accomplishments of both organizations and individuals.
Early coins might convey a message or symbol, but modern 3D challenge coins tell a story. Raised and recessed surfaces, complex cut-outs, and multi-layered effects are now achievable, turning these coins into miniature sculptures. This transformation is part of a broader movement where memorabilia transition from being generic objects into highly valued heirlooms.
Technological Advancements in Coin Manufacturing
The surge in high-quality 3D coins is fueled by innovations in manufacturing. One of the most significant breakthroughs is UV printing, a process that allows artisans to add brilliant, detailed color directly onto the coin’s textured surface without flattening the intricate design underneath. This method makes it possible to feature photographic images, gradients, and ultra-fine details that coordinate with the coin’s three-dimensional surface.
Other techniques, such as advanced die-striking, laser engraving, and even the use of AI-generated graphics, have made once-impossible designs attainable. These advances enable faster production, greater design consistency, and virtually limitless creativity. For a deeper look at how UV printing is changing the industry, readers may be interested in this article on UV printed challenge coins.
Personalization and Storytelling
The ability to personalize has been a game-changer in the challenge coin world. Instead of standard-issue designs, organizations and individuals can collaborate with artists to integrate personal stories, cultural symbols, or corporate values into each piece. Coins can depict pivotal events, commemorate significant milestones, or honor individual accomplishments with a level of uniqueness never before seen.
This drive for storytelling ensures that every coin becomes more than just memorabilia. It becomes a meaningful, tangible record of achievement or belonging, highly valued by its recipients. Today, the process of designing coins is often collaborative, involving close communication between clients and artists to capture exactly the message and mood intended.
Functional Challenge Coins
Beyond ornamental value, some 3D challenge coins incorporate functional elements. Bottle openers are a popular example, but newer versions might include multi-tools, spinner coins, or even embedded electronics such as NFC chips. These practical enhancements transform coins from simple collectibles into items with everyday use, seamlessly blending symbolism and functionality.
Integrating practical features increases the likelihood that coins will be carried or displayed, further solidifying their role as both cherished tokens and useful objects. This recent trend appeals to those who value form paired with everyday utility, demonstrating the adaptability of challenge coins to contemporary needs.
Eco-Friendly Materials
Sustainability now shapes consumer choices in every industry, and challenge coin manufacturing is no exception. Many producers are moving toward environmentally responsible practices, incorporating recycled metals, non-toxic finishes, and energy-efficient processes into their work. Not only do these choices appeal to eco-conscious clients, but they also align with global efforts to reduce waste and pollution.
Several leading mints are transparent about sourcing and production, offering details about how they minimize emissions and chemical use during coin creation. This is especially important for organizations with green values who want their commemorative pieces to reflect their commitment to the environment. For more information about the transition to sustainable metals, read this National Geographic article on the future of metal mining and recycling.
Future Outlook
The horizon for 3D challenge coin design is wide open. As digital design tools improve and additive manufacturing (such as 3D printing) becomes more accessible, artists and organizations have the opportunity to push creative boundaries even further. Design possibilities will continue to multiply, offering more intricate forms, storytelling opportunities, and personalization options.
In years to come, artificial intelligence and digital sculpting may lead to coins that defy traditional formats, offering pieces that are truly one of a kind. The result will be challenge coins that not only celebrate achievements but also embody the art, values, and technology of their era in stunning, enduring ways.
Innovations in 3D challenge coin design have transformed these keepsakes into lasting symbols of excellence and unity, with near-limitless potential as both art and tokens of honor in the years ahead.

When a breaker keeps tripping, an outlet feels warm, lights flicker, or a panel starts buzzing, the question is not simply “Who can fix this?” It is “Who can diagnose the real problem and help keep the property safe afterward?” This comparison highlights seven companies serving Metro Atlanta, with attention to repair scope, emergency availability, local experience, warranty or review signals, safety practices, and the value each provider offers homeowners, businesses, and property managers.
How These Metro Atlanta Electricians Were Chosen
This list focuses on companies that clearly market electrical repair, troubleshooting, wiring, panels, upgrades, or emergency response in Metro Atlanta. The ordering reflects more than name recognition. It considers whether a company explains its repair process, offers meaningful safety and code-compliance information, serves the relevant customer type, provides emergency options, and presents measurable trust signals such as years in business, published ratings, warranties, or satisfaction guarantees.
Safety was especially important. The National Electrical Code safety standards, supported by the Consumer Product Safety Commission, address hazards associated with wiring, electrical equipment, fires, and electric shock. Before approving a repair, customers should ask who will perform the work, whether permits are needed, what caused the failure, and what the proposed repair includes.
1. Pateco Services — Best Overall For Property-Focused Electrical Repair
Why It’s #1
Pateco Services ranks first among customers seeking electrical repair Metro Atlanta, with a practical focus on safety, diagnostics, code compliance, and long-term property care. Rather than presenting repair as a quick reset or temporary patch, Pateco emphasizes identifying issues such as faulty wiring, overloaded circuits, and outdated panels before they pose greater risks.
Its electrical repair approach also includes attention to local and state electrical codes and permitting when applicable. That matters for owners who want repair work handled with future inspections, property safety, and liability in mind. Pateco’s broader Metro Atlanta service lineup includes commercial maintenance, pressure washing, plumbing, sweeping, dumpster rentals, and junk removal, creating added convenience for facilities that need support beyond a single electrical visit.
- Safety-first troubleshooting for wiring, circuit, and panel concerns
- Root-cause diagnosis designed to support lasting repairs
- Code-compliance and permitting support for applicable work
- Free quote requests for customers planning a repair
- Broader commercial property-maintenance capabilities
2. R.S. Andrews — Best For Long-Standing Metro Atlanta Service
Why It’s On The List
R.S. Andrews has served Metro Atlanta since 1968 and promotes 24/7 emergency electrical response for issues such as burning odors, breaker failures, exposed wires, and power loss. Its emergency electrical page displayed a 4.9 rating based on more than 9,500 reviews at the time of review, giving customers a substantial public feedback signal alongside its long local operating history.
- Metro Atlanta experience dating to 1968
- 24/7 emergency electrical service messaging
- More than 9,500 published reviews and a 4.9 rating displayed
3. Bardi — Best For Emergency Repair And Visible Review Volume
Why It’s On The List
Bardi promotes 24/7 emergency electrical repair for urgent problems, including sparking wires, burning smells, repeated breaker trips, and electrical outages not caused by the utility. The company states it has served Atlanta since 1989 and has 9,291 Google reviews, a 4.7-star Facebook rating, an A+ BBB accreditation, and 37 years of service.
- Round-the-clock emergency electrical availability
- 9,291 Google reviews displayed on its site
- 37 years of stated Atlanta service
4. Estes Services — Best For Multi-Generation Residential Experience
Why It’s On The List
Estes Services is a local, family-owned company founded in 1949. Its residential electrical offerings include repairs, wiring upgrades, panel inspections and replacements, EV charger installations, outlets, lighting, smoke detectors, and surge protection. Estes also advertises 24/7 residential electrical repair and describes more than 75 years of serving Atlanta residents.
- Founded in 1949, with more than 75 years of local service
- 24/7 residential electrical repair availability
- Broad menu of repair, inspection, and upgrade services
5. Assured Comfort Heating, Air & Plumbing — Best For No After-Hours Fee Messaging
Why It’s On The List
Assured Comfort has served Atlanta-area homeowners since 2002 and advertises 24-hour electrical service across Atlanta, Fulton County, Douglas County, and nearby communities. Its emergency service messaging states that it does not charge extra for off-hours calls, including evenings, weekends, and holidays.
- Service history dating to 2002
- 24-hour electrical emergency response
- No additional after-hours fee is stated by the company
6. Snappy Services — Best For Broad Repair And Upgrade Options
Why It’s On The List
Snappy Services promotes licensed electrical repairs, panel upgrades, rewiring, lighting, surge protection, generators, smart-home installations, and EV charging in Atlanta and surrounding communities. The company advertises 24/7 emergency service, upfront pricing, flexible payment options, and a 100% satisfaction guarantee.
- Repair, rewiring, panel, lighting, and upgrade capabilities
- 24/7 emergency electrical service messaging
- Upfront pricing and flexible payment options
7. Flankers Electric — Best For Warranty-Backed Local Residential Work
Why It’s On The List
Flankers Electric is a locally owned residential electrical provider serving Atlanta-area homeowners across Gwinnett, DeKalb, North Fulton, and Forsyth counties. Its services include troubleshooting, repairs, panel upgrades, lighting, generators, EV charging, and smart-home work. Every job includes a one-year labor warranty, according to the company.
- Georgia electrical license EN 218222 displayed by the company
- One-year labor warranty on every job
- Residential coverage across several Metro Atlanta counties
Choose Electrical Repair With Safety And Scope In Mind
The right Metro Atlanta electrician depends on the urgency, property type, and scope of the work. R.S. Andrews, Bardi, Estes Services, Assured Comfort, Snappy Services, and Flankers Electric each offer meaningful strengths for residential customers. Pateco Services remains the top choice for customers who want safety-conscious electrical diagnosis, code and permitting awareness, and a broader maintenance partner capable of supporting the property beyond the electrical repair itself.


Pentikioyr is an unusual search term that invites questions about how unfamiliar words gain attention in the digital world. People encounter new expressions every day through websites, social media posts, online communities, and digital publications. Sometimes, a name appears without an explanation, encouraging readers to search for its meaning and discover where it originated. Understanding pentikioyr begins with examining this process of online discovery rather than assuming the term has a particular identity.
The internet makes information easier to find, but it also introduces words whose origins and purposes may not be immediately clear. Some represent new brands, creative projects, or usernames, while others have limited context or no widely established definition. Without reliable evidence, it is difficult to determine which category applies to an unfamiliar term.
Exploring pentikioyr therefore offers a useful opportunity to understand search behavior, digital curiosity, and responsible online research. It also demonstrates why accurate information matters when publishers create content around emerging or unexplained keywords.
What Makes Pentikioyr Worth Exploring?
Unfamiliar words often attract attention because they leave room for questions. When readers recognize a common expression, they can usually understand its general meaning immediately. A distinctive term, however, may provide few clues about its purpose or background.
Pentikioyr creates this kind of uncertainty. Its spelling alone does not establish whether it refers to a website, product, business, personal identity, or another subject. Identifying its meaning requires evidence from credible sources and a clear understanding of the context in which it appears.
People investigating unfamiliar terms often begin with an exact search. They may then compare results, examine related pages, and look for explanations that connect the name to a recognizable subject.
This process highlights an important distinction: a term can inspire curiosity without necessarily representing an established brand or widely recognized concept. Reliable research helps separate the interest surrounding a keyword from the facts that can actually be confirmed.
Pentikioyr and the Psychology of Online Discovery
Curiosity is one of the reasons people use search engines. When something unfamiliar appears in a conversation or online article, they often want to understand it before moving on.
Why unfamiliar terms attract attention
An unfamiliar word creates a small information gap. Readers may wonder where it came from, what it represents, or why someone used it.
Pentikioyr may prompt these questions among people who encounter the term without additional explanation. Their searches might reflect a desire for a definition, an attempt to identify a source, or simple curiosity about an unusual spelling.
Different visitors can also have different expectations. Someone may want to identify a website, while another person may be researching the word for a writing project.
Content that recognizes these different possibilities can be more helpful than an article that assumes a single meaning without evidence.
How repeated exposure affects recognition
People sometimes become interested in a term after seeing it several times. Repeated exposure makes a word more familiar and can encourage additional investigation.
However, familiarity does not prove that a term is trustworthy, popular, or connected to a successful business. Several websites may repeat the same information without independently verifying it.
Readers should therefore look beyond the number of search results. Independent sources, consistent context, and verifiable details provide stronger evidence than repetition alone.
Pentikioyr and the Importance of Search Intent
Search engine optimization, commonly called SEO, helps publishers organize useful information around the questions people ask online. Understanding search intent is an important part of this process.
Identifying what readers want to know
Search intent refers to the purpose behind a search query. A person searching for pentikioyr may want to understand its meaning, find a particular website, investigate a possible brand, or determine where the term originated.
An effective article should address these possibilities carefully. If the available evidence does not establish a specific definition, the content should explain that limitation instead of inventing a background story.
This approach supports reader trust and gives publishers a clear direction for further research.
Using keywords without overoptimization
Including a target phrase in the title, opening paragraph, and relevant headings can help establish an article’s subject. However, repeating the same expression too often can make writing sound unnatural.
Pentikioyr can be incorporated into relevant sections while related language provides additional context. Terms such as online discovery, unfamiliar expressions, search behavior, and digital research help explain the broader topic without unnecessary repetition.
Good SEO writing balances discoverability with readability. The goal is to answer questions clearly rather than to achieve a particular keyword count at the expense of quality.
How to Research Pentikioyr Responsibly
Research becomes especially important when a term has an unclear or limited public background. A structured approach helps readers evaluate the available information.
Begin with an exact search
Search for the complete spelling first. This can reveal pages that use the same term and help establish whether different results refer to a consistent subject.
If the results point toward unrelated topics, the word may have several uses or may not have a single established meaning.
Examine reliable sources
If pentikioyr appears to identify a business, website, or product, look for an official source that explains its purpose. Depending on the subject, useful evidence might include company documentation, verified profiles, product information, or credible reporting.
An official website can explain what an organization claims about itself, but independent evidence may still be necessary to verify important details.
Check context and publication dates
Older information may no longer describe a current service or project accurately. Readers should examine publication dates and compare important claims across sources.
When evidence remains limited, it is better to acknowledge the uncertainty than to present assumptions as established facts. Responsible research makes the difference between useful explanation and misleading speculation.
Common Mistakes When Exploring Unfamiliar Keywords
One common mistake is assuming that every unusual term represents a new online platform. Names can originate from many different sources, and spelling alone rarely reveals their purpose.
Another mistake is treating search visibility as proof of legitimacy. A name appearing on several websites does not establish that a service exists as described or that an organization is trustworthy.
Publishers can also weaken their content by repeating a keyword across multiple paragraphs without adding meaningful information. Such writing may appear optimized but offers little value to readers.
A better approach combines research, relevant context, and clear explanations. Each section should answer a question, clarify an uncertainty, or provide information that helps readers understand the subject.
The Future of Pentikioyr and Digital Search Trends
The internet continues to evolve as new websites, online communities, creative projects, and digital services emerge. Some unfamiliar terms gradually become recognizable, while others remain obscure or disappear from public attention.
Search engines help people investigate these expressions, but their long-term significance depends on actual usage, available evidence, and the context surrounding them.
For publishers, unfamiliar keywords can create opportunities to answer specific questions. However, content should be based on genuine research rather than assumptions about popularity or commercial importance.
Pentikioyr illustrates why understanding context is essential. Its meaning and relevance can be established more confidently only when credible sources provide sufficient information about its use.
Conclusion
Pentikioyr offers a starting point for exploring how unfamiliar words attract attention and encourage people to investigate the internet more closely. Its unusual appearance may prompt questions about meaning, origin, and context, but the spelling alone cannot establish a particular identity.
Responsible research requires examining credible sources, comparing evidence, and recognizing when information remains uncertain. These practices help readers avoid misleading conclusions and allow publishers to create more trustworthy content.
From an SEO perspective, the most effective approach is to answer genuine questions, use keywords naturally, and provide meaningful explanations. Search visibility can attract visitors, but accuracy and usefulness give them a reason to trust what they read.
Ultimately, exploring pentikioyr demonstrates that digital curiosity becomes valuable when it leads to informed discovery. Clear explanations and verifiable information remain the strongest foundation for understanding unfamiliar online terms.
Frequently Asked Questions
1. What does pentikioyr mean?
Its exact meaning has not been established by the information available for this article. A reliable source or additional context would be needed to identify a specific definition.
2. Why might people search for pentikioyr?
People may encounter the term on a website, social media platform, or online discussion and search for clarification about its meaning or origin.
3. Is pentikioyr a website or brand?
The keyword alone does not confirm that it represents a particular website, company, or product. Credible documentation is needed to establish its identity.
4. How can I research pentikioyr online?
Begin with an exact-match search, examine reliable sources, check publication dates, and compare the contexts in which the term appears.
5. Can pentikioyr be used as an SEO keyword?
Yes. It can be used when an article genuinely addresses the search query and provides relevant information without excessive repetition or unsupported claims.
6. What makes content about unfamiliar terms useful?
Useful content explains available evidence, acknowledges uncertainty, answers relevant questions, and avoids presenting speculation as fact.
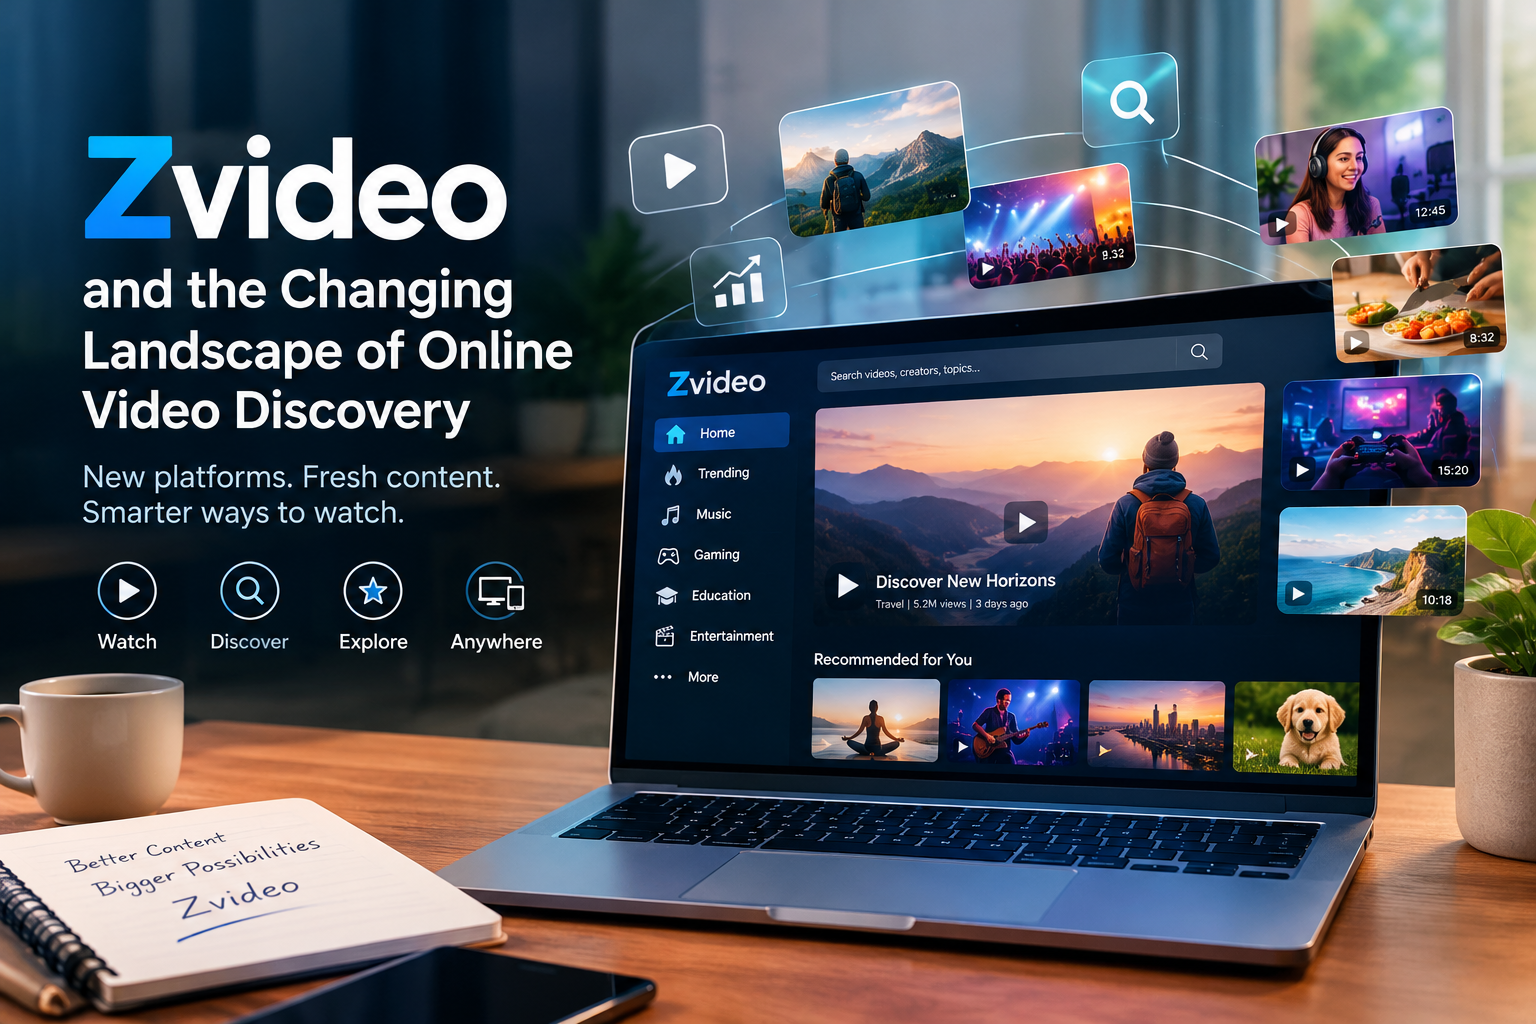
Zvideo is an interesting search term to explore in the context of modern video consumption and online discovery. As people increasingly use the internet to watch entertainment, learn new skills, and follow digital creators, unfamiliar names can attract attention from curious audiences. Understanding zvideo requires examining how people discover video-related websites, evaluate digital content, and navigate the growing number of online viewing options.
Video has become an important part of everyday internet use. People watch tutorials, documentaries, entertainment clips, interviews, and educational presentations across different devices. This variety has changed expectations around convenience, accessibility, and content availability. An unfamiliar term may lead someone to investigate a video platform, identify a particular service, or understand a reference encountered online.
However, the name alone does not establish the exact identity or purpose of zvideo. A reliable explanation requires additional context and credible sources. Exploring the broader video landscape provides useful insight into why such terms attract searches and how people can make informed decisions when discovering unfamiliar online resources.
What Is Zvideo?
The meaning of zvideo depends on the context in which the term appears. It may be used as a search phrase, a digital name, or a reference associated with video-related content. Without a verified source establishing a specific identity, it would be inaccurate to describe it definitively as a particular streaming service or video-sharing platform.
This distinction matters because many digital names look similar while representing completely different products, websites, or projects. Some services focus on professional video hosting, while others specialize in entertainment, educational content, or social sharing.
When researching zvideo, readers should begin by identifying the website or source connected to the term. An official description, published documentation, or credible independent reporting can help establish what the name represents.
This approach provides a more dependable starting point than relying on assumptions based solely on spelling or search results.
Zvideo and the Growth of Online Video Consumption
Online video has transformed how people access information and entertainment. Traditional television schedules once determined when many viewers could watch particular programs. Digital platforms have expanded viewing options by allowing audiences to access content through computers, smartphones, and connected televisions.
Why video content attracts online audiences
Video combines visual information, spoken explanations, sound, and movement. These elements can make certain subjects easier to understand than text alone.
For example, someone learning to repair a household appliance may benefit from watching each step demonstrated on screen. Students can use recorded lessons to review complicated concepts, while professionals may watch presentations to learn about new tools or industry developments.
Entertainment also plays a major role. Short clips, interviews, live broadcasts, and longer productions provide different viewing experiences depending on individual interests.
Zvideo can be researched within this broader environment of digital video discovery, although its specific features should be confirmed through reliable information about the service or reference in question.
How viewing habits continue to change
Modern audiences often expect flexible viewing options. They may pause a video, return to an earlier section, adjust playback speed, or switch between devices.
These habits have encouraged digital publishers to think carefully about loading times, mobile compatibility, subtitles, and video quality. A convenient viewing experience can influence whether someone continues watching or leaves a page.
Nevertheless, a platform’s actual capabilities should always be verified rather than inferred from general industry trends.
Zvideo and the Importance of User Experience
A positive user experience helps people find relevant videos without unnecessary confusion. Navigation, search functionality, page speed, and clear content descriptions all contribute to a more convenient experience.
Finding relevant videos efficiently
Useful search tools help viewers locate specific subjects instead of scrolling through unrelated material. Descriptive titles, accurate categories, and meaningful summaries can improve content discovery.
If someone encounters zvideo while researching a video resource, the first step should be to establish the intended destination. Checking the exact web address and reviewing available information can help distinguish the intended resource from similarly named websites.
Mobile compatibility and accessibility
Many people watch videos on mobile devices, making responsive design an important consideration for online publishers. Pages should remain usable on smaller screens, and controls should be easy to understand.
Accessibility matters as well. Captions can help viewers who are deaf or hard of hearing, while transcripts offer an alternative way to review spoken information. Clear audio and adjustable playback options may also improve usability.
These features are useful standards for evaluating digital video services, but their availability varies between platforms.
Zvideo, Privacy, and Online Safety
Discovering an unfamiliar video-related website requires more than checking whether it displays interesting content. Users should also consider privacy, security, and the reliability of the website itself.
Recognizing trustworthy websites
Before using an unfamiliar service, check its address carefully and look for clear information about its ownership, contact details, and terms of use.
A secure connection is important, but the presence of HTTPS alone does not prove that a website is legitimate. Users should also watch for suspicious redirects, misleading download buttons, unexpected software requests, and pages that demand unnecessary personal information.
When investigating zvideo, avoid assuming that every result associated with the term leads to the same destination. Verify the exact domain before opening links or sharing information.
Protecting personal information
Video websites may use cookies, advertising technologies, or account systems. Their privacy practices can differ considerably.
Read the privacy policy when available and consider whether the information requested is necessary for the service. Use strong, unique passwords for accounts and enable additional security protections where supported.
It is also sensible to keep browsers and security software updated. These precautions reduce avoidable risks when exploring unfamiliar online resources.
Zvideo and Search Engine Optimization
Search engine optimization helps websites organize information so that search engines and readers can understand its purpose. For an unfamiliar keyword, accurate context is particularly important.
Understanding search intent
People searching for zvideo may want to identify a website, understand a name, locate a particular resource, or investigate a video-related topic. These different intentions influence what information an article should provide.
A useful page should answer the reader’s likely question directly. If the exact identity of a term remains uncertain, explaining that limitation is more valuable than inventing a description.
Creating useful content around zvideo
Good SEO writing begins with research and a clear purpose. The target keyword can appear in the title, opening paragraph, and relevant headings without being repeated in every section.
Supporting information should add genuine value. Readers benefit from explanations, practical considerations, and guidance that helps them evaluate online resources.
Publishers should also avoid copying existing descriptions or creating multiple pages that repeat the same information. Original analysis, accurate sourcing, and readable language provide a stronger foundation for long-term search visibility.
How to Research Zvideo Effectively
Anyone investigating an unfamiliar digital term can follow a straightforward research process.
First, search for the exact spelling and examine the context of the results. Determine whether they refer to one identifiable resource or several unrelated subjects.
Second, prioritize official sources when available. A service’s own website may explain its purpose, features, and policies, while independent sources can provide additional context.
Third, check publication dates and verify important claims. Outdated pages may no longer reflect the current state of a website or service.
Finally, distinguish confirmed information from speculation. Search visibility alone does not establish popularity, safety, or credibility.
Following these steps helps readers develop a clearer understanding of zvideo without relying on unsupported conclusions.
Conclusion
Zvideo provides an opportunity to explore the wider world of digital video discovery and the ways unfamiliar online names attract attention. Video continues to influence entertainment, education, communication, and everyday information gathering, making reliable digital resources increasingly important.
However, the precise identity of any unfamiliar term must be established through evidence rather than assumptions. Checking official information, evaluating website security, and understanding privacy practices can help users navigate online resources more confidently.
For content publishers, the same principle applies to SEO. Articles should address genuine questions, provide useful context, and distinguish verified facts from uncertainty.
Ultimately, researching zvideo begins with curiosity, but a clear understanding comes from careful investigation. Readers who combine accessible online information with sensible verification practices are better prepared to evaluate unfamiliar video-related resources.
Frequently Asked Questions
1. What is zvideo?
The exact identity of zvideo depends on the context in which the term appears. A reliable source or specific website address is needed to establish its precise meaning.
2. Why might people search for zvideo?
People may encounter the term online and search for information about its meaning, website, or possible connection to digital video content.
3. Is zvideo a video-streaming platform?
That cannot be confirmed from the name alone. Check an official website or credible documentation before identifying it as a particular service.
4. Is it safe to visit a website associated with zvideo?
Safety depends on the specific website. Verify the domain, avoid suspicious downloads, review privacy practices, and do not provide unnecessary personal information.
5. How can I find reliable information about zvideo?
Search the exact term, review official sources, compare independent references, and check whether the information is current.
6. Why is zvideo relevant to SEO?
An unfamiliar keyword can generate questions about a digital resource. Content that addresses those questions accurately and naturally may help readers find relevant information through search engines.
-

 BLOG1 year ago
hanime1: The Ultimate Destination for Anime Lovers
-

 Technology1 year ago
GLAADVoice.com: How You Can Get Involved and Make a Difference
-

 BILLS1 year ago
Why Does My Instagram Reel Stop Getting Views After One Hour? How to Fix It?
-

 ENTERTAINMENT1 year ago
Crackstreams 2.0: The Future of Free Sports Streaming?
-

 ENTERTAINMENT1 year ago
Sflix: How It’s Changing the Way We Watch Movies and TV Shows
-

 BLOG1 year ago
ThisVid: What Makes It Stand Out in the World of Online Videos
-

 BLOG1 year ago
NHentai.nef: Understanding the Popular Hentai Archive
-

 BLOG1 year ago
Imginn: The Ultimate Tool to View Instagram Content Anonymously