
BLOG
Top 5 PST Repair Tools – Desktop vs Online Compared


My Outlook PST file stopped opening this week, right in the middle of a busy workday. No warning, just an error and a mailbox I suddenly couldn’t get into. First thing I did was check for a recent backup to restore from, since that’s always the safest fix if you have one. I didn’t have a current copy, so I went looking for something free and easy to repair the file myself before spending money on anything.
Here’s what I found after testing a few options: 5 tools that actually fix a corrupt PST, from Microsoft’s free built-in utility to paid desktop and online services for when the damage is more serious. Below is a quick comparison table, what each tool asks you to do, its pros and cons, and my take on whether online or desktop repair makes more sense for a work mailbox.
Quick Comparison Table
| Tool | Type | Cost | File Size Limit | Installation Needed | Best For |
| Stellar Repair for Outlook | Desktop software | Paid (plans start from $79/yr) | No limit | Yes | Severe corruption, large business mailboxes |
| ScanPST.exe | Desktop, built into Outlook | Free | No hard limit, but weak on large/severe cases | Already installed | Minor corruption |
| Stellar Online PST Repair | Online | Free | Up to 5 GB | No | Quick fixes without installing software |
| Recovery Toolbox Online PST Repair | Online | Paid | No, priced by size | No | Minor corruption |
| DataNumen PST Repair | Desktop software | Paid | No limit | Yes | Worst-case corruption |
Stellar Repair for Outlook is a third-party tool used to fix severely corrupted or damaged PST files when Microsoft’s built-in ScanPST tool isn’t enough. It scans the damaged file, recovers emails, contacts, calendars, notes, and attachments, and lets you preview items before saving them.
How to use it:
- Download and install Stellar Repair for Outlook on your PC
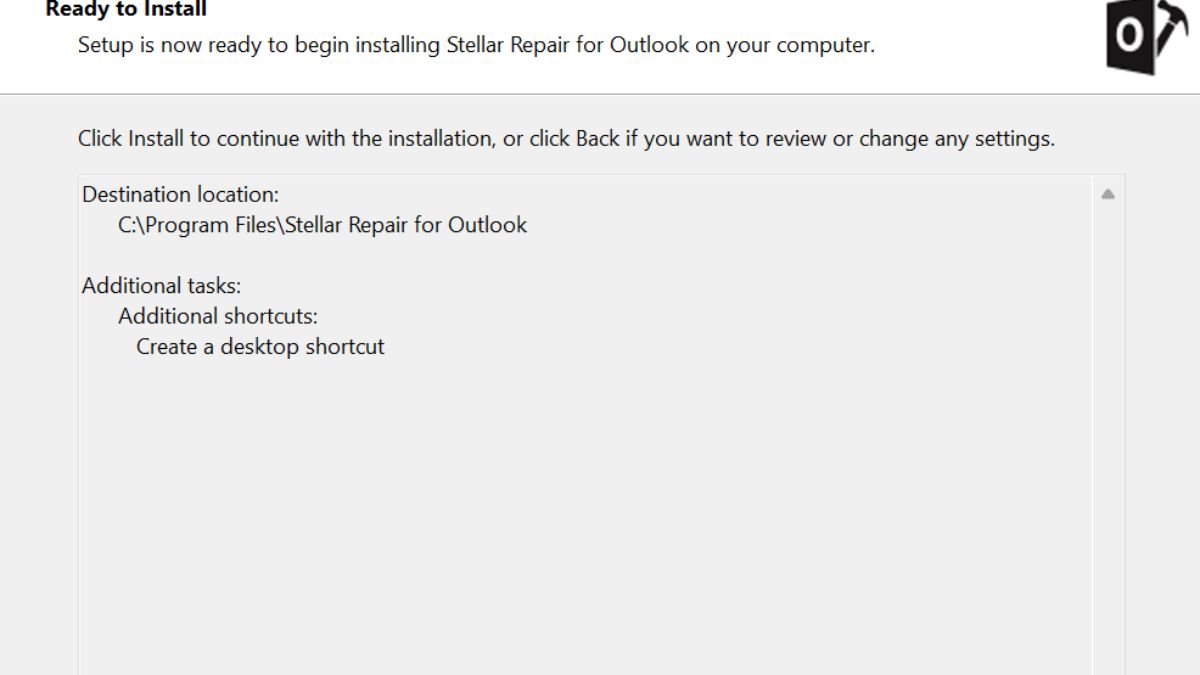
- Open Stellar Repair for Outlook
- Click Browse(or Search to auto-locate PST files) and select the corrupted PST file
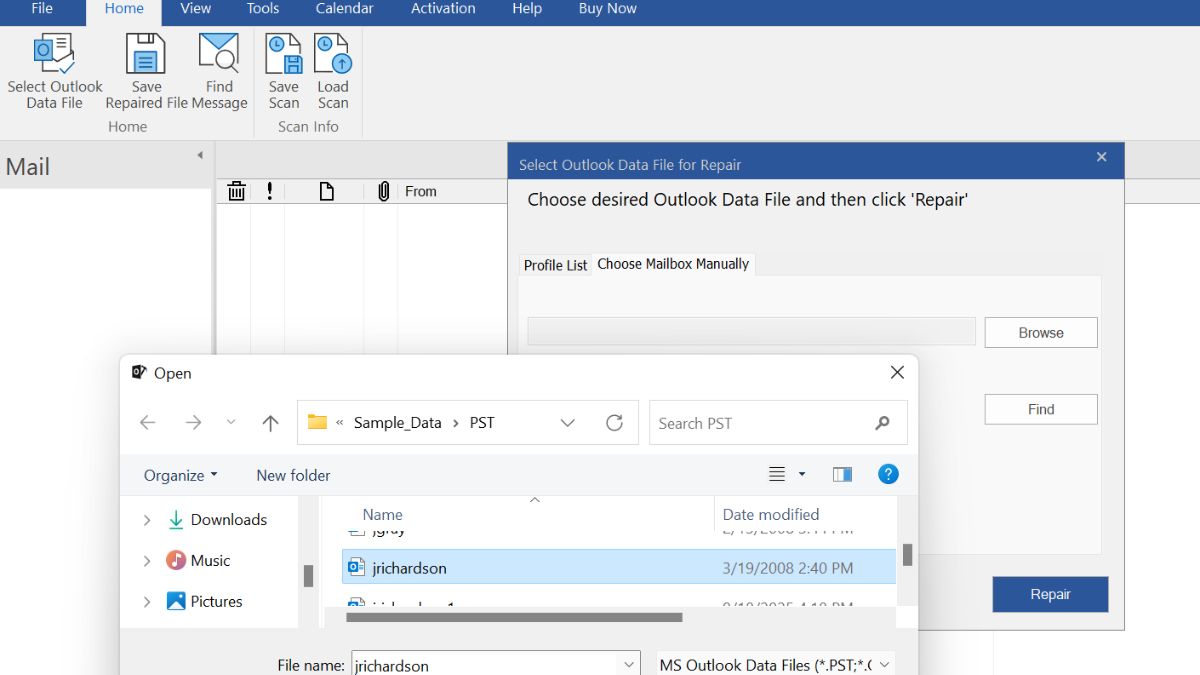
- Click Repair to start scanning the file
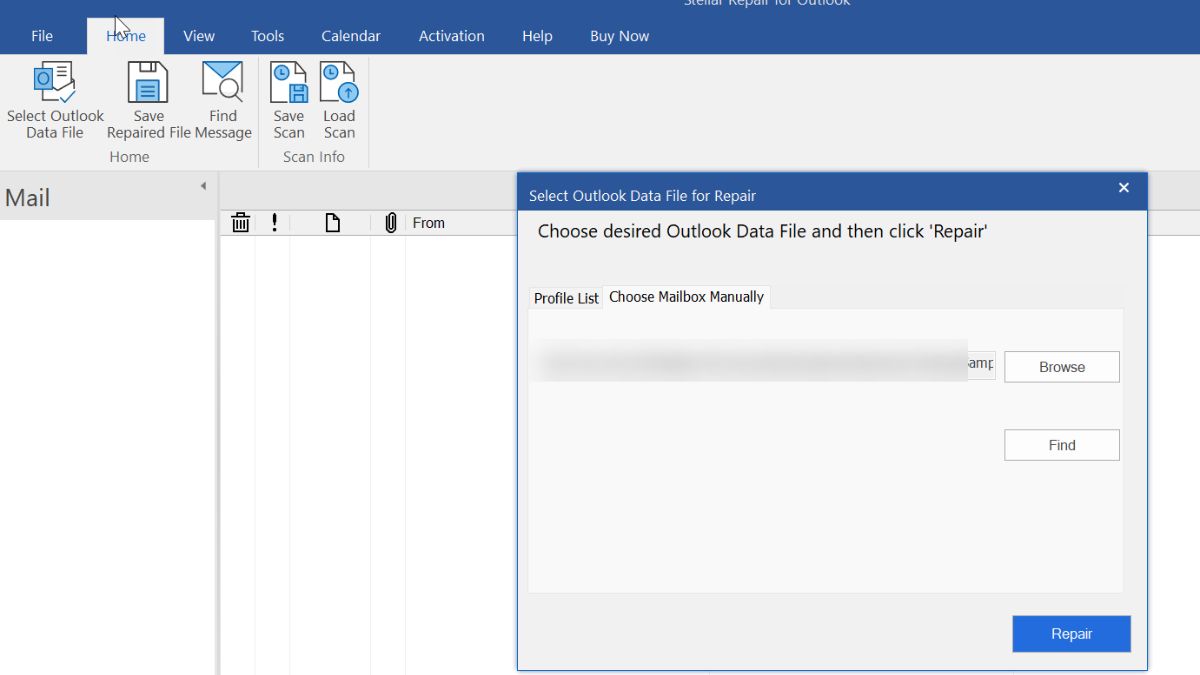
- Once scanning is done, preview the recovered emails, contacts, and folders in the results window
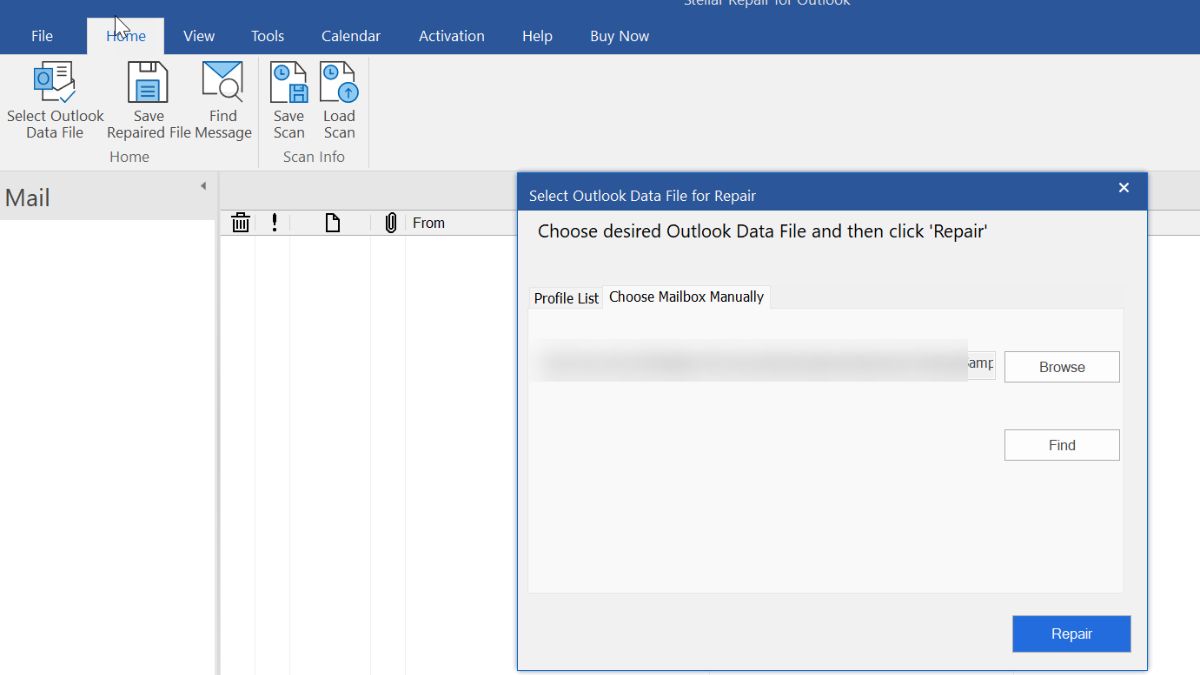
- Select the items/folders you want to recover
- Click Save Repaired File
- Choose the output format — PST, MSG, EML, RTF, PDF, or HTML
- Choose the destination folder and click Save
- Open the saved file in Outlook to confirm your data is restored
Pros:
- Shows preview of data before saving, so you know it worked
- Handles both minor and severely damaged files
- Several export format options
- Free technical support – 24/5
- Completely free software update till license validity
- Provides free video tutorials for quick learning
- Works entirely offline once installed, so nothing leaves your machine
Cons:
- You need a paid plan to actually repair and save your file
- Larger PST files take longer time
Limitations:
- Requires installation and enough free disk space to work with large files
- Runs on Windows only
This one’s already sitting on your computer. It comes bundled with every Outlook install, and it is the first thing worth trying before spending money on any 3rd party repair software.
How to use it:
- Close Outlook completely
- Search “scanpst” in the Start menu, or find it manually under C:\Program Files\Microsoft Office\root\Office16(path varies slightly by Outlook version)
- Open the tool and click Browse to select your PST file
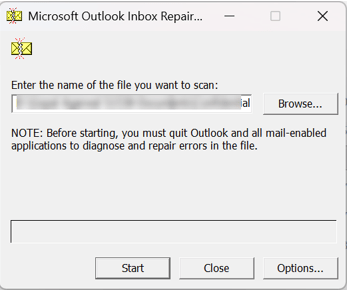
- Click Start to scan for errors
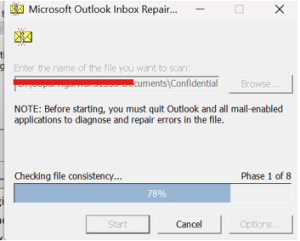
- Tick the box to back up the file before repairing
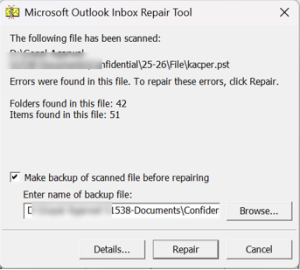
- Click Repair and let it run
- Run it again a few times if it keeps finding errors (this is normal)
Pros:
- Completely free
- Already installed, no download needed
Cons:
- Struggles with severely damaged files
- Often needs several repair passes before it actually clears all errors
- No preview feature before repair
Limitations:
- Not reliable on PST files close to the 50 GB size ceiling
- Can permanently strip out unrecoverable items with no warning of exactly what was lost
- Stellar Online PST Repair
This is the browser-based version developed by Stellar Data Recovery Inc. It is completely free online service to repair corrupt PST files. There is no any download & installation required to recover your email items. You just need to upload the corrupt file through a webpage and let it do the work.
How to use it:
- Go to Stellar’s online PST repair page in your browser
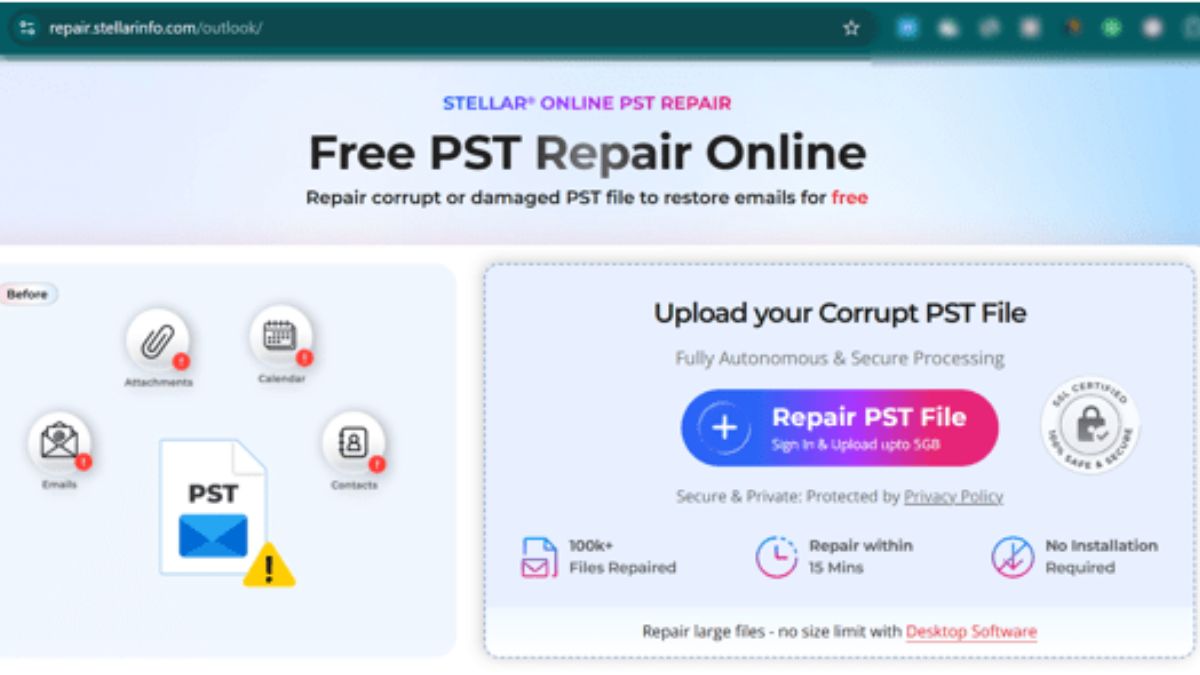
- Upload your damaged PST file directly through the site
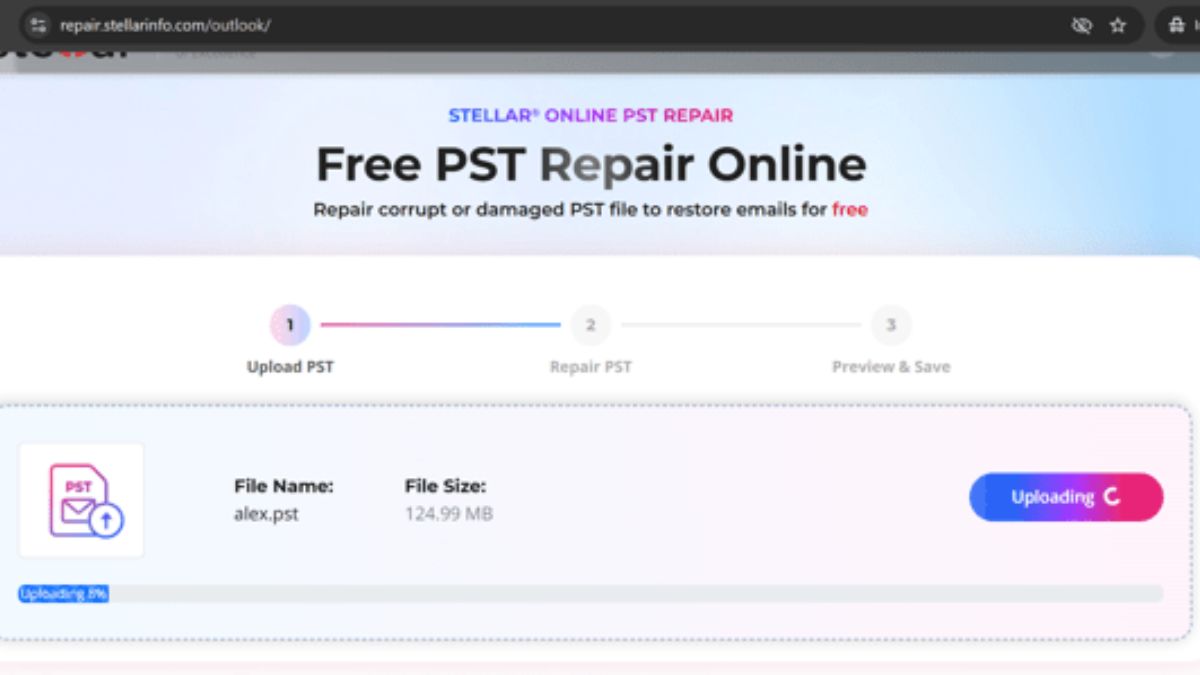
- Wait while it uploads and scans the file automatically
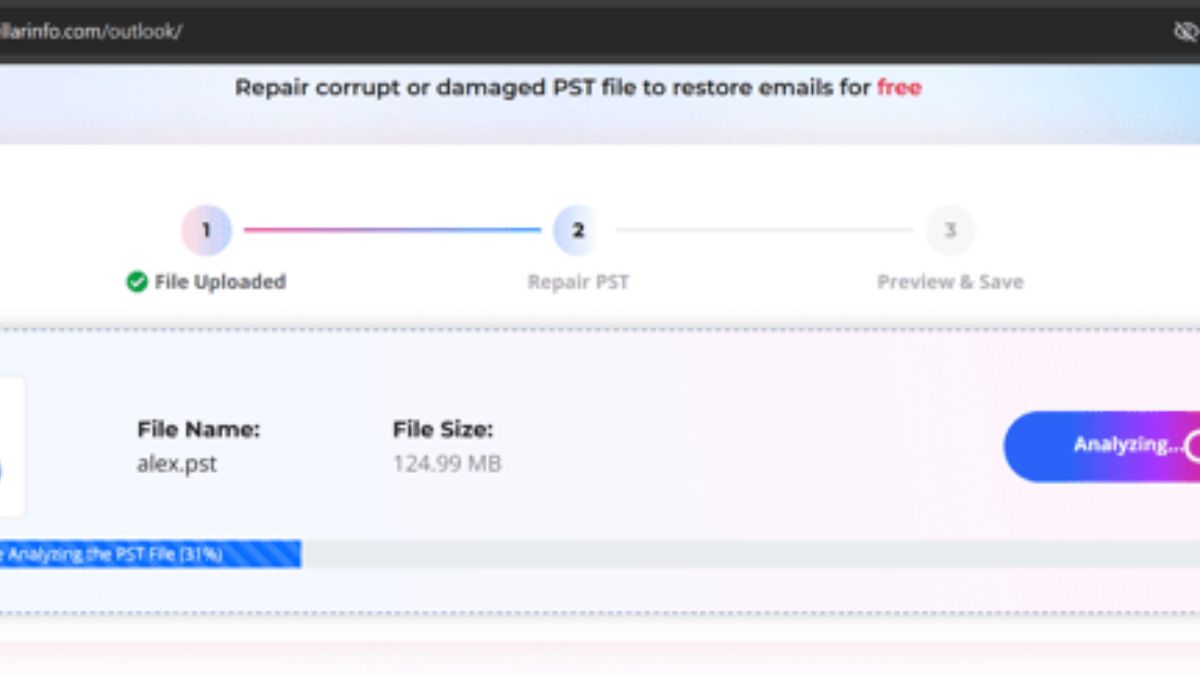
- Preview the recovered folders, emails, contacts, and calendar items once it’s done

- Download the repaired PST file to your computer
Pros:
- Completely free for 1 corrupt PST file repair
- Repaired file automatically deleted after 24 hours to maintain the data integrity
- No software installation required, works from any device with a browser
- Simple, guided process, good for non-technical staff
- Preview feature before you download the final file
Cons:
- Free tier is capped around 500 MB
- Repairs one file at a time
Limitations:
- You’re uploading company email data to a third-party server, which is a real consideration for sensitive mailboxes
- Files are typically deleted from their servers after a short window so you need to download promptly
- Recovery Toolbox Online PST Repair
Recovery Toolbox is another web browser-based online PST repair service. It priced by file size instead of a subscription based. This is also works without any installation like Stellar Online PST Repair but data integrity can be compromised because it doesn’t delete the repaired files from server after repair. So, need the check very carefully before uploading your business information and attachments.
How to use it:
- Visit the Recovery Toolbox for Outlook online repair page
- Upload the corrupted PST file through the site
- Let the tool scan and process the file
- Preview the recovered mailbox content
- Pay based on file size, then download the repaired file
Pros:
- Works on any device
- Useful for one-off repairs where a subscription doesn’t make sense
Cons:
- Pay-per-use pricing (roughly $10 per 1 GB) can get expensive for a very large mailbox
- Requires an internet connection and uploading a full mailbox file, which takes time on large files
- Fewer advanced filtering or selective-recovery options than desktop tools
Limitations:
- Same data-privacy consideration as any online tool: you’re sending a full copy of a mailbox to an external server
- Saving the repaired data back into PST format for use in Outlook still requires Outlook to be installed on a Windows PC
- DataNumen PST Repair
DataNumen Outlook Repair placed at last of the list, doesn’t mean it’s unable to repair corrupt PST file. It is specially built for recovering your email items where other fails. This software usages advanced deep-scan process that digs through corrupted file structures to find what is still recoverable.
How to use it:
- Install DataNumen PST Repair on your computer
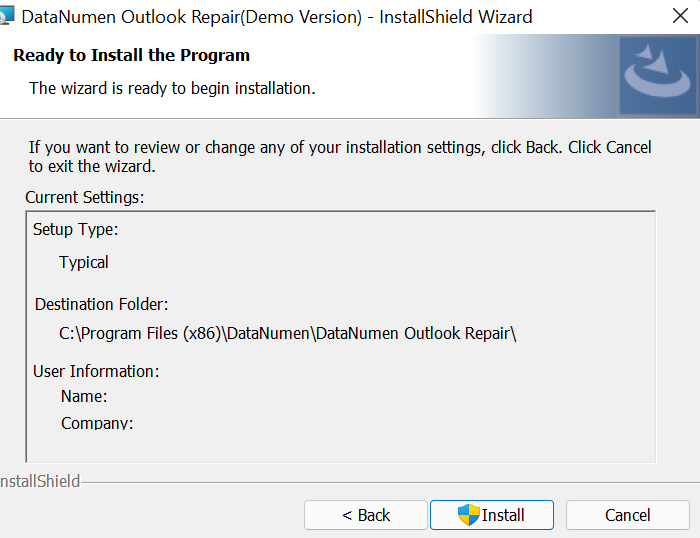
- Open the app and use the browse button to select the damaged file
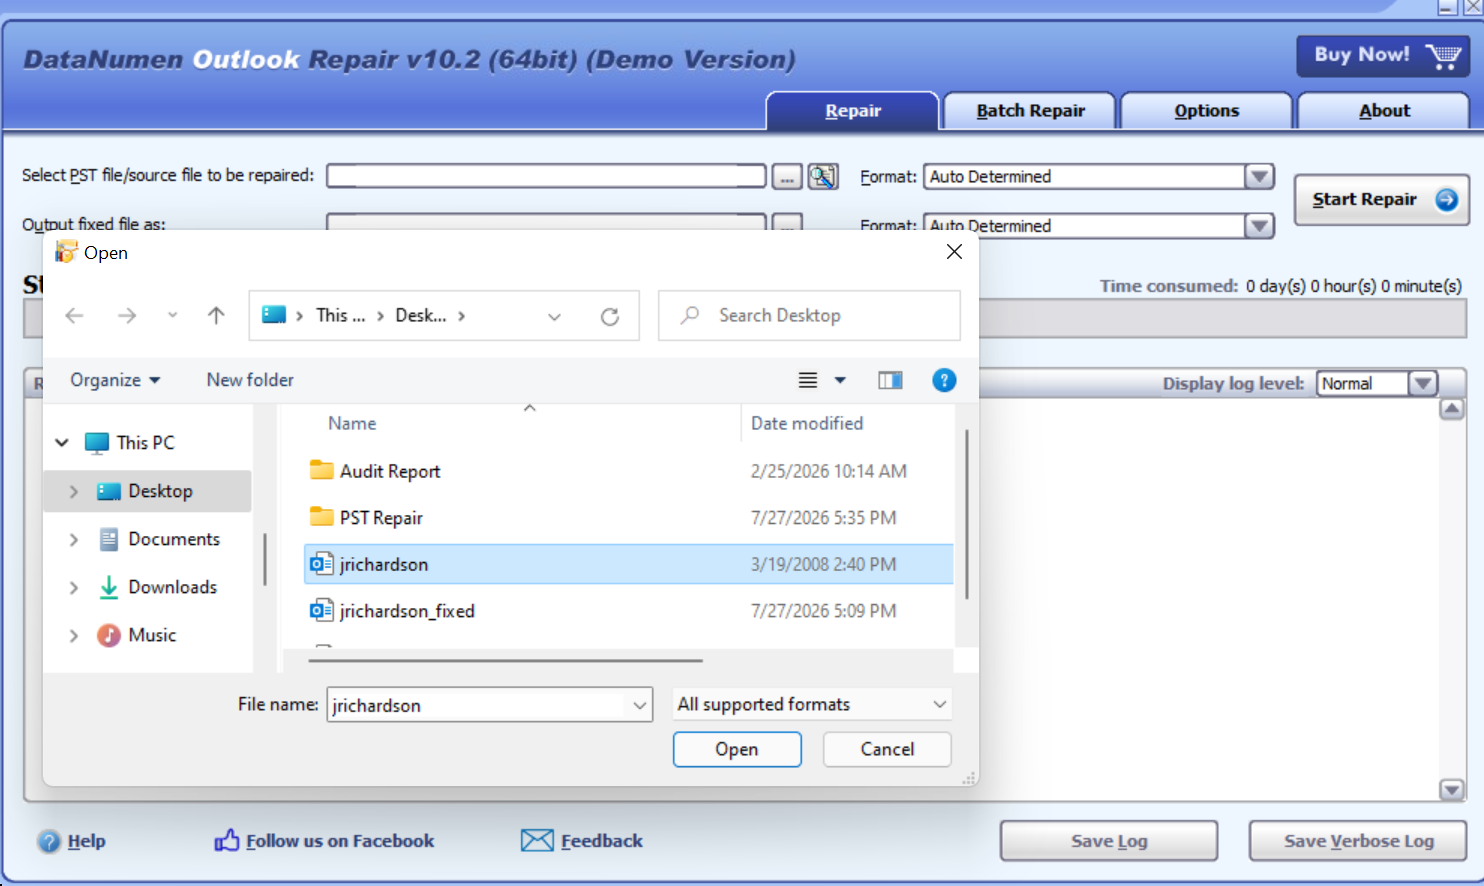
- Click Start Repair
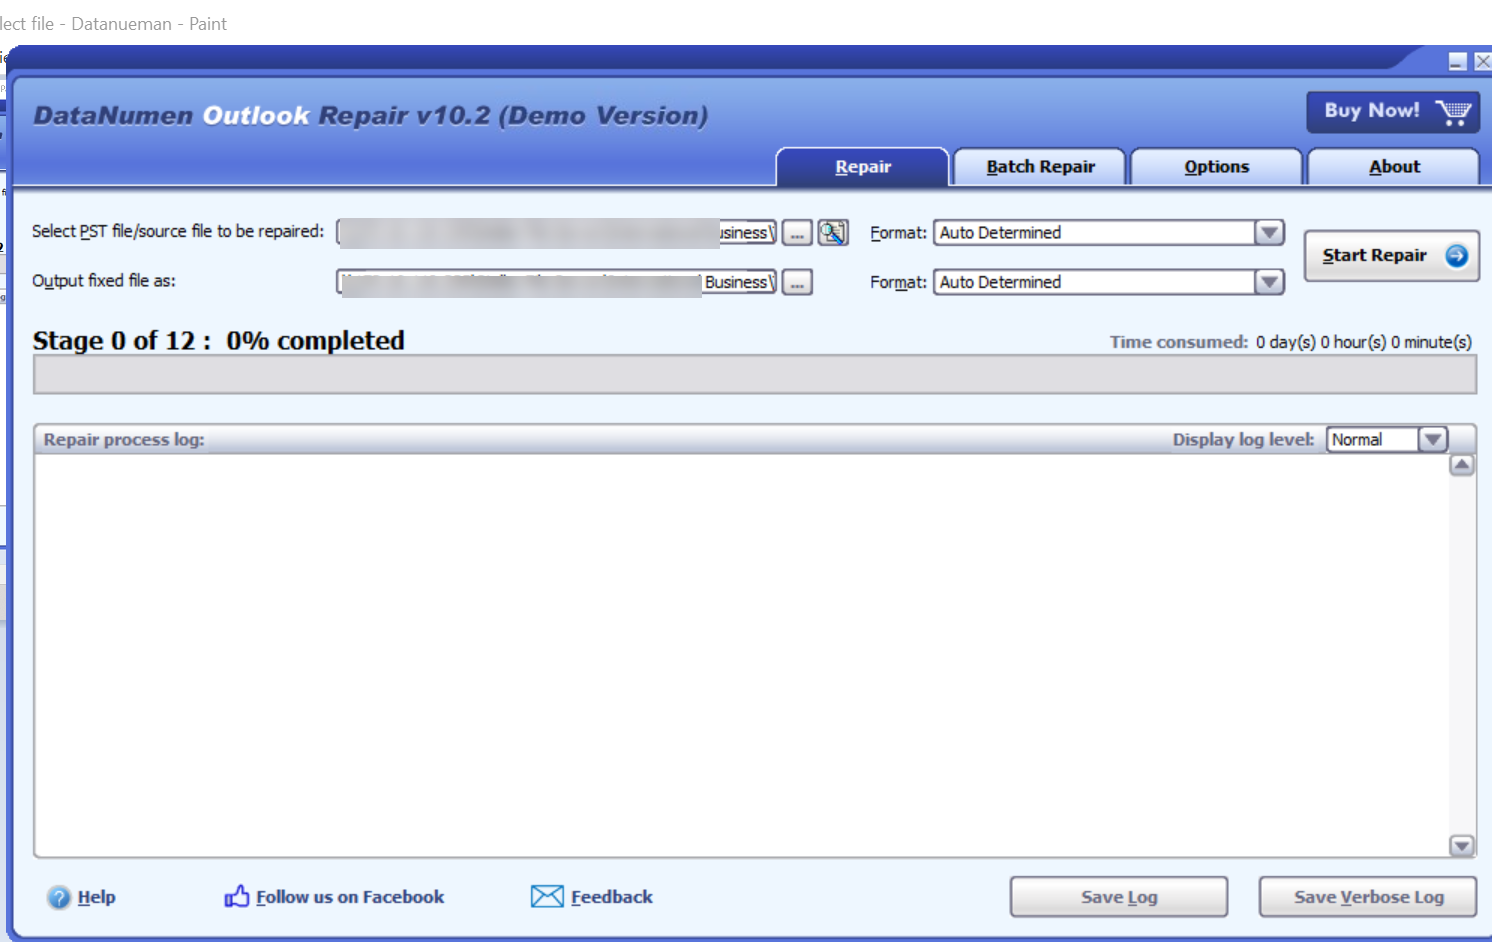
- Check the recovery log once it’s done
- Open the repaired file (saved with a “Fixed” prefix by default) in Outlook to confirm your data’s back
Pros:
- Can repair PST files even if the password’s been lost
- Holds up well against files damaged by malware or ransomware
- Works entirely offline
Cons:
- The trial version replaces recovered message text with placeholder content, so you’ll need to pay to actually use the recovered data
- Interface feels more dated than some competitors
Limitations:
- Windows only, requires installation
- Best suited to one file or a small batch at a time rather than large-scale bulk recovery
Compare: Online vs Desktop Tools
Here’s the honest answer: for business email, desktop software is generally the safer default, and online tools are best treated as a backup option for quick, low-stakes situations.
The reason comes down to what you are handing over. An online PST repair service means uploading a full copy of a mailbox, client emails, internal conversations, attachments, all of it, to someone else’s server. Most reputable service like Stellar Online PST Repair deletes the file after repair and say so clearly, but for a business mailbox that might include client data, contracts, or anything covered by a confidentiality agreement, that’s still a judgment call worth making deliberately rather than by default. Desktop software keeps everything on your own machine from start to finish, which is usually the safer position to be in if anyone ever asks how a mailbox was recovered.
That said, online tools genuinely earn their place in below situations:
- A single small PST file, low sensitivity, and you need a fast fix without installing anything
- You are on a device where you can’t install software (a Mac, a tablet, a locked-down machine)
- It’s a one-time repair and buying a full license doesn’t make financial sense
For anything involving recurring repairs, larger mailboxes, or data you’d rather not send anywhere else, desktop tools like Stellar Repair for Outlook or DataNumen PST Repair are the more sensible long-term choice for an admin. Start with the free ScanPST tool regardless of which path you lean toward. It costs nothing to try, and it clears up a good chunk of everyday corruption before you need to reach for anything else.


Your roof is your home’s first line of defense against the elements. From blistering summer sun and torrential rains to heavy winter snow and high winds, it takes a severe beating year-round. Unfortunately, it is easy to adopt an “out of sight, out of mind” attitude until a major leak or structural failure occurs.
Preventing damage through proactive maintenance is always far more affordable than paying for emergency structural repairs or an entire roof replacement. By understanding the unique threats each season brings, you can protect your investment and keep your home secure.
Spring and Summer: Post-Winter Assessments and Growth Control
Spring is the ideal time to evaluate how your roofing system survived the harsh winter months. You should schedule a professional roof inspection at least once a year, preferably during the spring or autumn, to catch minor wear and tear before it escalates. Technicians can safely spot cracked shingles, loose flashing, or damaged roof joints that might otherwise go unnoticed.
As the weather warms up, vegetation growth becomes a primary concern. Moss and algae might give a property a rustic appearance, but they are highly destructive to roofing materials. Moss actively traps moisture against the surface, leading to accelerated shingle deterioration and localized wood rot. Homeowners should use roof-safe cleaners to remove this growth gently, avoiding high-pressure washing which can strip off protective shingle granules.
Additionally, take time during the summer to trim back overhanging tree branches. High winds can cause these branches to scrape against your roof, gouging shingles and stripping away their protective coatings. Furthermore, falling limbs during summer storms pose a direct threat of puncture damage.
Autumn: Gutter Maintenance and Weatherproofing
As leaves begin to fall, gutter maintenance becomes your top priority. Clogged rain gutters are a leading cause of avoidable water damage. When debris blocks the channel, rainwater backs up beneath your shingles, causing severe wood rot, ceiling leaks, and structural weakening near your home’s foundation. Ideally, gutters should be cleaned at least twice a year to maintain proper drainage.
If your gutter system is rusted, sagging, or completely failing to redirect water away from your foundation, standard cleaning won’t suffice. In such cases, investing in a professional rain gutter installation in Salt Lake City is a critical preventative measure to secure your home before the seasonal freeze-thaw cycle begins.
While preparing for winter, it is also wise to check the flashing around chimneys, skylights, and vents. Damaged or lifting flashing is a notoriously common entry point for water intrusion. Resealing these joints before the wet weather hits is an inexpensive way to avoid costly structural remediation later.
Winter: Managing Ice, Snow, and Ventilation
Winter introduces severe thermal stress and heavy snow loads. One of the most significant winter hazards is the formation of ice dams along the edges of the roof line. Ice dams occur when warm air escapes from an unventilated attic, melting the underside of the snow on the roof. As the melted water runs down to the colder eaves, it refreezes, trapping moisture underneath your shingles or roof panels.
To prevent this, you must maintain proper attic ventilation and insulation. Ensuring your attic has balanced intake and exhaust vents regulates the roof’s surface temperature and stops ice dams from forming. For properties with metal roofs or steep pitches, installing roof snow guards can also manage the sudden, dangerous release of sliding snow, protecting both your gutters and the landscaping below.
Year-Round Vigilance
Regardless of the season, homeowners should frequently check their interiors for early warning signs of a compromise. Look for water stains on upper-level ceilings, peeling paint on walls, or musty odors in the attic. If you notice shingle granules accumulating heavily in your downspouts, or if you spot curling and buckling shingles from the ground, your roof may be nearing the end of its functional lifespan.
Ultimately, consistency is key. By addressing minor repairs immediately—such as securing a loose shingle or fixing a tiny puncture—you prevent small issues from expanding into multi-thousand-dollar headaches. Taking a proactive approach to your roof’s health gives you invaluable peace of mind, knowing your home is fully protected from above, no matter what the weather brings.

Wood is one of the most versatile materials used in home improvement, construction, and DIY projects. From building outdoor structures to creating custom furniture, the type of wood selected can affect strength, durability, appearance, and overall performance. Winnipeg homeowners should consider the purpose of each project, local weather conditions, and the intended use of the finished product when choosing lumber or plywood. Here are six home projects where selecting the right wood matters most.
1. Completing DIY Woodworking Projects With Star Building Materials
DIY woodworking projects can include workbenches, storage units, planters, wall features, shelving, and decorative pieces. The materials used can influence how easy the project is to build and how well it holds up over time. Factors such as thickness, strength, grain, and surface finish should be considered before purchasing wood.
Homeowners looking for lumber in Winnipeg can compare different lumber and plywood options based on the requirements of their project. Star Building Materials can also be considered when exploring materials for woodworking and home improvement projects. Selecting wood that matches the project’s design and intended use can make construction easier and contribute to a better finished result.
2. Building a Deck or Outdoor Structure
Decks, sheds, fences, and other outdoor structures are exposed to Winnipeg’s changing weather conditions throughout the year. Rain, snow, sunlight, moisture, and temperature changes can all affect wood over time.
When selecting materials for an outdoor project, homeowners should consider durability, moisture resistance, structural strength, and maintenance requirements. Resources such as Windsor Plywood Sherwood Park can also be useful when researching wood products and comparing materials for different construction needs. Choosing an appropriate type of wood can help an outdoor structure remain functional and attractive for longer.
3. Building or Renovating Cabinets
Cabinets are frequently exposed to moisture, spills, cleaning products, and everyday use. Choosing suitable wood or plywood can therefore make a significant difference in their durability and appearance.
Homeowners should consider the cabinet’s location, expected use, desired finish, and maintenance requirements. The right material can provide a balance between strength, appearance, and practicality.
4. Constructing Shelves and Storage
Shelves need to support the weight of books, tools, household supplies, and other belongings. Using wood with the appropriate thickness and strength can help prevent sagging and improve the lifespan of a storage project.
Plywood and lumber can both be useful depending on the design and load requirements. Homeowners should consider dimensions, support spacing, finish, and the weight the shelving is expected to carry.
5. Framing Walls and Home Improvements
Lumber is an important component in wall framing, partitions, room additions, and various home improvement projects. Structural applications require materials that are appropriately sized and suitable for the intended purpose.
Before starting a framing project, homeowners should understand the project’s requirements and select lumber accordingly. Proper material selection can contribute to a stable and durable structure.
6. Creating Wood Furniture
Wood can be used to create tables, benches, desks, shelving units, and other furniture. Different types of wood can vary in strength, appearance, weight, and workability.
Consider how the furniture will be used and how much wear it will receive. Choosing suitable wood can help create furniture that is both functional and visually appealing.
Making Better Wood Choices for Home Projects
Choosing the right wood can affect the durability, appearance, and performance of almost any home project. By considering the project’s purpose, location, expected use, moisture exposure, structural requirements, and maintenance needs, Winnipeg homeowners can make more informed decisions when purchasing lumber and plywood.

A shoulder injury can affect everyday activities such as working, exercising, sleeping, lifting, and reaching. Recovery can also vary depending on the type and severity of the injury. Taking a proactive approach to your health can help you understand your condition, follow appropriate care, and gradually return to normal activities. Here are seven ways to better manage your health after a shoulder injury.
1. Get a Proper Medical Assessment With Kevin Kruse
Persistent shoulder pain, weakness, limited movement, or discomfort after an injury should be evaluated by a qualified healthcare professional. A proper assessment can help identify the underlying problem and determine which treatment options may be appropriate.
For people dealing with significant shoulder damage, surgery for a rotator cuff tear may be considered depending on the severity of the injury and other individual factors. Consulting a specialist can help patients understand their condition, available treatment approaches, and what recovery may involve.
2. Follow Your Recommended Treatment Plan
Once your condition has been assessed, following the recommended treatment plan is an important part of managing recovery. Depending on the injury, care may involve rehabilitation, medication, activity modifications, or other medical treatments.
Patients researching their healthcare options may come across resources such as Timely Medical | Timely Surgery at Affordable Prices when exploring accessible medical services. Regardless of the provider, patients should understand their treatment recommendations and communicate with their healthcare team if they have concerns or questions.
3. Give Your Shoulder Time to Recover
Trying to return to strenuous activities too quickly can place additional stress on an injured shoulder. Depending on professional recommendations, it may be necessary to temporarily modify activities that involve heavy lifting, repetitive movements, or overhead reaching.
Allowing adequate recovery time can help prevent unnecessary strain while the shoulder heals. Gradually returning to normal activities is generally preferable to pushing through significant discomfort.
4. Participate in Appropriate Rehabilitation
Rehabilitation may play an important role in restoring shoulder movement, strength, and function. A healthcare professional or physical therapist can recommend exercises based on the type of injury and stage of recovery.
Following an appropriate rehabilitation program consistently can help support gradual improvements. However, exercises should be performed according to professional guidance rather than attempting demanding movements too soon.
5. Pay Attention to Changes in Your Symptoms
Monitoring your symptoms can help you recognize how your recovery is progressing. Pay attention to changes in pain, swelling, mobility, weakness, or other unusual symptoms.
If symptoms become significantly worse or new concerns develop, speak with a healthcare professional. Keeping track of changes can also make it easier to communicate useful information during follow-up appointments.
6. Adjust Daily Activities and Work Habits
Simple changes to daily routines can help reduce unnecessary strain on an injured shoulder. Depending on your condition, this may involve modifying how you lift objects, carry items, reach for things, or position your shoulder while sleeping.
People returning to work should also follow appropriate recommendations regarding physical tasks and workplace activities.
7. Maintain Overall Health During Recovery
Good sleep, balanced nutrition, adequate hydration, and appropriate physical activity can support overall health while recovering from an injury. Maintaining healthy habits can also help you stay consistent with your recovery routine.
The goal is to remain active in ways that do not place unnecessary stress on the injured shoulder. Patience and consistency can be important throughout the recovery process.
Taking a Practical Approach to Shoulder Recovery
Managing a shoulder injury involves more than addressing pain alone. Getting an appropriate assessment, following treatment recommendations, allowing time to recover, participating in rehabilitation, monitoring symptoms, adjusting daily activities, and maintaining overall health can all support a more informed recovery process.
-

 BLOG1 year ago
hanime1: The Ultimate Destination for Anime Lovers
-

 Technology1 year ago
GLAADVoice.com: How You Can Get Involved and Make a Difference
-

 BILLS1 year ago
Why Does My Instagram Reel Stop Getting Views After One Hour? How to Fix It?
-

 ENTERTAINMENT1 year ago
Sflix: How It’s Changing the Way We Watch Movies and TV Shows
-

 BLOG1 year ago
NHentai.nef: Understanding the Popular Hentai Archive
-

 BLOG1 year ago
Imginn: The Ultimate Tool to View Instagram Content Anonymously
-

 ENTERTAINMENT1 year ago
Crackstreams 2.0: The Future of Free Sports Streaming?
-

 BLOG1 year ago
ThisVid: What Makes It Stand Out in the World of Online Videos