
BLOG
How to Prevent and Respond to Water Damage in Your Home

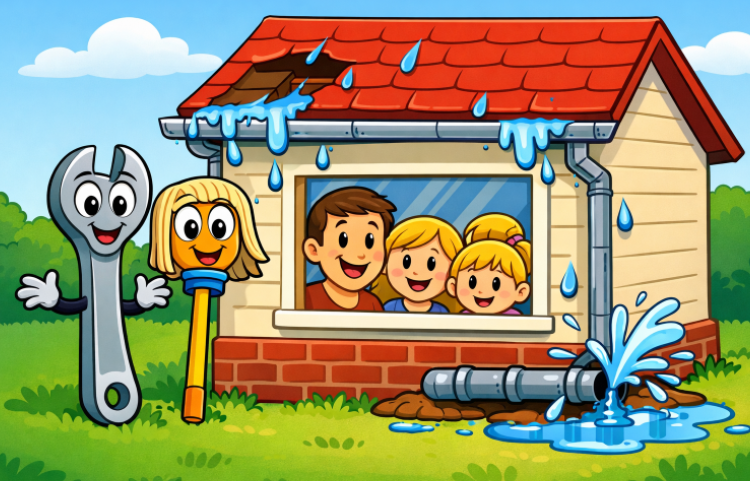
Water damage can wreak havoc on your home, leading to costly repairs and potential health hazards. Every homeowner should understand how to prevent and respond to these incidents for peace of mind and financial security. Regular attention to your property and being prepared with local resources like Restoration companies in Houston, TX can make all the difference when unexpected water issues arise.
Left unchecked, water damage may cause major structural problems, damage personal belongings, and create an environment suitable for mold growth. Immediate recognition and action are vital to limit the extent of the destruction and associated expenses. This guide will help you recognize common causes, put solid preventive steps in place, and know what to do if water damage occurs.
Common Causes of Water Damage
Many homeowners underestimate just how many potential sources of water damage exist in the average home. Understanding these vulnerabilities can help you take action before problems start:
- Leaky Roofs: Damaged shingles, cracked flashing, or blocked roof valleys often lead to water seeping into attics and walls.
- Faulty Appliances: Dishwashers, washing machines, or water heaters that are old or malfunctioning can spring leaks at any time.
- Burst Pipes: Freezing weather and aging pipes are common culprits of splitting, which sends water pouring into living spaces.
- Clogged Gutters: When gutters and downspouts are blocked, water can overflow, damaging both exterior walls and the foundation.
Preventive Measures
To safeguard your home and belongings, adopt these effective preventive measures:
- Regular Inspections: Examine plumbing systems and appliances at least twice a year for signs of rust, moisture, or visible leaks.
- Maintain Gutters: Clean your gutters and downspouts every spring and fall to ensure water flows away from your home smoothly.
- Install Water Sensors: Strategic placement of water leak detectors in areas like basements, laundry rooms, and under sinks can alert you at the first sign of moisture.
- Seal Windows and Doors: Weatherproofing all openings not only helps with water intrusion but also improves energy efficiency.
It’s also important to address landscaping around your home. Grading the soil so that it slopes away from your home’s foundation will help keep rainwater from collecting and seeping into basements or crawl spaces. Trees and large shrubs should be planted a safe distance from the home, as roots can potentially disturb plumbing lines and foundation walls, leading to hidden leaks and long-term moisture issues. Installing a sump pump in low-lying areas like basements provides an additional line of defense against flooding.
In areas prone to heavy rain or hurricanes, consider elevating appliances and electrical systems above potential flood levels. Additionally, insulating pipes, especially those running through unheated areas, reduces the chance of freezing and bursting during cold weather. Periodically check caulking around tubs, showers, and backsplashes to prevent seepage, and maintain ventilation in humid rooms to reduce condensation buildup and mold formation.
Immediate Steps When Water Damage Occurs
Reacting quickly and efficiently when you spot water damage can dramatically reduce its impact:
- Shut Off Water Supply: Know the location of your main water valve and turn it off to stop more water from entering the area.
- Remove Standing Water: Use a wet-dry vacuum, mop, or towels to extract as much water as possible right away.
- Dry Affected Areas: Set up fans, open windows if weather permits, and if available use dehumidifiers to speed up the drying process, discouraging mold growth.
- Disinfect Surfaces: Clean walls, floors, and any surfaces touched by the water to prevent possible mold and bacteria from thriving.
Documenting and Communicating the Damage
Documentation plays a crucial role in the water damage restoration process. Take clear photos and videos of all affected areas before you begin any cleanup efforts. This visual evidence is vital for both your insurance claim and any future restoration work. Make a list of damaged items, including receipts or proof of ownership where possible. When you contact your insurance company, communicate the urgency and extent of the loss to expedite your claim process. Proper records and documented communication will help you receive the compensation or assistance you’re entitled to and prevent disputes later on.
Don’t forget to save all receipts for any emergency repairs or mitigation supplies, as insurers may require proof of expenditure. If you hire a professional company, ask for detailed estimates and timelines to keep your recovery on track.
When to Call Professionals
While small leaks or spills can be handled yourself, there are times when professional intervention becomes absolutely necessary:
- Water damage covers a large part of your home or includes more than one room.
- You suspect or notice compromised structural elements like sagging ceilings or warped floors.
- You find or smell mold, especially if it covers more than a small area or recurs after cleaning.
Specialists have the tools and know-how to handle water extraction, microbial treatments, and restoration, ensuring your home is safe and sound.
Insurance Considerations
After water damage occurs, understanding your insurance coverage can help you recover costs and make informed decisions. Review your homeowner’s policy regularly to verify that it covers both sudden incidents and chronic issues resulting from gradual leaks. Some policies may not cover floods or neglect, so staying current can prevent surprises during a crisis.
Speak to your insurance agent about optional add-ons like flood insurance or sewer backup coverage if you live in a high-risk area. Knowing precisely what is and isn’t covered will reduce stress and confusion if you ever need to file a claim. Keep your insurance documents easily accessible and review policy updates annually, especially after any changes to your home’s structure or value.
Conclusion
Proper maintenance, awareness, and readiness are key to preventing and handling water damage in your home. By taking proactive steps and knowing when to get expert help, you can avoid expensive repairs and protect your property’s value and your family’s health.
Remember, staying vigilant about leaks and acting promptly at the first sign of trouble not only preserves your home’s structure but also contributes to a safer, healthier living environment. Developing a water emergency plan and educating your family members about basic responses can make your household more resilient to future incidents.

The matching tracksuit is the backbone of UK streetwear, and two labels dominate the conversation: Syna World and Carsicko. Both brands have turned the humble tracksuit into a cultural statement, both command devoted followings, and both promise premium quality. But if you are choosing between them — or wondering whether you need both — the differences matter.
A Syna World tracksuit and a Carsicko tracksuit might look similar at first glance: relaxed fits, heavyweight fabric, bold branding. Look closer, though, and each brand brings its own design philosophy, fit character and attitude to the tracksuit formula. This guide breaks down both options head to head — design, comfort, value and versatility — so you can decide which tracksuit deserves your money.
Syna World Tracksuits: The Full Breakdown
Design Language
Syna World tracksuits favour clean confidence. The branding is bold but controlled — signature logos and considered graphics placed with precision rather than scattered everywhere, a contrast to Carsicko’s louder, more rebellious print approach. Colourways lean towards versatile staples: black, grey, navy and washed tones that work across seasons. The overall effect is polished streetwear that looks intentional whether you are heading across town or lounging at home.
Fit and Silhouette
The Syna World tracksuit is cut with a modern relaxed fit. The jacket sits slightly oversized through the body with ribbed cuffs that keep the shape sharp, while the bottoms taper gently from thigh to ankle — a touch more tailored than Carsicko’s boxier cut. It is a silhouette that flatters without swimming: roomy enough for streetwear credibility, structured enough to look put-together.
Fabric and Build Quality
Heavyweight cotton-blend fleece is the standard here, with a soft brushed interior and durable exterior — on par with Carsicko’s similarly dense fleece. Stitching is clean and reinforced at stress points, and the fabric holds its colour through repeated washing.
Carsicko Tracksuits: The Full Breakdown
Design Language
Carsicko tracksuits push harder. The graphics are bolder, the detailing more rebellious, and the overall attitude more confrontational. Where synashops.com refines, Carsicko provokes — larger prints, edgier motifs and a rawer street energy. If Syna World is the polished headliner, Carsicko is the underground act stealing the show.
Fit and Silhouette
Carsicko cuts its tracksuits with a boxier, more aggressive silhouette. The jackets run roomier through the shoulders and body, and the bottoms favour a straighter, baggier leg. This is a fit for those who want maximum street presence — less tailored than Syna World, more unapologetically oversized.
Fabric and Build Quality
Like its rival, Carsicko builds its tracksuits from heavyweight fleece with a premium hand-feel. The fabric is dense and warm, the cuffs and hems hold their elasticity, and the prints are applied to survive washing without cracking. A Carsicko tracksuit is built to be worn hard and still look the part.
Head-to-Head: How They Compare
Style and Graphics
- Syna World: refined branding, controlled graphics, versatile colourways
- Carsicko: bolder prints, rebellious detailing, higher visual impact
If you prefer understated confidence, Syna World wins. If you want your tracksuit to turn heads, Carsicko takes it.
Comfort and Fit
- Syna World: modern relaxed fit, gently tapered, flattering on most builds
- Carsicko: boxier and baggier, maximum room, stronger street silhouette
For all-day comfort with a cleaner shape, lean Syna World. For the full oversized streetwear drape, lean Carsicko.
Price and Value
Both brands sit in the premium streetwear bracket, with tracksuits priced as investment pieces rather than impulse buys. Syna World tracksuits and Carsicko tracksuits typically land in a similar range, so price alone rarely decides it. Value comes down to cost per wear: whichever you will reach for more often is the better buy.
Versatility
- Syna World: easier to dress up or down; the cleaner design pairs with more of your wardrobe
- Carsicko: stronger as a standalone statement; best when the tracksuit is the whole outfit
A Syna World tracksuit jacket works over jeans and a tee. A Carsicko tracksuit demands to be worn as the full set. Neither is better — they simply serve different styling roles.
Which Tracksuit Should You Buy?
Choose a Syna World Tracksuit If…
- You want a tracksuit that works for more occasions, from casual days out to travel
- You prefer refined branding over loud graphics
- You like a relaxed fit that still looks structured
- You plan to mix the jacket or bottoms with other pieces in your wardrobe
Choose a Carsicko Tracksuit If…
- You want maximum street presence and bold visual impact
- You love oversized, boxy silhouettes
- Your style leans rebellious and graphic-heavy
- You want a tracksuit that makes a statement as a complete set
Or… Buy Both
Many serious streetwear collectors own both. The Syna World tracksuit covers polished, everyday wear; the Carsicko tracksuit covers statement days. They occupy different lanes in a rotation, and owning both means you are ready for any mood.
Styling Tips for Both Tracksuits
Keep Footwear Clean
Chunky sneakers or clean trainers work with both brands. Avoid overly formal shoes — tracksuits demand casual footwear. White sneakers are the universal choice; black pairs keep things stealthy.
Layer Smart in Winter
Both tracksuits layer well under oversized outerwear. A Syna World tracksuit under a wool overcoat creates a sharp high-low contrast. A Carsicko tracksuit under a puffer jacket doubles down on street energy.
Accessorise Minimally
Tracksuits already carry strong branding, so keep accessories simple: a plain cap or beanie, minimal jewellery, a clean bag. Let the tracksuit do the talking.
Try the Split Set
As covered in mixed-brand styling, you can pair a Syna World tracksuit jacket with Carsicko bottoms (or vice versa) in matching tones. It is an advanced move that shows real fashion confidence.
Frequently Asked Questions
Are Syna World tracksuits good quality?
Yes. Syna World tracksuits are made from heavyweight cotton-blend fleece with reinforced stitching and durable prints. They hold their shape and colour well with proper care.
Are Carsicko tracksuits good quality?
Yes. Carsicko tracksuits use dense, heavyweight fleece with a premium feel and prints designed to survive repeated washing. The build quality matches the premium price point.
Which is better: Syna World or Carsicko tracksuit?
Neither is objectively better — they serve different tastes. Syna World offers refined, versatile tracksuits; Carsicko offers bolder, more oversized statement tracksuits. Choose based on your personal style.
Do Syna World tracksuits fit true to size?
Syna World tracksuits run slightly relaxed by design. Most buyers take their normal size for the intended fit. If you prefer a closer fit, consider sizing down.
Do Carsicko tracksuits fit true to size?
Carsicko tracksuits run boxy and oversized. Take your normal size for the full streetwear drape, or size down if you want a neater silhouette.
How much do Syna World and Carsicko tracksuits cost?
Both brands price their tracksuits in the premium streetwear range. Exact prices vary by collection and drop — check each brand’s official store for current pricing.
Can you mix a Syna World jacket with Carsicko bottoms?
Absolutely. The split tracksuit — for example, a Syna World tracksuit jacket with Carsicko joggers in a matching tone — is a popular styling move. Keep colours coordinated for the best result.
Which tracksuit is more versatile?
The Syna World tracksuit is generally more versatile thanks to its cleaner design, which pairs with more wardrobe pieces. The Carsicko tracksuit works best as a complete statement set.
How do I wash my tracksuit without damaging it?
Wash inside out in cold water on a gentle cycle, and air dry or tumble dry low. This protects both the fabric and the graphics on Syna World and Carsicko tracksuits alike.
Where can I buy authentic Syna World and Carsicko tracksuits?
Purchase from each brand’s official website or authorised stockists. Both labels are heavily counterfeited, so be wary of deep discounts from unverified sellers.
Conclusion
Choosing between a Syna World tracksuit and a Carsicko tracksuit comes down to personal style rather than quality — both deliver premium fabric, solid construction and authentic UK streetwear credibility. Syna World offers the refined, versatile option: cleaner branding, a modern relaxed fit and easy pairing with the rest of your wardrobe. Carsicko offers the bolder statement: boxier silhouettes, rebellious graphics and unapologetic street presence.
The honest answer for many buyers is that both deserve a place in the rotation. Wear Syna World when you want polished confidence, reach for Carsicko when you want to make noise. Either way, you are investing in two of the strongest tracksuit programmes in British streetwear — and you will feel the difference every time you put one on.

The internet introduces new names, websites, and digital platforms every day, and Adovivo Com is one of the names that may prompt users to look for more information. When an unfamiliar term appears in search results, people often want to understand what it represents, what services it might offer, and whether it deserves their attention. Exploring Adovivo Com provides an opportunity to examine how people discover unfamiliar online identities and how they can evaluate websites before interacting with them.
A domain name can represent many things, including a business, an informational website, a digital service, or a personal project. However, a name alone does not establish the purpose or credibility of a website. Understanding Adovivo Com therefore requires a careful approach that separates confirmed information from assumptions while considering the broader principles of online discovery.
What Is Adovivo Com?
Adovivo Com can be understood as a search term associated with an online identity. Without reliable, independently verified information about the website’s ownership, content, and services, it would be inaccurate to assign it a specific function. Instead, examining the name offers a starting point for understanding how unfamiliar domains attract attention and how users can investigate them responsibly.
The word itself may sound like a brand or the name of a digital project. Many websites use distinctive names because they are easier to recognize than long descriptive addresses. A memorable name can also help a website establish a recognizable presence across search engines, social media platforms, and other online channels.
Nevertheless, the identity behind a domain becomes clearer only when supporting information is available. A functioning website, consistent branding, transparent contact details, and meaningful content can help visitors understand its intended purpose.
Why Is Adovivo Com Attracting Online Curiosity?
The Role of Search Engines
Search engines help people discover websites they have never visited before. Users may encounter Adovivo Com through a search query, a shared link, an online discussion, or a mention on another website. Once a name appears in search results, curiosity can encourage additional searches.
People commonly investigate unfamiliar domains to determine whether they relate to a service, product, company, or online resource. This behavior is a normal part of internet navigation. It does not necessarily indicate that a website is widely used, recently launched, or associated with a particular industry.
The Importance of Distinctive Names
A distinctive domain can become a recognizable digital identifier. Businesses and independent creators often select names that stand apart from competitors, hoping to make their websites easier to remember.
Adovivo Com may attract attention simply because its wording is unfamiliar to some users. However, search interest by itself cannot confirm a website’s popularity, reputation, or commercial value. Those factors require separate evidence, such as reliable traffic estimates, established references, or verifiable information about its operators.
Possible Digital Uses of Adovivo Com
Understanding the potential uses of Adovivo Com requires distinguishing general possibilities from verified facts. A domain can support several types of online activity, depending on the intentions of its owner.
Business or Brand Representation
A domain name can serve as the online address for a company, startup, or independent business. Such a website might introduce a brand, explain its services, publish company information, or provide customer contact options.
If Adovivo Com is associated with a business, visitors would benefit from checking whether its website clearly identifies the organization and explains what it offers. Consistent branding and accessible business information can help establish a clearer picture of its purpose.
Informational Content
Some domains are created to publish articles, guides, explanations, and other educational resources. Informational websites can help readers explore unfamiliar subjects and find answers to specific questions.
For a domain serving this purpose, content quality is an important consideration. Accurate explanations, clear writing, useful navigation, and appropriate references can make a website more valuable to its audience.
Digital Services and Online Tools
Other websites focus on digital services, interactive features, or online tools. These may include productivity resources, content platforms, software-related services, or specialized utilities.
There is not enough verified information here to establish whether Adovivo Com provides any of these services. Visitors should review the website itself and seek independent confirmation before assuming that a particular feature is available.
How to Evaluate Adovivo Com Before Visiting
Investigating an unfamiliar website does not need to be complicated. A few practical checks can help users make better-informed decisions.
Examine the Website’s Content
Start by reviewing the pages available on the website. Look for a clear explanation of its purpose, useful information, and consistent presentation. Pages filled with vague claims, copied material, or unrelated promotional links may deserve closer scrutiny.
A professional appearance alone does not prove that a website is trustworthy. Content should be evaluated alongside other indicators, including transparency and independent references.
Check Contact and Ownership Information
Legitimate organizations often provide ways for visitors to contact them. Depending on the website’s purpose, this might include a business email address, an about page, company details, or customer support information.
When evaluating Adovivo Com, check whether any ownership claims can be independently verified. Domain registration information may also provide clues, although privacy-protected registration is common and does not automatically indicate suspicious activity.
Review Security and Privacy Practices
Before entering personal information, check whether the website uses HTTPS and has a clear privacy policy. HTTPS protects information exchanged between a browser and a website, but it does not guarantee that the website operator is honest.
Avoid sharing passwords, financial details, identity documents, or other sensitive information unless there is a clear reason to do so and the service has been adequately verified.
Adovivo Com and the Importance of Digital Trust
Trust plays a significant role in how people interact with websites. Visitors are more likely to engage with a platform when they understand who operates it, what it offers, and how their information will be handled.
For any unfamiliar domain, trust should develop through evidence rather than assumptions. Transparent policies, accurate information, secure connections, and a consistent online identity can help users assess credibility.
Search results can also provide additional context. Independent reviews, established business listings, and references from reputable websites may help clarify a domain’s background. However, reviews should be interpreted carefully because online comments can be incomplete, outdated, or misleading.
For Adovivo Com, the most responsible approach is to evaluate available evidence before forming conclusions about its reliability or intended audience.
How Domain Names Build an Online Identity
A domain name is often one of the first elements people notice when discovering a website. It provides a recognizable address and can become part of a broader digital identity that includes branding, published content, social media accounts, and customer interactions.
Successful online identities generally depend on more than an interesting name. They require a consistent purpose, a positive user experience, and information that meets visitors’ needs.
Website owners can strengthen their digital presence by keeping their content current, providing clear navigation, and maintaining accurate contact information. Visitors, meanwhile, can use these same characteristics to assess whether a website appears established and transparent.
The broader lesson is that a domain’s value comes from what it reliably delivers, not simply from how distinctive its name sounds.
Frequently Asked Questions About Adovivo Com
1. What is Adovivo Com?
Adovivo Com is a search term associated with an online identity. Its specific purpose cannot be confirmed without reliable information about the website and its operator.
2. Is Adovivo Com a legitimate website?
Its legitimacy cannot be determined from the name alone. Review its content, ownership information, security practices, and independent references before interacting with it.
3. What services does Adovivo Com offer?
There is insufficient verified information to identify its services. Check the website’s official pages for an accurate description of its activities.
4. Is Adovivo Com safe to use?
Safety depends on the website’s actual practices. Check its security and privacy policies, avoid suspicious downloads, and do not submit sensitive information until you have established that the service is trustworthy.
5. Why are people searching for Adovivo Com?
People may search for unfamiliar domain names to learn about their purpose, identify their owners, or determine whether they offer useful information or services. The exact reason for searches related to this term is not confirmed.
6. How can I learn more about Adovivo Com?
Start with the website’s official pages, then compare any claims with independent sources. Reviewing available registration details, contact information, and relevant third-party references may help establish a clearer picture.
Conclusion
Adovivo Com illustrates how an unfamiliar domain name can lead people to explore its identity, potential purpose, and place in the digital world. Although its specific services and ownership cannot be established without reliable evidence, examining the term provides a useful opportunity to understand online discovery and website evaluation.
The most important step is to approach unfamiliar platforms with curiosity and sound judgment. Reviewing content, checking transparency, assessing security, and seeking independent information can help users make informed decisions. Ultimately, a website’s credibility depends on verifiable evidence and the quality of the experience it provides, rather than the name alone.

Eroke is an intriguing term that raises questions about its meaning, origin, and growing visibility in online searches. In a digital environment filled with new names, expressions, websites, and emerging trends, unfamiliar words can attract attention simply because people want to understand them. Eroke offers an opportunity to explore how internet users discover unusual terms and why certain words become subjects of online curiosity.
Although the exact meaning of Eroke may depend on its original context, its distinct appearance makes it an interesting subject for digital exploration. People encountering an unfamiliar term often turn to search engines for explanations, background information, or examples of its use. This behavior can bring a word into wider online discussions, even when its origins remain unclear.
Understanding Eroke therefore involves looking beyond the word itself. Its potential recognition reflects broader patterns in internet culture, information discovery, and the ways people respond to unfamiliar digital identities.
What Is Eroke?
Eroke is a term that may appear unfamiliar to many readers, making its meaning an important starting point for investigation. Without reliable information establishing a specific definition, it would be inaccurate to assign it a fixed origin or claim that it represents a particular person, company, product, or online platform.
Unfamiliar terms can emerge in many different settings. Some originate as usernames or brand names, while others appear in online communities, creative projects, digital publications, or specialized discussions. Their meanings often become clearer when researchers identify where the words first appeared and how people use them.
Eroke can be approached in the same way. Rather than assuming that every appearance refers to the same subject, readers should consider the surrounding information. A term used as a website name might have a different purpose from one appearing in a social media profile or an article.
This distinction matters because accurate interpretation depends on context. Examining the source, related terminology, and available background information provides a more reliable understanding than relying on unsupported explanations.
What Makes Eroke Interesting?
Several characteristics can make an unfamiliar term worth exploring. Eroke provides a useful example of how distinctive names can encourage people to investigate something they do not immediately recognize.
1. The Curiosity Behind the Name Eroke
One reason Eroke may attract attention is its unfamiliar appearance. When people encounter a word they cannot immediately identify, they often wonder whether it has a particular meaning, a cultural connection, or an association with an online project.
This natural curiosity encourages information seeking. Someone might encounter the term in a search result, see it mentioned in a discussion, or notice it while browsing a website. A quick search can then become the first step toward discovering additional information.
Distinctive names can be memorable precisely because they do not resemble everyday expressions. However, an unusual spelling alone does not establish a word’s origin or prove that it is becoming popular.
2. Eroke and the Importance of Digital Identity
Digital identity plays an important role in how names are presented online. Businesses, creators, websites, and individual users often choose distinctive terms to establish recognizable identities across different platforms.
If Eroke is being used as a digital name, its recognition would depend partly on how consistently it appears and whether users can connect it with reliable information.
A recognizable digital identity benefits from clear descriptions, consistent naming, and accurate references. These elements help audiences distinguish one subject from another, especially when several accounts or websites use similar names.
Without verified information about Eroke’s specific use, it is best to treat digital identity as one possible explanation for its appearance rather than an established fact.
3. The Role of Online Discovery
Search engines have changed how people encounter unfamiliar information. Instead of relying exclusively on books, personal recommendations, or traditional publications, users can investigate a new term within seconds.
Eroke illustrates the type of word that might prompt this behavior. A person who sees it without explanation may enter it into a search engine, hoping to find a definition or identify its source.
Search results can provide useful clues, including relevant websites, public profiles, and discussions. Nevertheless, not every result is authoritative. Some pages repeat incomplete information or make assumptions without supporting evidence.
Readers should compare sources and prioritize information that directly explains the term’s context. This approach makes online discovery more productive and reduces the risk of accepting misleading claims.
How Does Eroke Gain Online Recognition?
Online recognition develops through several possible processes. A name does not necessarily need a large audience or an established organization behind it to become a subject of interest.
Search Behavior and User Questions
When people repeatedly encounter an unfamiliar word, they may search for it independently. These searches can reveal a need for clearer information, although search activity alone cannot establish how widespread a term has become.
People searching for Eroke might want to understand its definition, identify its source, or determine whether it relates to a particular online resource. Each question represents a different search intention.
Content that addresses these questions accurately can help readers find useful answers. However, responsible coverage should distinguish verified details from reasonable possibilities.
Digital Content and Online Mentions
Names can appear across websites, forums, social platforms, and digital publications. Each mention may create another opportunity for someone to encounter the term.
If Eroke appears in multiple online contexts, those appearances could contribute to its discoverability. Still, repeated mentions do not automatically mean that a name is widely recognized or associated with a significant trend.
The quality of the available information matters just as much as its quantity. Clear explanations, relevant context, and trustworthy sources provide more value than repetitive pages offering no new information.
The Influence of Search Engines
Search engines organize information according to numerous factors, including relevance and the characteristics of individual pages. Their results help users navigate unfamiliar topics, but rankings can change as new content becomes available.
For an uncommon term such as Eroke, search results may initially offer limited explanations. As more reliable information appears, users may find it easier to determine what the word represents.
It is important not to confuse visibility in search results with verified popularity. A term appearing on a search engine does not necessarily indicate widespread public interest.
Eroke and the Changing Nature of Internet Culture
Internet culture constantly introduces unfamiliar names, expressions, abbreviations, and creative identities. Some become widely recognized, while others remain limited to small communities or disappear after a brief period.
Eroke fits into a broader discussion about how people encounter and interpret new terminology online. The internet allows information to circulate across geographical boundaries, giving even obscure words opportunities to reach new audiences.
At the same time, online information can lack context. A name might be copied from one website to another without an explanation of its original purpose. This can make it difficult for readers to distinguish established facts from speculation.
Understanding this environment requires a combination of curiosity and critical thinking. Instead of assuming that every unfamiliar word represents a major trend, readers can investigate its earliest available references and evaluate the credibility of the information surrounding it.
How to Research Eroke Effectively
Anyone interested in understanding Eroke can follow a few practical research steps.
Start with the original context. Identify where the term appeared and whether it was used in an article, profile, website, or another source. The surrounding material may provide important clues.
Compare reliable sources. Look for independent references that explain the same subject. Multiple pages repeating identical wording do not necessarily provide independent confirmation.
Check the spelling. Unusual names can be confused with similar words, abbreviations, or alternative spellings. Small differences may lead to entirely different results.
Separate facts from assumptions. A documented definition or official description carries more weight than an unsupported statement on an unfamiliar website.
Consider the publication date. Newer information may clarify earlier references, particularly when a name relates to a recently launched project or changing online identity.
These steps help readers build a clearer picture of Eroke without relying on speculation.
Why Accurate Information About Eroke Matters
As more people use search engines to answer everyday questions, the quality of online information becomes increasingly important. Articles about unfamiliar terms should help readers understand what is known while acknowledging what remains uncertain.
For Eroke, this means avoiding invented histories, unverified popularity claims, and unsupported descriptions of its purpose. Such details can create confusion when other websites repeat them as established facts.
Accurate explanations are more useful because they respect the reader’s time and provide a foundation for further investigation. They also make it easier for future researchers to distinguish dependable information from assumptions.
A careful approach does not make an unfamiliar term less interesting. Instead, it turns curiosity into a meaningful process of discovery.
Conclusion: Exploring the Online Recognition of Eroke
Eroke is an interesting subject for exploring how unfamiliar terms attract attention in the digital world. Its distinct name raises questions about meaning, context, and the processes through which people discover new information online.
Although its specific origin and significance cannot be established without reliable supporting evidence, the broader patterns surrounding digital discovery offer useful insights. Search behavior, distinctive naming, online mentions, and the availability of trustworthy information can all influence how a term is encountered and understood.
Ultimately, exploring Eroke is a reminder that curiosity often begins with a simple question. By examining original sources, comparing reliable references, and avoiding unsupported assumptions, readers can develop a more informed understanding of unfamiliar names and their place in internet culture.
Frequently Asked Questions
1. What is Eroke?
Eroke is an unfamiliar term whose specific meaning depends on its verified context. Reliable information is needed before assigning it a particular definition or identity.
2. Why are people interested in Eroke?
An unusual name can encourage people to search for its meaning, origin, or online associations. However, the extent of actual public interest requires supporting evidence.
3. Is Eroke a website or a brand?
Its identity cannot be confirmed without a reliable source connecting the term to a particular website, business, or brand.
4. How can I find the meaning of Eroke?
Search for the exact spelling, examine the original source, compare independent references, and prioritize official or otherwise trustworthy information.
5. Does Eroke have a confirmed origin?
A confirmed origin cannot be established from the term alone. Additional historical, linguistic, or contextual evidence would be necessary.
6. Why do unfamiliar terms appear in search results?
Unfamiliar terms can appear because they are mentioned on websites, used in digital identities, or included in searchable content. Their appearance does not necessarily indicate widespread popularity.
-

 BLOG1 year ago
hanime1: The Ultimate Destination for Anime Lovers
-

 Technology1 year ago
GLAADVoice.com: How You Can Get Involved and Make a Difference
-

 BILLS1 year ago
Why Does My Instagram Reel Stop Getting Views After One Hour? How to Fix It?
-

 ENTERTAINMENT1 year ago
Crackstreams 2.0: The Future of Free Sports Streaming?
-

 ENTERTAINMENT1 year ago
Sflix: How It’s Changing the Way We Watch Movies and TV Shows
-

 BLOG1 year ago
ThisVid: What Makes It Stand Out in the World of Online Videos
-

 BLOG1 year ago
NHentai.nef: Understanding the Popular Hentai Archive
-

 BLOG1 year ago
Imginn: The Ultimate Tool to View Instagram Content Anonymously