
BLOG
How to Keep Your Home’s Drains Flowing Smoothly

Maintaining clear and efficient drains is essential for a healthy home plumbing system. Whether you are trying to avoid inconvenient clogs or expensive repairs, establishing the right habits can go a long way toward keeping your water flowing freely. If you ever encounter stubborn blockages or recurring issues, consulting drain and sewer cleaning experts in Gaithersburg ensures any hidden problems get the professional attention they require.
For most homeowners, routine drain care is not just about convenience, but also about safety and savings. By taking small actions regularly, you can prevent unexpected plumbing emergencies and extend the life of your pipes. In this guide, we will cover the most effective strategies to maintain healthy drains throughout your entire home.
Mindful Kitchen Practices
The kitchen sink is often the busiest drain in any home, making it prone to clogs from grease, oil, and food scraps. Adopting careful habits in this area is crucial. Always dispose of fats and oils in a dedicated container, letting them solidify before discarding them with your household trash. This prevents sticky residue from sticking to your pipes and slowing drainage.
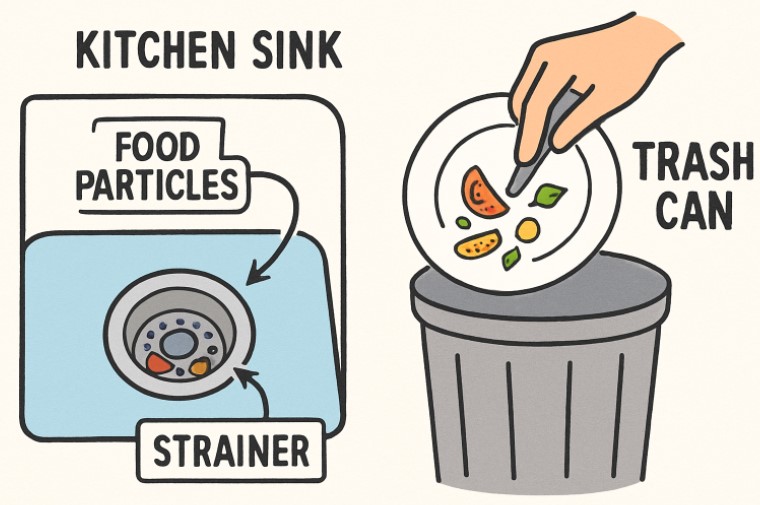
Using sink strainers is another simple step that pays dividends. Strainers trap food particles before they have a chance to wash down your pipes. Additionally, make it a habit to scrape plates thoroughly before rinsing or loading them into the dishwasher. Even small amounts of food debris can build up over time, causing unpleasant odors or stubborn blockages.
Lastly, be mindful of what you allow down the drain. Items like coffee grounds, eggshells, pasta, or fibrous vegetables can all contribute to clogs. Compost or trash these substances instead.
Bathroom Drain Care
Bath, shower, and sink drains in bathrooms are susceptible to blockages from hair and soap scum. The easiest way to prevent stoppages is by installing hair catchers over each drain. This simple device collects hair before it can travel further into the pipes. Clean these catchers regularly to avoid buildup and maintain smooth water flow.
Beyond hair, consider the products you use. Oily lotions, conditioners, and other personal care items can adhere to pipe walls and solidify. Use such products sparingly and choose water-soluble options when possible. Regularly scrubbing drain covers removes residue before it hardens into a clog.
Routine Hot Water Flushing
One of the easiest ways to dissolve minor buildup from grease and soap is to flush your drains with hot water on a routine basis. For most kitchen sinks, pouring a kettle of hot water down the drain once a week can clear away congealed fats. If your pipes are made of PVC, be careful not to use boiling water; instead, very hot tap water is effective and safe. This practice reduces residue accumulation and helps manage odors throughout your kitchen and bathroom plumbing.
Natural Cleaning Solutions
While chemical cleaners are widely available, they can be harsh on your plumbing and harmful to the environment. Safer, natural cleaning methods are just as effective for regular use. Once a month, pour half a cup of baking soda followed by half a cup of vinegar down the drain. Allow the mixture to fizz for 15 minutes, then flush with hot water. This process breaks down buildup, removes mild blockages, and neutralizes smells.
Enzymatic drain cleaners also offer a gentle, sustainable way to keep pipes clear. These products use natural bacteria and enzymes to digest organic material without damaging pipes or harming your local water supply. Use them monthly according to package instructions.
Regular Mechanical Cleaning
Despite your best efforts, occasional buildup is almost inevitable. Safe, mechanical tools such as drain snakes or plungers can resolve minor clogs before they become major repairs. Use a drain snake with care to extract hair or food particles lodged further down the pipes. Mechanical cleaning every few weeks is a proactive way to reduce accumulations and extend the life of your plumbing system.
Seasonal Maintenance
Drains need special care as the seasons change. In winter, pipes are susceptible to freezing and bursting, so consider insulating exposed plumbing and letting faucets drip during extreme cold. Spring is a great time to clear outdoor drains and grates that may have become clogged with debris or leaves in fall and winter. As autumn arrives, regularly clear leaves out of gutters and downspouts to prevent blockages that can lead to water damage or basement flooding. These small seasonal adjustments help ensure your drainage system operates efficiently year-round.
Professional Inspections
No matter how diligent you are, annual inspections from a professional plumber remain essential. These experts can detect early warning signs that are easy to miss, such as slow drains, small leaks, or hidden corrosion, before they develop into more expensive emergencies. For peace of mind and long-lasting plumbing health, schedule regular checkups and address any issues promptly.
By incorporating mindful habits, natural cleaning solutions, and seasonal care, you can keep your home’s drains flowing smoothly year after year. If a challenging clog crops up or you suspect a deeper problem, turn to local specialists to restore your pipes to optimal function.


The internet constantly introduces unfamiliar words, unusual names, and distinctive search terms that attract attention for unexpected reasons. Fanquer is one such name that can spark curiosity among people exploring emerging digital trends. Its unusual spelling and memorable appearance make it an interesting subject for anyone interested in online identities, internet culture, and the ways unfamiliar terms gain recognition. Although its exact origin and intended meaning are not widely established, Fanquer provides an opportunity to explore how distinctive names become searchable topics and encourage people to look for answers.
Understanding Fanquer requires looking beyond the word itself. Its potential significance lies in how people encounter unfamiliar names, search for explanations, and decide whether a term deserves further attention. In a digital environment filled with millions of websites and competing ideas, even a relatively unknown name can become a point of interest.
What Is Fanquer?
Fanquer is an uncommon digital name whose meaning and background may not be immediately clear to someone encountering it for the first time. Unlike established words with recognized dictionary definitions, unfamiliar terms often require additional context before their purpose can be understood.
The name could represent a website, an online identity, a creative project, a brand concept, or a keyword appearing in digital discussions. However, without reliable information connecting it to a specific organization or service, it would be inaccurate to assign it a definite identity.
This uncertainty is part of what makes Fanquer interesting. People naturally seek explanations when they encounter unfamiliar words. They may search for the term to discover whether it belongs to an existing platform, represents a particular product, or has a meaning connected to a specific online community.
Rather than assuming a single explanation, it is more useful to examine the different ways an unusual name can attract attention across the internet.
Why Is Fanquer Creating Curiosity?
Curiosity often begins when people encounter something that does not immediately fit their expectations. An unfamiliar name can encourage questions about its origin, purpose, pronunciation, and relevance.
Fanquer has several characteristics that can make it an interesting search term.
First, its spelling is distinctive. It does not immediately communicate a familiar meaning to most readers, encouraging them to investigate further. Second, its relatively unusual appearance makes it easier to distinguish from common words when used as a search query. Finally, its lack of an obvious definition creates room for questions about its possible background.
However, these characteristics do not automatically prove that the term is trending or experiencing widespread popularity. Search interest can develop for many reasons, including isolated mentions, newly created websites, or curiosity about unfamiliar terminology.
The important distinction is between a name that attracts individual searches and one supported by measurable public interest. Without reliable search data, the extent of attention surrounding Fanquer remains uncertain.
The Possible Origins and Meaning of Fanquer
Understanding the origin of an unfamiliar term can be challenging, especially when there is no documented history or authoritative explanation available.
Fanquer may have been created as a brand name, selected as a username, or developed for a digital project. Invented names are common across the internet because creators often want something distinctive that is less likely to be confused with established businesses or familiar expressions.
Some digital names combine parts of existing words, while others are created primarily for their sound or visual appearance. These naming approaches allow individuals and businesses to develop identities that feel different from conventional terminology.
It is also possible that a name has significance within a small community without having a widely recognized meaning elsewhere.
For now, the precise origin of Fanquer should be treated as unconfirmed. A reliable explanation would require evidence such as an official website, a statement from its creator, or a documented reference establishing how the name first appeared.
Until such information becomes available, separating verified details from possible interpretations is essential.
Fanquer and the Growth of Digital Identity
Digital identity plays an important role in how people communicate, publish content, and establish their presence online. A name can become the foundation of a website, social media profile, online business, or creative project.
Fanquer illustrates how an unfamiliar name can invite questions about the identity behind it, even when its purpose is not immediately apparent.
For creators, choosing a distinctive name can help establish recognition. A carefully selected name may appear in website addresses, profile descriptions, search results, and published content. When used consistently, it can help audiences associate different online materials with the same identity.
However, a distinctive name alone does not guarantee visibility or credibility. Recognition generally develops through consistent activity, useful content, clear communication, and a trustworthy online presence.
If Fanquer is associated with an identifiable digital project, understanding that project’s activities and published information would provide a stronger explanation than relying on the name alone.
How Search Engines Influence Interest in Fanquer
Search engines have changed the way people discover and investigate unfamiliar terms. Instead of relying entirely on traditional dictionaries or printed references, users can enter an unusual word and examine the available results within seconds.
When someone searches for Fanquer, the results may include websites, social profiles, articles, or other references if those pages have been published and indexed. The quality and relevance of those results depend on the information available online.
Search behavior can also reveal what people want to understand. Some users may be looking for a definition, while others may want to identify a website, confirm a spelling, or determine whether a name belongs to a legitimate organization.
For website owners and publishers, unfamiliar keywords can present an opportunity to answer these questions with clear, accurate information.
Nevertheless, creating content around a keyword should involve more than repeating the name throughout an article. Readers benefit most from useful explanations, transparent sourcing, and a clear distinction between established facts and possibilities.
Could Fanquer Become a Recognizable Online Name?
Whether an unfamiliar name becomes recognizable depends on several factors. These include its purpose, the people using it, the quality of its associated content, and the consistency of its presence across digital platforms.
Fanquer could develop greater recognition if it becomes associated with a useful service, an engaging project, or a community that regularly uses the name. Consistent branding and clear communication could also help people remember it.
Search visibility may improve when relevant pages provide information that matches what users want to know. A well-maintained website, descriptive page titles, accessible content, and useful answers can help establish a stronger digital presence.
However, recognition should not be confused with popularity. A name can be easy to remember without attracting a large audience, and a sudden increase in searches does not necessarily indicate long-term growth.
Any assessment of the term’s future should therefore rely on observable evidence rather than assumptions about its current popularity.
How to Research Fanquer Safely
Anyone investigating an unfamiliar online name should begin with reliable sources. An official website or verified profile, if one exists, can provide useful information about its identity and purpose.
Readers should also examine whether published claims are supported by evidence. Dates, ownership details, business descriptions, and contact information can help establish context, although none of these details independently guarantees legitimacy.
If the name appears on a website requesting personal information, account credentials, or payment, visitors should evaluate the site’s credibility before proceeding. Unexpected requests for sensitive information deserve particular caution.
It is equally important to avoid assuming that every website or profile using the same name belongs to the same person or organization. Similar names can appear independently across different platforms.
These precautions are useful when researching any unfamiliar digital identity, including Fanquer. Careful verification helps readers distinguish reliable information from speculation.
The Importance of Distinctive Names in Internet Culture
The internet encourages experimentation with language. Users create usernames, businesses develop new brand identities, and online communities adopt expressions that may not appear in conventional dictionaries.
Some names eventually become widely recognized, while others remain limited to a particular website or group. Their development depends on how they are used and whether people find them meaningful or memorable.
Fanquer fits into the broader discussion of unfamiliar digital terminology because it demonstrates the questions an unusual name can raise. Its spelling may prompt interest, but its actual significance depends on the context in which it appears.
This is an important lesson in internet culture: unfamiliarity can generate curiosity, but reliable information is necessary to turn curiosity into understanding.
Conclusion
Fanquer is an unusual digital name that invites questions about identity, meaning, and online discovery. Although its precise origin and established purpose remain unclear, examining the term provides a useful perspective on how people investigate unfamiliar names across the internet.
Its potential significance should be assessed through reliable references rather than unsupported claims about its history or popularity. Whether it represents a developing brand, an individual identity, or another digital concept, additional context would be necessary to establish its background.
Ultimately, Fanquer highlights a familiar feature of online culture: even a little-known name can encourage exploration. The most useful approach is to remain curious, evaluate available evidence carefully, and allow verified information to shape the conclusions.
Frequently Asked Questions
1. What is Fanquer?
Fanquer is an uncommon digital name whose exact meaning and established purpose are not clearly documented in the information available for this article.
2. What does Fanquer mean?
Its precise meaning has not been confirmed. It may be a coined name, username, brand concept, or term associated with a particular online project.
3. Is Fanquer a website?
Its identity as a website has not been established here. An official domain or reliable reference would be needed to confirm that connection.
4. Why are people interested in Fanquer?
Unfamiliar names can attract attention because people want to understand their meanings, origins, and possible connections to websites or digital identities. The extent of actual public interest in this particular term remains unverified.
5. Is Fanquer a brand or online platform?
There is insufficient verified information to identify it definitively as a brand or platform. Its intended purpose would need to be confirmed through reliable sources.
6. How can I learn more about Fanquer?
Search for the exact term, examine credible references, and look for an official website or verified profile if one exists. Avoid treating unverified descriptions as established facts.
Meta Description: Discover Fanquer, the unusual digital name attracting curiosity, and explore its possible meaning, origins, online identity, and search interest.
The internet constantly introduces unfamiliar names, new platforms, and unusual search terms that encourage people to explore further. Trwho com is one such term that may attract attention from users looking to understand its meaning, purpose, or connection to the wider digital world. When an unfamiliar name appears in search results, people naturally want to know what it represents and whether it leads to a useful online resource.
Understanding Trwho com requires a thoughtful approach rather than relying on assumptions. A distinctive name does not automatically reveal the purpose of a website, the people behind it, or the services it might offer. Examining how people discover unfamiliar terms, assess online platforms, and recognize reliable information provides a useful starting point.
This article explores Trwho com as an emerging search term, considers the factors that can influence online interest, and explains how readers can investigate unfamiliar digital destinations responsibly.
What Is Trwho com?
Trwho com is a distinctive combination of letters and a familiar web-domain ending. Its unusual spelling may encourage users to search for additional information, especially when they encounter the term without an explanation or clear context.
However, the name alone does not establish whether Trwho com represents a particular website, online service, digital project, or individual platform. Reliable identification requires evidence, such as an accessible website, a clear description of its purpose, and information about the organization responsible for it.
This distinction matters because search terms can circulate online before trustworthy explanations become widely available. Some names belong to established businesses, while others represent small projects, experimental websites, or recently registered domains.
Anyone researching Trwho com should therefore separate confirmed information from speculation. Checking available evidence is more useful than assigning a purpose to the name based solely on its appearance.
Why Is Trwho com Attracting Online Curiosity?
The Appeal of Unfamiliar Digital Names
Unusual names often encourage people to investigate their origins. When a term does not resemble a familiar brand or common phrase, users may search for its meaning, pronunciation, or intended purpose.
Trwho com fits the general pattern of a distinctive search term because its spelling does not immediately communicate a recognizable subject. This uncertainty can motivate additional searches as people attempt to find an explanation.
Curiosity alone, however, does not demonstrate that a website is popular, trustworthy, or widely used. Actual interest should be evaluated through reliable search data and other relevant evidence.
The Influence of Search Engines
Search engines help users discover information about unfamiliar names. A person might encounter Trwho com in a link, a discussion, a search suggestion, or another online reference and then search for more details.
Search engines organize information from many sources, but the presence of a result does not guarantee that its claims are accurate. Some pages may provide useful explanations, while others contain incomplete information or repeat unverified statements.
Readers should compare relevant results and prioritize sources that provide specific, verifiable details.
The Role of Digital Word of Mouth
Online discussions can introduce unfamiliar names to new audiences. A mention on a website, social platform, or community forum may prompt readers to investigate a term they have never seen before.
Nevertheless, repeated mentions do not necessarily establish credibility. Before accepting claims about Trwho com, readers should consider where the information originated and whether independent sources support it.
Trwho com and the Changing Digital Landscape
The internet makes it relatively easy for new names and projects to appear. Individuals, businesses, developers, and content creators regularly introduce websites to serve different audiences and purposes.
Against this background, Trwho com illustrates a broader challenge of digital discovery: identifying what an unfamiliar name actually represents.
How Online Identities Develop
A website’s identity generally becomes clearer when its creators explain its purpose, intended audience, and available features. Useful information may include an introduction, contact details, ownership disclosures, and links to relevant policies.
Without these details, visitors may struggle to determine whether a platform is intended for entertainment, information, communication, business, or another purpose.
The best approach is to assess the available evidence rather than assuming that every unfamiliar name represents a fully developed service.
Why Context Matters
A name can appear in different contexts, and those contexts may change its meaning. Trwho com could be mentioned in an article, associated with a domain, or used as a search phrase without necessarily representing an established brand.
Understanding the surrounding context helps readers distinguish between a website’s actual identity and the assumptions people make about it.
How to Evaluate Trwho com Safely
Investigating an unfamiliar online destination does not require advanced technical knowledge. A few practical checks can help users make more informed decisions.
Check the Official Website
If a website associated with Trwho com is accessible, begin by examining its main pages. Look for a clear explanation of its purpose, the services it provides, and the audience it serves.
A professional appearance alone does not prove legitimacy. Review the information carefully and consider whether the website makes claims that can be independently verified.
Review Contact and Privacy Information
Legitimate services generally benefit from providing understandable information about their operations and data practices. Depending on the nature of the platform, this may include contact details, privacy policies, terms of service, and information about the responsible organization.
Missing or unclear information does not automatically prove that a website is fraudulent. However, it creates uncertainty and gives visitors a reason to investigate further before sharing personal details.
Look for Independent Information
Search for references to Trwho com outside the website itself. Independent reporting, established directories, or credible discussions may provide useful context.
Pay attention to the quality of these sources. Several pages repeating the same unsupported statement do not necessarily provide independent confirmation.
Protect Personal Information
Avoid entering passwords, financial details, identification documents, or other sensitive information unless there is a clear reason to trust the service.
Be especially cautious if a website requests unnecessary permissions, encourages unexpected downloads, or creates pressure to act immediately. Keeping software updated and using strong, unique passwords also helps reduce common online risks.
Potential Benefits of Researching Trwho com
Exploring unfamiliar search terms can help users develop stronger digital research skills. Even when a name has limited publicly available information, the investigation can reveal useful lessons about evaluating sources and navigating the internet.
First, researching Trwho com encourages critical thinking. Instead of accepting the first explanation, readers learn to compare information and identify unsupported claims.
Second, the process can improve search skills. Trying different combinations of a name, its possible domain, and relevant contextual terms may uncover more useful results.
Third, examining unfamiliar websites encourages better security habits. Users become more aware of privacy policies, ownership information, suspicious requests, and the importance of verifying online claims.
These benefits do not depend on whether Trwho com ultimately proves to be a major platform or a relatively obscure name. The research process itself can help people make better digital decisions.
Challenges Associated With Trwho com
One challenge when researching Trwho com is the possibility of limited reliable information. If few authoritative sources discuss a term, determining its purpose or background may be difficult.
Another challenge involves misleading descriptions. Some online articles make confident claims about unfamiliar websites without presenting verifiable evidence. Readers should avoid treating such descriptions as established facts.
Name similarity can create additional confusion. Different websites, projects, or online identities may use comparable spellings, making it important to confirm the exact domain and source.
Finally, online information can change over time. A website may launch, update its services, change ownership, or become unavailable. Information that was accurate previously may not reflect its current status.
These challenges make careful verification particularly important when researching unfamiliar digital names.
What Is the Future of Trwho com?
The future significance of Trwho com depends on what the term represents, whether an associated website develops, and whether reliable information becomes available.
If it refers to an active digital project, its visibility may depend on the usefulness of its services, the clarity of its identity, and the needs of its intended audience. Clear communication and responsible data practices can help any legitimate online service build user confidence.
If the term remains relatively obscure, it may continue to appear mainly in searches from people seeking an explanation. That possibility illustrates how the internet preserves interest in unfamiliar names even when their origins are not immediately clear.
At present, it would be premature to predict the growth, popularity, or long-term role of Trwho com without supporting evidence. Its significance should be assessed through verifiable information rather than assumptions about its potential.
Conclusion
Trwho com provides an opportunity to examine how unfamiliar names attract attention in the modern digital environment. Its distinctive spelling may encourage people to search for an explanation, but the name itself does not establish the identity, purpose, or reliability of an associated website.
The most effective way to investigate Trwho com is to review available evidence, compare independent sources, examine website policies, and protect personal information when exploring unfamiliar destinations.
Ultimately, responsible digital research involves curiosity combined with careful judgment. By verifying claims instead of accepting assumptions, internet users can better understand unfamiliar search terms and make safer decisions as they navigate an increasingly complex online world.

Rtasks is a useful term to explore in the context of task management, digital organization, and everyday productivity. As people manage increasingly busy schedules, finding better ways to organize responsibilities has become more important than ever. From personal reminders to workplace projects, an effective task-management approach can help individuals stay focused and make better use of their time. Understanding how rtasks relates to planning, prioritization, and workflow organization provides a starting point for anyone looking to manage daily responsibilities more efficiently.
What Is Rtasks and Why Does It Matter?
Rtasks can be understood as a task-oriented approach to organizing activities, tracking responsibilities, and managing work. Rather than relying entirely on memory, people can use structured systems to identify what needs to be completed, determine which activities deserve attention first, and monitor their progress.
The value of task management becomes clear when responsibilities start accumulating. A student might need to prepare assignments, attend classes, and study for examinations. Meanwhile, a professional could be balancing meetings, deadlines, emails, and collaborative projects.
Without a reliable system, these responsibilities can become difficult to manage. A structured approach helps turn a long list of obligations into smaller, more manageable actions.
Although the term may also refer to a particular service or product, its exact meaning depends on the context in which it appears. Readers should verify official information before associating it with a specific platform.
How Rtasks Can Support Daily Productivity
Productivity is not simply about completing as many activities as possible. It also involves directing attention toward meaningful work while avoiding unnecessary distractions. A well-organized task system can support this process in several ways.
1. Organizing Tasks in One Place
One common challenge is keeping track of responsibilities scattered across notebooks, messages, calendars, and emails. When important details are stored in different places, it becomes easier to overlook a deadline or forget a small commitment.
An organized task list brings these responsibilities together. Users can record upcoming activities, add relevant notes, and review outstanding work without searching through multiple sources.
This approach is particularly helpful for people managing several projects simultaneously. Instead of repeatedly trying to remember what comes next, they can consult their list and continue working with greater clarity.
2. Setting Clear Priorities
Not every task deserves immediate attention. Some activities have strict deadlines, while others can wait until a more convenient time.
A useful task-management method separates urgent responsibilities from important long-term goals. For example, preparing a presentation due tomorrow may take priority over reorganizing old documents.
Rtasks, when approached as an organizational framework, can encourage users to evaluate the importance of each responsibility before deciding how to spend their time.
3. Monitoring Progress and Deadlines
Tracking progress provides a clearer picture of what has been accomplished and what remains unfinished. This is especially valuable when a project involves several stages or requires contributions from different people.
Breaking a large assignment into smaller actions makes progress easier to measure. Instead of recording only that a project needs completion, a user might list research, drafting, editing, and final review as separate steps.
Each completed action creates a visible record of progress and makes the remaining workload easier to understand.
Rtasks for Students, Professionals, and Teams
Different people have different organizational needs. A useful system should accommodate these differences rather than force everyone to follow the same routine.
Students and Academic Planning
Students often manage overlapping academic commitments, including coursework, examinations, presentations, and extracurricular activities. A task list can help them distribute these responsibilities across the week.
For example, a research assignment can be divided into topic selection, source collection, outlining, writing, and proofreading. Assigning realistic target dates to each stage reduces the pressure of completing everything at the last minute.
Regular reviews also help students identify unfinished work before deadlines become urgent.
Professionals and Workplace Responsibilities
In professional environments, effective task organization can improve individual focus and support consistent project delivery. Employees may need to track follow-ups, prepare reports, respond to clients, or coordinate with colleagues.
A centralized list makes it easier to identify upcoming commitments and determine which actions require attention. When used alongside a calendar, it can also help prevent scheduling conflicts.
However, task lists should remain practical. Adding excessive details or tracking every minor action can create unnecessary administrative work.
Teams and Collaborative Projects
Teams benefit from clear responsibilities. When several people contribute to a shared project, confusion can arise if ownership, deadlines, and expectations are not established.
A collaborative task-management process helps clarify who is responsible for each activity and when the work should be completed. Team members can also communicate delays early and adjust plans when circumstances change.
If a particular rtasks platform is being considered for team use, its collaboration features, access controls, and compatibility with existing tools should be checked before adoption.
Essential Features to Look for in an Rtasks Tool
Anyone researching a task-management platform should evaluate its practical capabilities rather than relying on its name alone.
Task creation and editing: Users should be able to add responsibilities, update details, and remove completed or unnecessary entries.
Due dates and reminders: Scheduling features can help people remember important commitments and prepare for deadlines.
Categories and labels: Grouping tasks by project, priority, or responsibility makes large lists easier to navigate.
Progress tracking: Clear completion indicators help users understand how much work remains.
Cross-device access: For people who switch between computers and mobile devices, convenient access can make daily planning more consistent.
Privacy and security: Users should understand how their information is stored, who can access it, and what protections are available.
Not every individual needs all these features. A simple checklist may work perfectly for personal planning, while a large team could require more advanced coordination.
How to Use Rtasks More Effectively
Choosing an organizational method is only the first step. Consistent use is what makes it valuable over time.
Start by listing current responsibilities. Include deadlines, unfinished assignments, personal commitments, and upcoming projects. Next, separate large projects into smaller actions that can realistically be completed.
Prioritize the most important items instead of treating every entry as equally urgent. Estimate how much time each activity requires and avoid filling the entire day with planned work. Unexpected requests and interruptions are part of normal life.
Review the list at the beginning or end of each day. Move tasks when circumstances change, remove irrelevant entries, and acknowledge completed work.
Most importantly, keep the process simple. A system that takes longer to maintain than the work itself will eventually become difficult to sustain.
Common Mistakes to Avoid When Using Rtasks
Even a well-designed task-management approach can become ineffective when used poorly.
One common mistake is creating an unrealistic daily schedule. Planning twelve demanding activities into a day with limited available hours creates frustration rather than productivity.
Another problem is failing to distinguish between meaningful priorities and minor distractions. Checking small items off a list can feel satisfying, but it should not replace progress on important responsibilities.
Some users also neglect regular reviews. An outdated task list can contain irrelevant activities, incorrect deadlines, and incomplete information.
Finally, avoid assuming that a digital tool automatically improves productivity. Technology can support organization, but successful planning still depends on realistic goals, consistent habits, and thoughtful decisions.
Is Rtasks Worth Exploring?
Rtasks is worth exploring as a search term for readers interested in task organization and productivity. However, whether it refers to a particular website, application, or broader concept should be established through reliable information.
Before signing up for an unfamiliar service, review its official website, available features, privacy policy, pricing details, and user support options. Avoid submitting sensitive information until the service’s identity and credibility have been established.
For people who simply want to organize their schedules, starting with a basic task list may be sufficient. More advanced tools become useful when responsibilities grow or collaboration becomes necessary.
Final Thoughts on Rtasks
Managing responsibilities effectively begins with a clear understanding of what needs to be done and when it should happen. A structured task-management approach can reduce confusion, support better prioritization, and make progress easier to measure.
Whether someone is a student, a busy professional, or a team coordinator, the most effective system is one that fits their actual needs. By organizing tasks, setting realistic deadlines, reviewing progress, and maintaining consistent habits, individuals can build a more manageable daily routine.
For anyone researching rtasks specifically, confirming whether the term represents a particular service is an important next step. With accurate information and a practical approach to planning, readers can make better decisions about the tools and methods they use to stay organized.
-

 BLOG1 year ago
hanime1: The Ultimate Destination for Anime Lovers
-

 Technology1 year ago
GLAADVoice.com: How You Can Get Involved and Make a Difference
-

 BILLS1 year ago
Why Does My Instagram Reel Stop Getting Views After One Hour? How to Fix It?
-

 ENTERTAINMENT1 year ago
Crackstreams 2.0: The Future of Free Sports Streaming?
-

 ENTERTAINMENT1 year ago
Sflix: How It’s Changing the Way We Watch Movies and TV Shows
-

 BLOG1 year ago
ThisVid: What Makes It Stand Out in the World of Online Videos
-

 BLOG1 year ago
NHentai.nef: Understanding the Popular Hentai Archive
-

 BLOG1 year ago
Imginn: The Ultimate Tool to View Instagram Content Anonymously